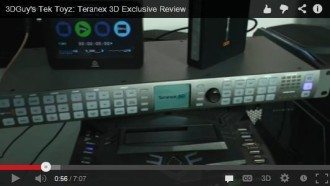
In December 2011, Blackmagic Design acquired the Teranex brand. Since that time they have completely redesigned the Teranex standards/ format converter.
This year, there are more improvements!
Originally a $90,000 plus machine Blackmagic Design has come out with a Teranex that gives you more for a lot less.
The new Teranex comes in two flavors, the Teranex 2D costs $1999 and the Teranex 3D runs $3999.
The folks at Blackmagic Design have been nice enough to let me do a road test of the new Teranex 3D.
This dual channel processor allows you to convert anything in to almost anything out. The box itself is a very compact 1 RU rack size and only 6″ deep.
Lets talk about of what you get.
The deinterlacing is extremely high quality. With their patented PixelMotion deinterlacing algorithms the result is vastly improved image quality while maintaining vertical resolution.
With your up and down conversions, you get clean smooth lines without the usual “jaggies” that you see with so many other converters.
With Cross Conversions the unit will add or remove cadence (3:2 pulldown) from 23.98 or 24 fps film sources to give beautiful video results.
Even edited film contaminated with flash fields can be converted into clean online masters.
Noise Reduction is another hallmark of this unit.
Utilizing award-winning temporal recursive noise reduction the output gives a more efficient compression in your authored content.
- Adjustable Scaling
- SD or Tri-Level Sync either internal or external
- Aspect ratio conversion (without visible stretching)
- 16 tracks of Audio plus Timecode and Subtitles
The BlackMagic UltraScope is included with the Teranex but you do need Thunderbolt connectivity to utilize it. You get Parade, WAVEFORM, Vectorscope and Histogram, along with Audio metering and picture view with time code.
The Teranex is a world-class broadcast tool used by both major studios and broadcast networks worldwide.
With the Teranex 3D you can open up a world of 3D possibilities.
First up, 3D Convert. What this enables you to do is to adjust and convert everything that the Teranex can. And by inputting either separate left and right channels via the SDI inputs or by using the HDMI input frame packed Multi-View Codec or other 3D formats.
What’s even more amazing is that you can input two separate non synchronous cameras via SDI and sync the 3D signal for Full Frame, Side by Side, Top/Bottom or Line Interleave 3D outputs.
That means you can take 2 of those beautiful Black Magic Cinema Cameras and use them to create stunning 3D with 13 stops of Dynamic Range.
Along with all that the Teranex 3D gives you pixel precise 3D alignment tools. Adjust each camera for flip, horizontal and vertical positioning, axial rotation,
toe-in alignment and trim adjustments to both horizontal and vertical fields. I will be doing field testing of this feature very soon and report back on my results.
Finally, something that BlackMagic calls 3D Simulation.
but in my opinion it does a pretty good job!
While I wouldn’t use it to completely replace shooting in 3D, it does offer an excellent way of saving shots that were improperly converged or had some kind of problem with one of the 3D cameras.
Here is a shot with this magnificent tiger. The shot was done with a beam splitter and since it was too dangerous to move the rig too close to the tiger,
a zoom was used. Unfortunately, let’s say, the settings weren’t adjusted properly leaving us with a beautiful tiger face combined with an eye wrenching instant headache inducing background.
Running it through the Teranex 3D you can save the shot and produce a very useable 3D shot. All with fantastic ease of use and huge time and cost savings over most other 3D conversion solutions.
The front panel is laid out in intelligent manner. With controls flowing from left to right. Equipped with a LCD dead center, which acts to help you select and adjust settings and act as a preview screen. Select the input, video and audio, pick your format, frame rate and aspect ratio. Then select output and make your decisions there. That’s it, it’s ready to process. Simple and elegant in one stroke.
If you work in or with broadcast materials this box is a must have. I have only scratched the surface of the abilities of this machine. In future posts
I will dig in and show to how to use the specific tools of the Teranex 3D.
Please send me an email with any questions or comments that you may have about the Teranex 3D, I will be happy to answer them.


