

When I think of my first SLR, the Pentax Spotmatic F and my second, the Nikon F, these were iconic cameras. They broke new ground set a new standard for their time. As I progressed through this review, holding Samsung’s flagship NX1 mirrorless camera, my gut says it will be joining the list soon. While Samsung sells tons of cameras all around the world, they have never offered a professional camera. The NX1 has been greeted with a great deal of skepticism from many quarters. But all the elements are right there. Breakthrough tech combined with a solid build and a vision for the future. Mirrorless cameras have been declared the future and DSLR’s, the past. This camera reinforces that. And the potential is there for even more. When this camera was in development Samsung actually tested the sensor at 6K RAW @ 240fps. Maybe we’ll see that resolution in the next generation.
Key Features
A list of key features is quite impressive.
- 28 megapixel APS-C BSI CMOS sensor 23.5 x 15.7 mm
- Internal 4K @ 24fps, 4K UHD @ 30fps & 1080p @ up to 60fps (120 fps in 1080)
- 30.7 MP Actual, 28.2 MP Effective
- Advanced Hybrid Autofocus system utilizing 205 phase and 209 contrast-detection autofocus points
- ISO range of100-25,600 native with the ability to increase to 51,200
- 76.6mm (3.0″) Super AMOLED w/Touch Screen with a resolution of 1036k dots
- Dynamic Range of 10-12 stops
- Video Format – H.265 recording system (first of it’s kind)
- Uncompressed 8-bit 4:2:2 – 4K output via HDMI
- Still formats-SRW RAW, JPEG, MPO (yes, it can shoot 3D)
- Fast continuous still shooting up to 15fps @ 28MP
- Built In Intervalometer to create 6.5K time-lapse videos
- Android OS with both Android and iOS app controllability
- WiFi and Bluetooth sharing
- Incredibly fast DRIMe V image processing engine
- Ultra high 1/8000-second shutter speed
- Professional Bit-rate of 80Mbit/s in 4K and 40Mbit/s in Full HD
- Intelligent Auto Shooting Modes, Baseball, Jump Shot, Trap Shot
- USB 2.0 or 3.0 connection or charging
- Measures 139x102x66mm (5.47×4.02×2.6″)
Pros and Cons
Pros:
- H.265 codec
- USB Battery charge
- Good solid grip and excellent balance
- NFC, WiFi & Bluetooth
- WiFi can send pictures but only one at a time
- Good app integration, especially like remote viewfinder and Android Bluetooth shutter
- Price
- Nice button layout
- Separate Video and stills buttons next to each other
- Super AMOLED screen with essentially no lag
- excellent ISO range
- At fast shutter speeds, high speed action@30fps can be cleaner than some cameras at 60fps
- Scene modes work very well
- Gamma DR
- The NX1 can output 4K 4:2:2 8-bit video over HDMI for capture on an external recorder.
- Can do rack focus shots using touch screen
- 28.2 MP backside illuminated sensor
- Hybrid AF system with phase-detect points covering 90% of frame
- 153 cross-type AF points with industry-leading frame coverage
- Mostly effective subject tracking
- High quality 4K video performance
- 4K 4:2:2 8-bit video out
- Outstanding dynamic range and low light image quality
- 15 fps burst shooting
Cons:
- H.265 Codec
- Screen size
- Few problems with autofocus with any kind of bright lights behind subject
- Needs custom settings that hold frame rate as well as other settings
- Needs 60fps recording in 4K UHD
- Desperately needs 10-bit or even 12-bit color sampling
- HDMI output limit too many features. You have to unplug to get to them
- Flash “shadows” 16-50mm lens, must zoom to eliminate it.
- no cover for the EVF screen
- Mini HDMI is still glitchy when connected to external Atomos Shogun
- Movie Converter software is poorly built with no advanced features and many basic features missing. Definitely a stop-gap software. no batch settings If you have 50 files to convert, you must go through them one at a time to select the conversion settings (unless you want the default settings). Finally, the conversion process is slow enough to have a significant impact on workflow unless you have a really fast computer.
Let’s discuss the build of the camera.

Samsung chose to make The NX1 using die-cast magnesium alloy for the body. The result is a light but an extremely sturdy frame. The overall size of the camera body equates to a medium-sized DSLR.
The hand grip gets away from the trend of smaller and instead delivers a true grip that feels extremely comfortable in my hand. It’s snug to the base of my thumb and doesn’t tire out my hand like many other smaller grip cameras. This is important when you shoot all day long.
The ergonomics get an A+.
The body is splash resistant and combined with the “S” Series lenses you a fully sealed water resistant system in case you are exposing the camera to the harsher elements.
At 610grams, the weight is less than a Canon 5D Mark III(950grams) or the Sony A7RII (625grams) but slightly more than the Panasonic GH4 (569grams).
Physical Layout of Controls
The layout of the controls is both familiar and unique. As I hold it my fingers deftly fall and find controls right where I expect them to be. A beautiful, natural, intuitive design. The top dials are right where you expect them to be. The mode control dial features a useful locking button to avoid mistakenly changing settings. The left-hand dial offers ISO, AutoFocus, metering and white balance. The lower part of the dial handles drive operation, single shot, normal continuous, self-timer and bracketing. Harkening back to classic cameras, the top-mounted LCD supplies you with almost every setting in one view. One feature that I love is the placement of a separate stills and video record buttons. They are situated right next to each other, allowing you to just slide your thumb over to activate either function. One caveat is that The video record button is recessed a little too much for me. I’d prefer a slight bump to make it easier to feel as I slide my thumb over. The main reason behind this request is the closeness of the exposure compensation button which I have on more than one occasion pressed thinking I was activating record. No harm done as the exposure compensation control is a combination of pressing that button and turning one of the thumbwheel controls. However, several video recording opportunities were delayed due to the inadvertent push of the wrong control.
Stills and Video Formats
Since the NX1 captures 6480×4320 stills at a 3:2 aspect ratio and 3840×2160 for 4K UHD which is a 16:9 ratio. For framing video, the customizable backside menu dial has a default set to change the image to display the proper aspect ratio when you press the right arrow on the dial.
However when you utilize the autofocus by executing a half press of the still shutter, the display snaps back to the 6480×4320 – 3:2 aspect ratio.
When you press the video record, the screen snaps to the 16:9 ratio video format from the 3:2 stills formatting. It doesn’t hurt anything but for framing purposes it can drive you a little buggy.
On the positive side switching back and forth between stills and video is super simple.
Super AMOLED w/Touch Screen
The Super AMOLED w/Touch Screen is really just that, super. I have never seen a better looking, brighter or cleaner image on a screen. I am not a fan of the sliding tilt, however. I’d like to see swing out and twist.
This is one of the few things that I don’t love about the camera. It is something that you can get used to. That said, the touch screen is marvelous and even the play feature with the ability to pinch to zoom, swipe, and tap. Something that we are all used from our smartphones and tablets.
Even without the limited movement of the screen, you can, however, still do selfies by using the Smartphone App connection.
One immensely useful tool is the tap to focus in live view mode. I have been able to do a smooth rack focus just by tapping the screen.
The companion 1024×768 OLED viewfinder is outstanding and can be set in the menu for color or black and white for more critical focus situations.
I found the focus system to fast and accurate about 85-90% of the times. But I have only tested it with the two best high-end lenses that Samsung makes.
A general observation about the interconnectivity of the device between iOs and Android is that, not surprisingly, Android is a much smoother, easier setup and operation.
Sensor and Processor
The Samsung NX1 comes with a 28 megapixel APS-C BSI CMOS sensor 23.5 x 15.7 mm with image processing by the DRIMe V image processing engine.
Wow, that sounds impressive, and it is. Memorize it and use it at the next party you go to and you will be the “Grand Nerd of the Night”.
But what does it really mean to your shooting experience? Why is it such a big deal?
Let’s pull it apart and see how it relates.
The BSI or BackSide Illuminated CMOS image sensor uses a novel approach to the layout of the electronics for the sensor. Traditional CMOS sensors have the electronics on the front of the chip with microlenses, then the real workhorses, the photosites that actually record the light behind them. By placing the electronics behind the sensor, Samsung has been able to add more photosites to the same size sensor area, thus enabling more precious light to reach the photosites. More light means less amplification is needed which in turn means less noise in your picture and cleaner, crisper images.
This same tech is the reason that smartphones today are producing better images. It was, in fact, originally used in astronomy sensors for complex telescopes. Till then, no one had made a BSI CMOS this big. Sony has since upped the game by introducing a 42.4MP image sensor on the a7RII.
To give you a comparison, Samsung’s NX30 has a traditional CMOS configuration. The same sensor size yields a 20.8 MP image. So you can see by adding the BSI CMOS Samsung was able to increase the amount of pixels on the sensor to 28.2MP. That’s 8 million more pixels spread across the same size sensor.
Another result of the additional light is the additional sensitivity for better low light performance giving the camera a native resolution range of ISO 100-25,600. Which can be electronically stretched to a whopping 51,200.
The DRIMe V (pronounced DREAM) image processing engine (a quad-core chip) is really the brains of the operation. that Samsung describes as It takes all the information gathered by the sensor electronics and creates the image. Sounds simple, but it’s not, especially when you realize that the NX1 can shoot at a blistering 15fps for 90 images (with the 1.40 firmware upgrade) in Superfine JPEG or 25 images in SRW RAW. That’s a mind-blowing 700 million pixels of information being spewed out at 15fps. Add to the mix the 14-bit sampling of raw images and 12-bit in continuous shooting application. To look at it in another way, shooting 4K UHD video at 30fps means that you are capturing thirty – 8MP images every second. With continuous shooting the engine is handling fifteen – 28MP images every second. Quite a processing feat indeed.
One more item that will bring home the inherent value of this camera. The NikonD4S shoots 16MP at 11fps and costs almost 3 1/2 times the Samsung NX1.
The processing engine also handles the autofocus duties. With 205 phase and 209 contrast-detection autofocus points the camera is lightning fast focus. These points are built into the surface of the sensor.
If you aren’t familiar with how these two focus systems work, allow me to give you a quick primer.
Advanced Hybrid Autofocus System
Phase Detection Autofocus compares two complimentary images of the selected subject. Simply put if they don’t line up, then they are not in focus. The difference in the distance between the two images tell the camera how much to refocus, either nearer or further.
Contrast-detection autofocus measures the subject contrast ratio. If the ratio increases, then the camera knows it’s going the right way. If it decreases, it reverses course and goes back. While all of this trial and error measuring happens very quickly, nevertheless, you will see a slight blurring, sometimes referred to as breathing, before the focus snaps into place.
Why then, do cameras have both? Because Contract Autofocus works better on faces and Phase Detection Autofocus tunes in moving objects faster. Hence the hybrid combination.
By spreading the autofocus detection points across the entire surface of the sensor with a denser package towards the center versus the edges produces the most efficient results.
That once again takes us back to that wonderfully lightning fast DRIMe V image processing engine which creates the fastest and most accurate autofocusing system that I have seen on any camera.
That is not to say that you don’t run into issues. This is where understanding the limitations of any machine versus the human brain comes into play. In certain conditions, the autofocus does lose the plot, but these are mostly extreme circumstances where, for instance, an extremely bright back light directly next to your subject. That’s where you use your processing engine, your brain, and either move the subject or switch to manual focus.
You have three autofocus settings to choose from, Single AF (SAF), Continuous AF (CAF) and Active AF (AAF).
SAF is designed for shooting still subjects. A half-press of the shutter adjusts the focus in the boxed focus area. When in focus the box has a green outline.
CAF is the workhorse position. This is designed to continually adjust the focus. You can resize or move the focus box using the touchscreen or the command dial.
AAF will flip between SAF and CAF as needed. So if the subject is far away but moving towards the camera, it would start with SAF and as the image gets closer and bigger it would switch automatically to CAF. Manual assisted focusing either enlarges the picture by 5x or 8x.
My personal choice is to use CAF for video and SAF for stills.
In video, the speed of the processor is the reason that you can record 4K to the internal SDHC cards. Because it is processing the image information so fast, then utilizing the H.265 codec to capture the video files in a compressed format that still retains the original image quality. In fact, H.265 can be as much as 1/2 the file size of H.264. Plus it aids the SDHC cards by not requiring them to capture so much data. Meaning that you don’t need the incredible speed need in the cards as you do for cameras like the RED that have to capture to extremely high-speed SSD drives.
Autofocus modes consist of Selection AF, whereby touching the screen you decide on a focus point. Whereas Zone AF will set the autofocus to adjust within a zone area that you preset. This works well with camera movement.
Multi AF displays a green rectangle in places where focus is set correctly. The photo is divided into two or more areas, and the camera obtains focus points of each area. This mode is recommended for taking landscape photos.
Face Detection AF is designed for group photo settings.
Self-Portrait AF It can be difficult to check whether your face is in focus when you are taking a self-portrait. When this function is on, the camera beeps faster when your face is in focus and located at the center of the composition.
I must say that the last two Face Detection and Self-Portrait are definitely solely consumer based. And with the heft of this camera it is certainly not designed for selfies.
That said, the Selection AF, Zone AF and less so the Multi AF are definitely helpful for pros as well as consumers.
These modes combine with the Focus Assist Modes for the greatest efficiency outside of good old fashion manual focus.
Touch AF
AF Point
Tracking AF
One Touch Shot
I have found that Selection AF combined with Touch AF is my most used AF mode combo.
The NX1 captures both 4K DCI (4096 x 2160) @24p and UHD (3840 x 2160)@23.98p, 24p, 25p/30p plus Full HD (1920×1080) @ variable to 120fps, 60p/50p, 25p/30p, 23.98p, 1280×720 , 640×480 Resolution (though I’m not sure why anyone would use the last few).
H.265 Codec
H.265, the heir apparent to H.264 was developed as the “HEVC” (High Efficiency Video Coding) format by both the Moving Picture Experts Group (MPEG) and the Video Coding Experts Group(VCEG).
How H.265 works is similar to H.264 in that it uses “image blocks”. It “sees” the image frames and scans for the areas that change and those that don’t. What H.265 does differently is it adjusts the size of the “blocks” to match what is happening on the screen. So the static area gets bigger “blocks” while the changing areas get smaller “blocks” which are easier to rapidly change as the image does.
I’ve kept the explanation somewhat simplified and there are other factors that contribute to the quality improvements. If I went into everything that goes into H.265, this article would be more like a very thick book.
The result is that the image quality is substantially improved while the file size is drastically reduced. The process does require substantially more processing power. Again where the DRIMe V image processing engine comes into play.
You’ll notice later that I list the H.265 codec as both a “Pro” and a “Con”. There is good reason for both.
As a “Pro”, it is a pretty sure bet that H.265 will be the next de facto codec for camera recording, just as H.264 was before it. It will certainly not disappear in the face of Google’s VP-9 codec. Even Google doesn’t believe that it will as they also support H.265 playback on Chrome.
Samsung has taken a bold step in being the first to feature this codec. Although in all honesty, the NX1 forums have more than their share of moaners and groaners cajoling Samsung to offer both H.264 and H.265 codecs in the camera. These neophytes don’t realize the added complexity nor the pointlessness of offering both. You either lead the charge or sit on the fence. Samsung has decided to take a picture of the fence as it surges forward.
As a “Con” it is a short term one. At this point, there is no NLE on the market that can edit the codec. In fact, until recently it was hard to find a player that worked properly. Samsung supplies both a player and a converter for the H.265 codec. The NLE situation will be resolving itself as well as software companies are already working on ways to edit this tightly compressed codec.
If you don’t care for Samsung’s Conversion solution there are several others out there and some are free.
here is a list and brief description.
Footage Studio 4K – Acrovid.com
This is not a free one, but it packs a ton of features into an introductory price of $129.
You can convert into multiple formats including ProRes, DNxHD, MJPEG, MP4 (H.264), plus more and even resample and upscale to 10-bit in the process. Noise reduction, Frame rate change, overcranking and undercranking plus a whole lot more.
CineMartin Cinec -http://www.cinemartin.com/cinec/hevc-h265/
Convert to Multiple formats including ProRes 4444, HQ, LT, 422, DNxHD, H.264 MPEG4, VP9 and a whole lot more. Add LUTs, Cut/Trim videos, Control Adjustments, Crop, Split videos, Overlays, Batch Outputs and the list goes on. Upscale/downscale to HD, 4K, 6K, 8K at 8-bit or 10-bit. It even has a RAW editor to create video files from an image sequence, supporting stills in TIFF, JPEG, GIF, PNG, Cinema DNG and DPX. Available in three versions $226 / $340 / $910
Rocky Mountain Movie Converter – http://sourceforge.net/p/rockymountainsmovieconverter/wiki/Home/
This Free converter is quite a deal and was born out the frustration with the Samsung Converter. It basically utilizes FFmpeg source code in a GUI application. It is basic but very quick at converting to H.264, H.265. ProRes Proxy, LT, SQ and HQ codecs. Your choice of downscaling to 1080p or converting to 4K. No bells and whistles here, just simple and efficient.

True 6.5K Video in TimeLapse
This is a marvelous little extra treat. The Samsung NX1 has a built in intervalometer for doing time lapse and it will even process the image files into a 4K video file. My advice, don’t do it.
Leave the image sequence as is. When you import it into your NLE (Pro Tip: adjust in Lightroom first) you will then have a glorious 3:2 ratio 6.5K video to play with. Zoom in to 60% and it will fill the screen with a decision to crop at the top or bottom. The 6.5K resolution means you can zoom as much as you like with little or no effect on the image quality.
Or leave it at 100% and create a Hyper-Lapse by keyframing your pan and scan moves. Either way enjoy and take advantage of the extra resolution.
(links to samples on our site)
HDMI Output
Why only 8-bit 4:2:2 Samsung? With all the 10-bit proffered by other manufacturers and the need for 10-bit color sampling for 4K I can only hope that we will see it in a firmware upgrade.
The weakest point on all the modern breed of mirrorless cameras is the mini HDMI port. The port may be mini but the physical weight of the cables certainly is not. I have seen far too may issues when using these tiny ports when connecting to external HDMI devices like the Atomos Shogun. The best solution is an HDMI saver. Most that I saw on the market were heavy and cumbersome. The answer for me was in designing and 3D printing my own. It is practically weightless and works perfectly to reduce the strain from the HDMI cable and save you from needless repairs and the loss of time with your camera. (http://bit.ly/1EyfnYg)
Dynamic Range
Dynamic range describes the ratio between the minimum and maximum useable light captured by the camera.
This is one of the most misunderstood and misused buzzword out there. It is akin to the wildly extravagant claims of contrast ratio for TV’s. There are a million different ways to measure it, all of which can be slanted in one direction or the next. Add to that the fact that the new BT2020 standard, which will show how that immense dynamic range will perform, has not made it to market yet.
Test conditions make a huge difference as well. What type of lighting? Studio? Outdoor Daytime? Outdoor Nighttime? ISO Setting? How much digital noise is there in the image? How much is acceptable?
There are no real established standards at this time.
While Samsung NX1 does not have a raw or LOG setting for video, it does have GammaDR and Smart Range+. While both of these work together to increase the range available, it won’t be complete until Samsung offers a true flat profile.
For our purposes, let’s discuss this with more practical applications.
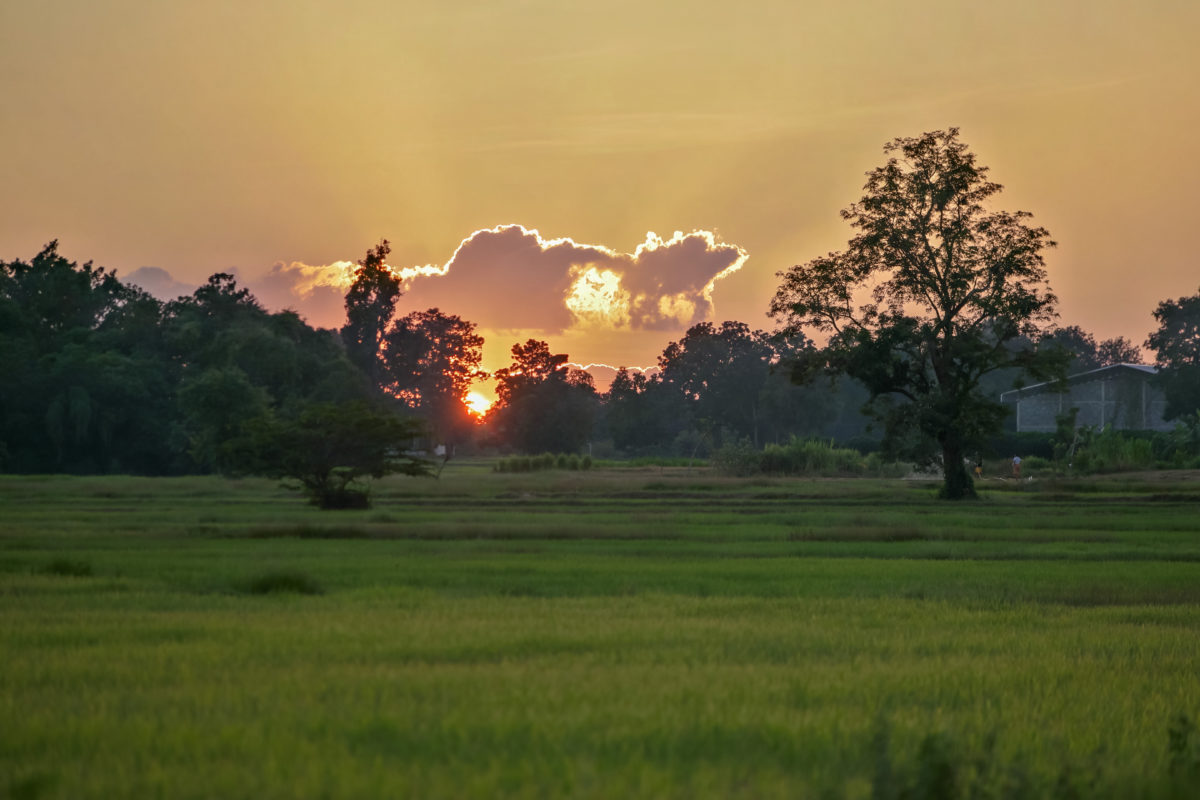
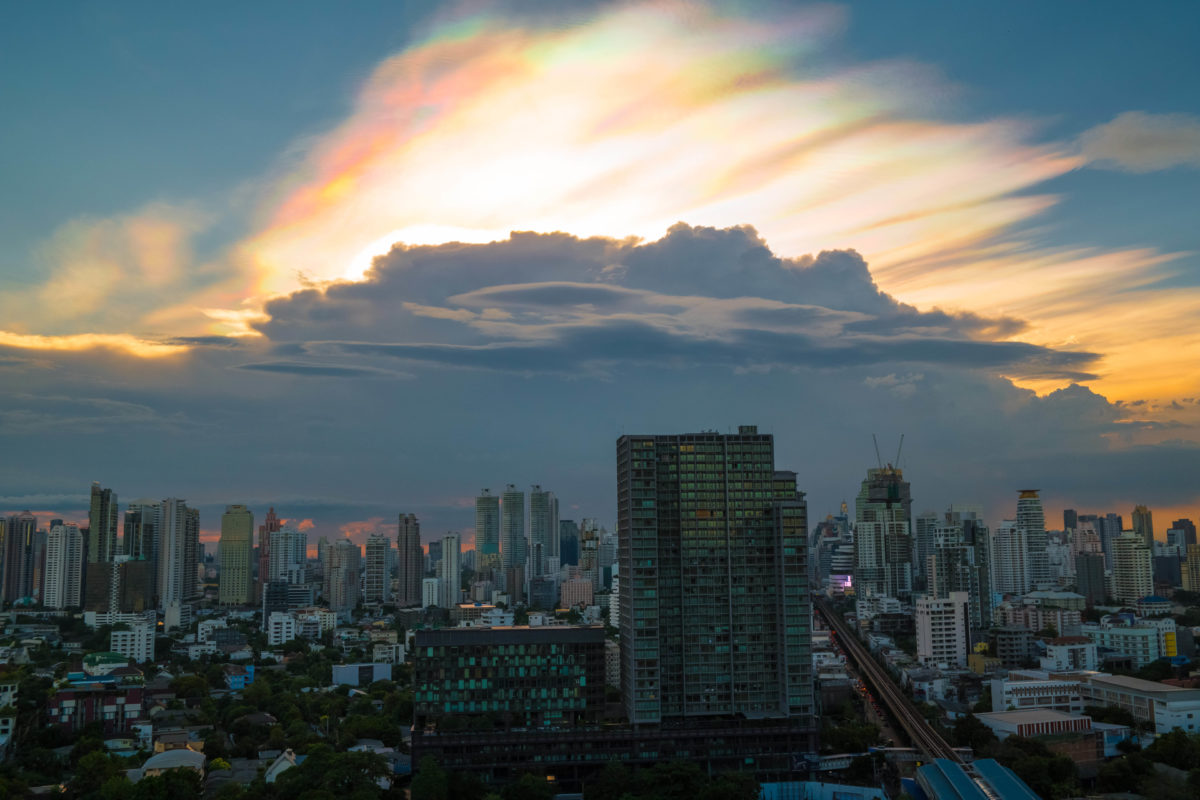
As an example, you are shooting at sunset. You have the sun visible in the shot and you have a darkened area that goes all the way to a deep black. The True Dynamic Range would be measured between the highest degree of white that isn’t blowing out and the most visible detail in the blackest area.
In my subjective testing, I have found that the NX1 is almost as good as a full frame sensor. Depending upon the lighting and the exposure, aim for proper exposure of the highlights as the Samsung really holds the details in the shadows much better. So the trick is to slightly underexpose on the highlights and correct and expand in post.
There are several parameters to bear in mind during testing.
It is a given that the higher the ISO, the more digital noise is introduced into the image. Settings of 100 to 800 ISO were used for testing. I pushed beyond all the way up to 51,200, but it just got silly testing for any kind of true pro quality at those settings. For me, they are there for those images you just HAVE to get and don’t care how fuzzy it looks.
Shutter speed plays a factor in the testing. Lower shutter speeds are great for gathering more light for shadow areas whereas higher shutter speeds, in general, they can save you in the highlights.
And not to get you more confused but, Exposure compensation is another one of those, “tricks of the trade”. I found that depending upon lighting conditions, that adjusting the EV by +4EV can result in a much better image than increasing or decreasing shutter and ISO.
The final factor is the lens. Each lens is designed to have a “sweet spot”. This is the optimum f-stop setting for any particular lens. Manufacturers don’t want to talk about this because the misconception would be that the lens is somehow “less” at any other setting. That is NOT true. It is widely accepted that there is a “native” ISO for every camera. Well, the same goes for lenses.
Without testing, there is no definitive way to know, but in most cases a “middle-of-the-road” approach is safe.

Keeping those parameters in mind I have found that, at it’s best the Samsung affords a solid 12 1/2 stops of Dynamic Range. At it’s worst, you will bottom out at 10 – 11 stops. These were all shot with a 100 ISO setting. The results will drop steadily with any ISO over 800.
One final thought about dynamic range. Many talk about it like it’s the Holy Grail. And it is wonderful when you are shooting on a camera that has it built in. But if not, the truth is that proper exposure can result in just as good or better results. True profiles to increase dynamic range are wonderful, but unfortunately, the trend lately has been to create these pseudo LUTs or profiles or even de-LUT’s (whatever that snake oil is) in post.
But reader, let me tell you, if you are not applying this to the camera as it records then all you are doing is adjusting the color correction to create a flatter video image and then color correcting it again. It’s pseudo-science, snake oil, my friends, now you see it, now you don’t. If you buy it, then I’ve got some dry swamp land to sell you!
Menu
This is the one place where I think there is a need for improvement, page numbers on the menu. There are none. You go to any book, there are page numbers. When you look something up in the index, there are page numbers. It is a simple but extremely effective way to find the item that you are looking for. It slows you down to look for the exact item you want to change. It’s unbelievable to me that with the technological advances of this machine that the menu doesn’t have page numbers. Ok, enough of my rant. Samsung please give us page numbers. that’s all I’ll say on that.
The menu operation is smooth and easy with either touchscreen or dial control.
Shooting Modes
Samsung Smart Shot, Picture Wizard, and Smart Filters are both a bow to the consumer side of the prosumer users.
Picture Wizard gives you the option to pre-adjust your image with built in looks. You can also create and save your own look with Custom Settings.
Built in choices include:
- Standard
- Classic which applies a black and white effect
- Vivid with highly saturated colors
- Portrait creates natural skin tones.
- Landscape emphasizes the forest greenery
- Retro gives you a brown sepia tone
- Cool adds accent to the cool blues
- Calm is described by Samsung as creating a calm scene effect.
- Clicking the up arrow on the control dial will allow you to customize each one of these if you like.
- Scrolling over to Custom 1, 2 or 3 allows for complete customization of the look.
Smart Filters
The Smart Filter options are
- Vignetting Applies the retro-looking colors, high contrast, and strong vignette effect of Lomo cameras.
- Miniature (H) Applies a tilt-shift effect to make the subject appear in miniature. The top and bottom of the photo will be blurred.
- Miniature (V) Applies a tilt-shift effect to make the subject appear in miniature. The left and right of the photo will be blurred.
- Watercolor Applies a watercolor painting effect.
- Red Desaturate all colors but red.
- Green Desaturate all colors but green.
Samsung Auto Shot
- Beauty Face Capture a portrait with options to hide facial imperfections.
- Landscape Capture still-life scenes and landscapes.
- Action Freeze Capture subjects moving at high speed.
- Rich Tones Capture a photo with vibrant colors HDR.
- Panorama Capture a wide panoramic scene in a single photo.
- Waterfall Capture scenes with waterfalls.
- Multi Exposure Capture multiple photos and overlap them to create one photo.
- Samsung Auto Shot Capture action photos, such as someone hitting a baseball, a jumpshot, or when the subject passes a preset point.
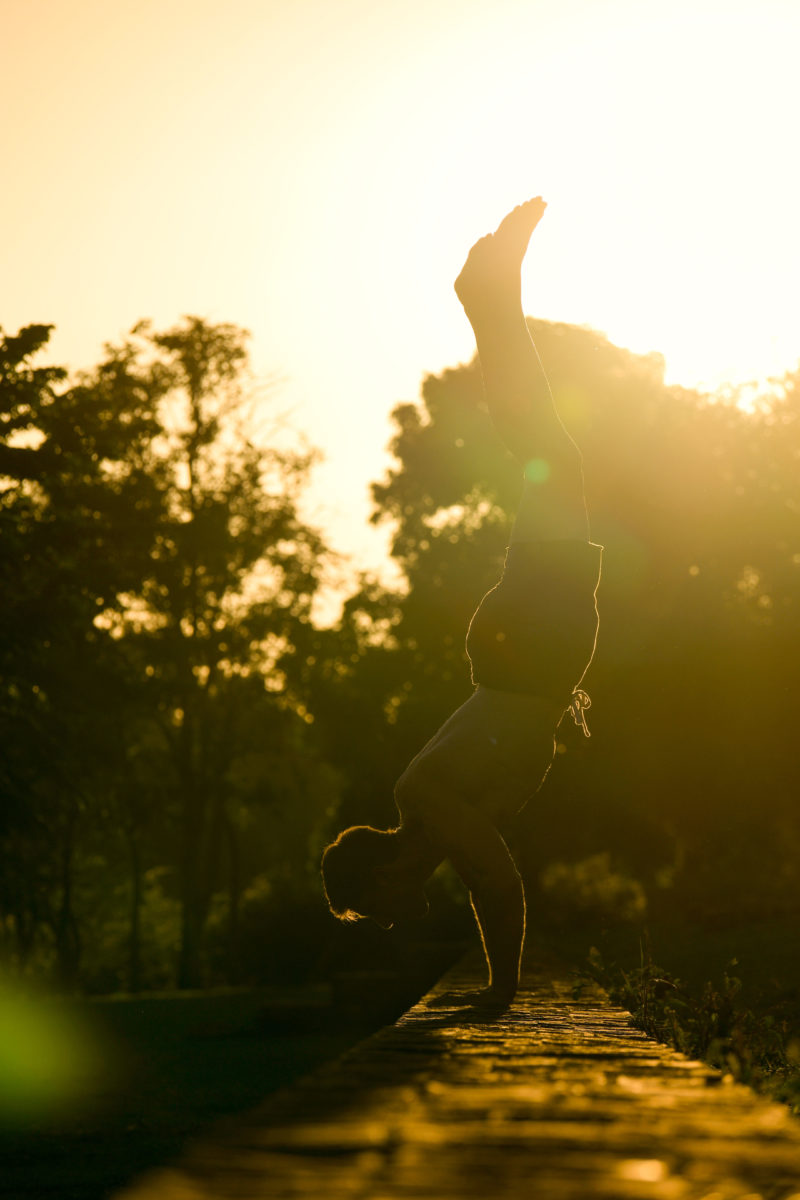
- Silhouette Capture subjects as dark shapes against a light background.
- Sunset Capture scenes at sunset, with natural-looking reds and yellows.

Personally, while I did test these and they all worked fine. I keep the setting in the “off” position, preferring to shoot in SRW RAW mode and adjust in Lightroom and Photoshop. Please keep in mind that if you are shooting in RAW only, the Smart Filters setting will be grayed out in the menu along with the choice of Photo Size.
i-Function
With one button on the lens and two dials on the body you can set the aperture, shutter sped, ISO, Exposure Value, and White Balance and Intelli-Zoom (if the lens is so equipped). This is a fantastic feature for “run and gun” shooters eliminating having to go to the menu to make these adjustments.
I like it because you can make all of these adjustments after enabling the i-Function with just using the two command dials at the top and back of the camera. Customization of the features are available through the menu under “iFn Customizing”.
Interconnectivity
The trio of NFC, WiFi and Bluetooth make the NX1 the top of its class in wireless camera connectivity. Dual Band communication features a choice of 2.4GHz or 5GHz transmission. This is especially helpful if there is an overload of 2.4GHz devices in the area.
Utilizing the Bluetooth you can have the time set automatically and add GPS coordinates to your image file. One caveat is that the Bluetooth only works on Android and not the iOS version. Overall I would say that the Android experience is smoother than the iOS app, which is to be expected considering you are linking to Samsung smartphones. Which is too bad because I really like the Bluetooth shutter feature on the Android version.
Both do offer smartphone camera control and remote viewfinder control. With Remote Viewfinder, you can set the file size for stills or video, change picture modes, drive settings, AF settings, white balance and decide on either VGA or QVGA streaming. There is very little lag in operation, but if the camera goes dark then you can lose the connection and have to re-establish.
While you can directly post to your Facebook or Instagram accounts, you can transfer between the camera and smart device easily with the application.
The i-Launcher software system is built into the Samsung NX1 Camera. Once you plug your camera into your Mac or PC the i-Launcher or i-Launcher Web allows you to update the firmware of the camera or the lens, or download the User Manual. It also allows you to
download and install Samsung Movie Converter, Samsung DNG Converter, PC Auto Backup, Power Media Player, and the SDK reference program.
No more CD with software that gets lost when you need to install again. Everything your need to work with your camera including the H.265 converter software is there.
In addition, there is a licensed copy of Adobe Lightroom for you. Be sure to update the software as soon as you install it as the version supplied does not support Samsung’s SRW RAW file format.
Lenses
Adding any of the Premium “S” Series lenses, like the 50-150mm F2.8 S ED OIS Lens at 915grams or the 16-50mm F2-2.8 S ED OIS Zoom Lens at 621 grams add some beef to your hand. But it feels good. Traditionally, as long as the camera is well balanced a little more weight lends itself to better stability in your shots. Plus these lenses have optical stabilization built in.
For my testing, I have been provided with these two lenses and I can truthfully say they have served me for 95% of my shooting. I would have liked a true wide angle to test like the 10mm F3.5 Fisheye lens for testing, but perhaps at a later date I can get my hands on one.
The 16-50mm F2-2.8 S ED OIS Zoom Lens offers an 82.6 degree angle of view at 16mm, equal to a 24mm lens to a 31.4 degree angle of view, the same as a 75mm lens in a 35mm system.
The 50-150mm F2.8 S ED OIS Zoom Lens picks up from there nicely offering an 31.4 degree angle of view at 50mm, equal to a 75mm lens and tapers off to a 10.7 degree angle of view at 150mm, the same as a 231mm lens in a 35mm system.
The availability of a range of lenses which was an early criticism of the system is rapidly expanding. Samsung now offers 28 lens choices, including primes, with more on the way.
Rokinon, Samyang, Bower, Lensbaby & Rising are all offering a steadily increasing selection of Samsung NX mount lenses.
In addition Fotasy and FotodioX both have economically priced adapters to use either Canon EF or Nikon lenses. Although using these adapters send you to manual only adjustments. No word yet from Metabones about a powered adapter, although I am sure as the camera grows in popularity, we will see an offering from them.
These two lenses represent the high end of the lenses offered by Samsung. What sets them apart is the overall combination of features.
The 16-50mm F2-2.8 S ED OIS Zoom Lens has 18 elements in 12 groups. The lens includes three aspherical, two ED, and two XHR lenses. The aspherical elements control the softness often seen at the edges of other lenses. These elements balance the distribution of light more effectively creating a much smoother distribution of light across the image.
The ED or Extra-low Dispersion performs a similar equalling out of the color, preventing fringing on the edges and keeping a smooth dispersion of the color wavelengths across the surface of the lens. this gives you superior sharpness and color correction by diminishing chromatic aberration.
The Xtreme High Refractive (XHR) lenses makes for more efficient and uniform distribution of light and keeps the lens more compact and lightweight than other lenses.
These features combine with the lens-shift OIS (Optical Image Stabilization) and the Ultra-Precise Stepping Motor (UPSM) to produce true professional quality image results even in the most adverse conditions. The additional bonus is that these lenses are truly dust and splash proof.
An interesting difference in the 50-150mm F2.8 S ED OIS Lens is the SHS or Samsung Hyper Shield Coating on the lens. It incorporates Anti-Fingerprint, Anti-Fog and Anti-Splash characteristics to the lens versus convention coating.
In addition, the lens has a custom focus range limiter that can be adjusted to a specific distance area of focus. This in turn allows for extremely fast autofocus. In testing this feature, I found it especially useful in distance shots in outdoor nature situations. The 6-axis Optical Image Stabilization performs excellently to keep the image in the viewfinder stable for framing.

My testing with both lenses revealed a well designed and executed lens system. There was a great deal of thought that went into this pair of optic tools. Clean, clear crisp images with fast accurate focusing, weather proofing with a strong feel and responsive action in your hands. I especially appreciated the little things like both lenses having a filter ring size of 72mm, making it easy to switch any filters or even interchange lens caps as you alternate between cameras.
The Bokeh is the term for the ascetics of the out of focus areas of the image. The origin of the word comes from the Japanese word ボケ味, the “blur quality”. The best cinematic lens offers Bokeh described with terms like smooth or creamy or harsh. They enhance your images by enhancing your subject against a pleasing intentionally blurred background. In my opinion, I would describe the Bokeh as creamy and rates highly in comparison to almost any professional lens on the market. Both the 50-150mm F2.8 S ED OIS Lens and the 16-50mm F2-2.8 S ED OIS Zoom Lens use nine rounded aperture blades, so the Bokeh for both areas matched set.
Another example of team minded design.
Newest Firmware Upgrade
While working on the completion of this review, the eighth (8th) Firmware Upgrade and sixth (6th) Lens Firmware Upgrade was released by Samsung, Version 1.40.
Samsung has continued to follow an aggressive stream of upgrades with a combination of fixing issues and adding or improving additional features. Honestly, I can’t remember another camera manufacturer who has been this committed to improving it’s product.
Some of the listed changes are obvious, some not so much. In testing these add-ons four stand out as being major.
First, the increased continuous maximum shot counts. Adding 20 is a testament to the power of the DRIMe V image processing engine. And while adding another 5 shots in the continuous burst of 15fps may not sound like a lot, it most certainly is when you realize that each SRW RAW is 47.6MP.
Adding DIS (Digital Image Stabilization) is, in my opinion, the most important of the group. It is a boon to handheld shooters. There is a slight crop applied to the image which is a necessary and acceptable trade off for the visibly improved image quality.
Critically focused shots are an absolute must for 4K shooting and Focus peaking is your best friend. One of the major bugs before this update was that the focus peaking would have to be reinitialized. Now it can be Key-mapped to a custom button in the menu. I choose the down arrow of the command dial.
Lastly, the improved autofocus during zooming is a very noticeable improvement. While it is restricted for only 6 lenses, these do constitute the real workhorse lenses in the Samsung arsenal. In video, I usually don’t zoom unless it’s a sports event that I am shooting with one camera. In the past in those cases I was stuck with a sometimes nasty “breathing” of the focus until it settled. It didn’t take very long, but it was, nonetheless, unacceptable for professional video. That issue has been eradicated totally with this upgrade.
One major thing to remember with installing a firmware upgrade is that it does a reset of the choices in your settings. If you change a lot it would be worthwhile to make a text file or take pics of each menu page for easy resetting after.
[v.1.40]
- Increased continuous maximum shot counts
– 15fps JPEG : 70ea → 90ea
– 15fps RAW : 20ea → 25ea
- Added Video DIS (except 120p, VGA size video)
- Added AEL at M mode, ISO Auto setting
- Added Focus Peaking menu in button setting menu
- Improved AF to work during zooming
(6 Supporting Lens : 16-50mm S, 50-150mm S, 16-50mm PZ, 18-55mm Ⅲ, 12-24mm, 50-200mm Ⅲ)
※ Please updated Lens together with Latest version
Lens Firmware can be updated by iLauncher
- Add Flash Exposure info. display on Live view Live view (when Flash is ON)
- Improved battery display to show both internal & external remains together when vertical grip is mounted
- Improved Playback speed of photo
- Improved sound quality of external Mic. (only for Auto MIC Control OFF)
- Overall fixed minor bugs
In the Field – Real World Testing

A unique opportunity recently arose when I was hired as the behind the scenes videographer and still photographer for the new Jean-Claude Van Damme/Dave Bautista movie, Kickboxer Vengeance.
The movie, penned and co-directed by Dimitris Logothetis and John Stockwell is more than an action packed martial arts fest. It is a UFC, MMA fan dream with such notables as George St.Pierre, Gina Carano, Cain Velasquez, Fabricio Werdum and more. The reboot costars Alain Moussi, a rising Canadian actor/stuntman with kicking and splits abilities that surpass Van Damme himself. The female lead is Sara Malakul Lane, an up and coming successful Thai model and actress who elevates the original female lead to Lui a tough Thai Policewoman and love interest to Kurt Sloan. Ted Field, of Riddick, Last Samurai and Three Men and a Baby produces.
Having just received the Samsung NX1, at the time, to review this seemed like the ideal real-world testing ground. What better way to find the capabilities of the camera than to use it on a Hollywood movie set.
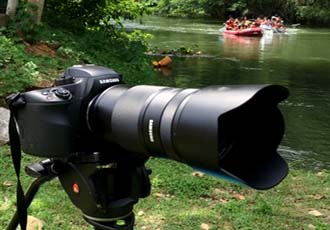
My video weapons of choice included the Samsung NX1 with the 16-50mm F 2-2.8 S ED OIS and the 50-150mm F 2.8 S OIS lens. This pair offered the flexibility for both wide angle masters as well as tight portrait shots. In addition, I used the Atomos Shogun, but I will talk about that in a separate review.
The concept was to shoot both 6.5k stills and 4K video, from which high quality stills could be easily pulled from the NLE timeline.
Both Director of Photography, Mateo Londono and the Director, Dimitris Logothetis took notice of the quality of the shots and the camera. They both commented that the Samsung NX1 produced cinema quality shots that could be paired with the Red Epic being used by the production.
Having lived and breathed with this camera for 14 days of shooting everything from night scenes to high action martial arts fights to press conferences it is safe to say that I am fully indoctrinated to the nuances of the camera.
Conclusion
The NX1 manages to achieve something no one else has been able to do at this level, create a camera that delivers both professional quality stills alongside spectacular Pro video.
As a still camera, the amazing 90 JPEG @ 1/8000th-second continuous image burst at 15fps surpasses cameras three times the price. With that kind of latitude the need for neutral density filters disappears.
The SRW RAW files contain a spectacular amount of image data that can easily and creatively adjusted in Lightroom and Photoshop. But never fear, if you straight from the camera stills, the NX1 delivers them quite well. This is where the built-in creativity of the Smart Shot, Picture Wizard and Smart Filters comes into play nicely. And the built-in wiFi means that you are a connection away from emailing anyone a picture straight out of the camera.
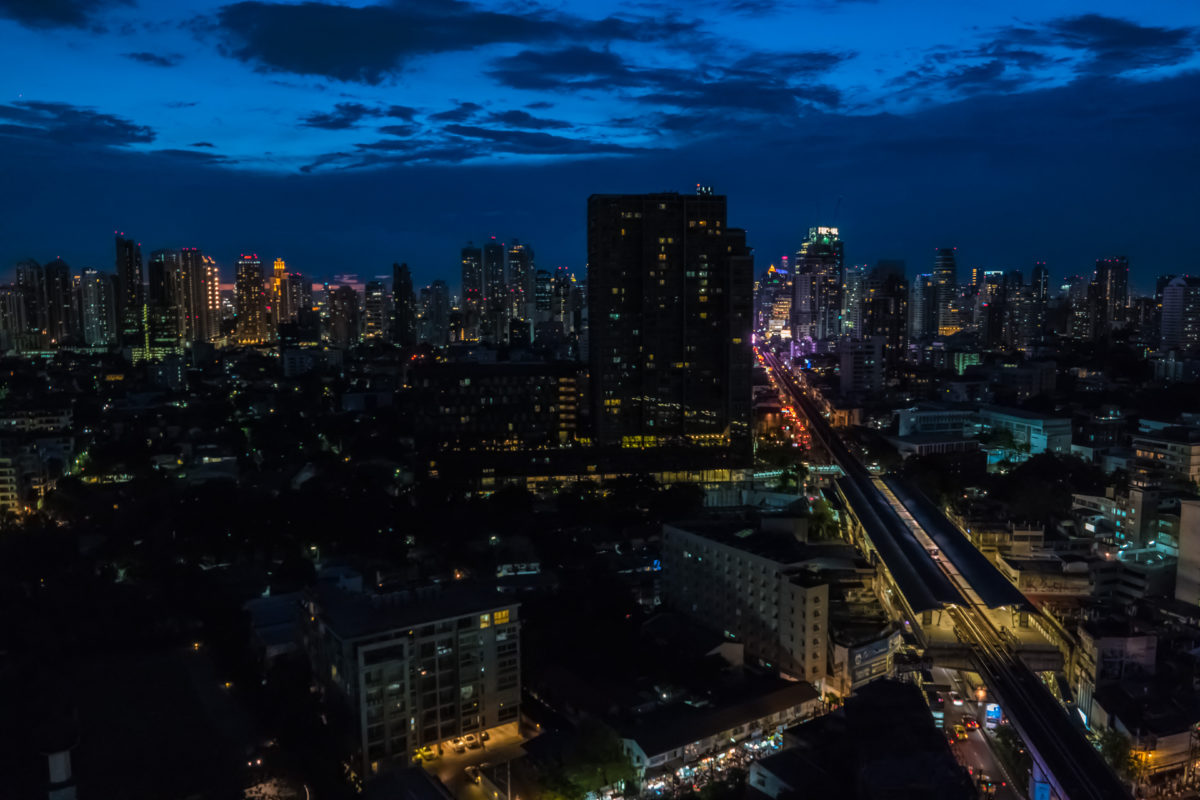
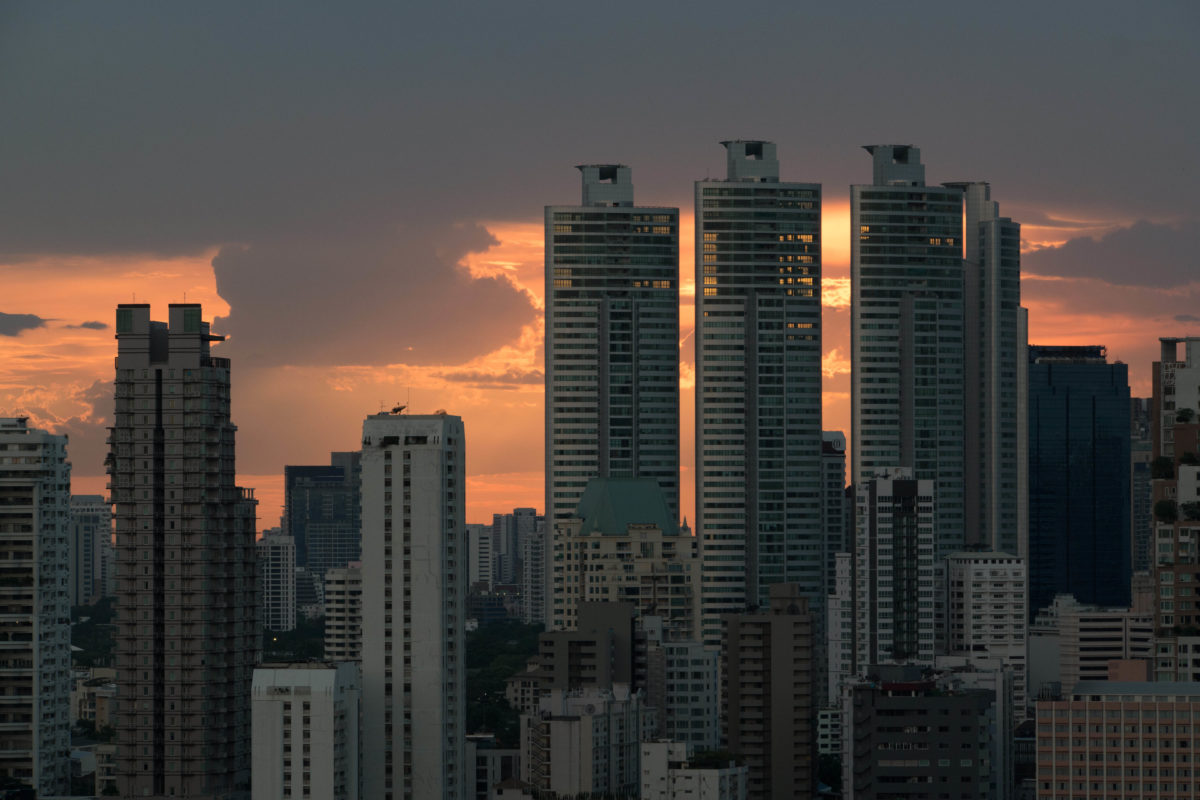
The video performance of this camera is flat out stunning. Having tested it in low light on a night shoot of a Hollywood movie to the overpowering brightness of shooting a sunset, the camera has constantly outperformed expectations.
There is a huge fixation lately about RAW and flat S-LOG which is overinflated and misleading. While it is true that the NX1 does not offer a super flat image, a properly exposed shot can be adjusted in post to do everything that a flat profile can offer. Indeed one that same Hollywood movie set of Kickboxer Vengeance the consensus was that the Samsung NX1 could be used side by side with the Red Epic footage in post production. You simply can’t expect better than that for a sub $2000 camera.
I highly advise avoiding this strange concept that seems to be brewing for those who sell these NLE based LUTS and De-LUTS. In my opinion, if you don’t apply it in the camera, then you are doing nothing to add the dynamic range or quality of the image. In fact, you are basically color correcting to achieve a flat image only to color correct a second time to reach the “look” that you want. It’s like flying from New York to New Jersey by first flying to LA. Sure you can do it. But the question is, WHY?
While the NX1 allows for custom controlling of the Luminance Levels and Master Black Levels these as not designed to expand the dynamic range but rather as a way to match to other cameras in given shooting environments. The base settings in combination with the Gamma DR setting grants you the widest latitude in true dynamic range.
I found it very easy to use the Touch AF for set up of focus during those hectic points in shooting behind the scenes on a stunt-filled action movie like Kickboxer Vengeance. In fact, I was even able to pull off rack focus using the Touch AF and the AF Responsiveness adjustment in the menu. The results were as smooth as using the lens control but without needing a second person focus puller.
When I had the time the 1280×70 viewfinder was sharp and spectacular with the manual focus switch on the lens barrel easy to access.
There are however a few hurdles for Samsung’s wizards in engineering to overcome to achieve full professional parity. 10-bit 4:2:2 color sampling and 4k 60p frame rates among them. Enabling 10-bit 4:2:2 instead of 8-bit4:2:2 from the HDMI port would be a welcome first step. That would grant us the ability to use the Atomos Shogun to its fullest potential in external video recording.
Audio has always been a weak link in all mirrorless cameras, but the newest firmware upgrade has taken the first step by improving the external audio capture. But still more needs to be done.
H.265 is a definite long term advantage allowing you to record twice as much as H.264 while still maintain the same professional quality standards. An added bonus is that you don’t need the excessive fast SDHC cards that can cause long term overheating issues and failure.
If you are serious about capturing stills or video, my advice is that this is THE camera to get. There is no other camera in this price range that delivers the bang for the buck that the Samsung NX1 Camera does.
Just a note the Adobe Premiere cc, After Effects and Media Encoder now support HEVC .h265 natively and the results are very nice. I’m also using Adobe Media Encoder to transcode any files to Prores that I want to use in FCPX.