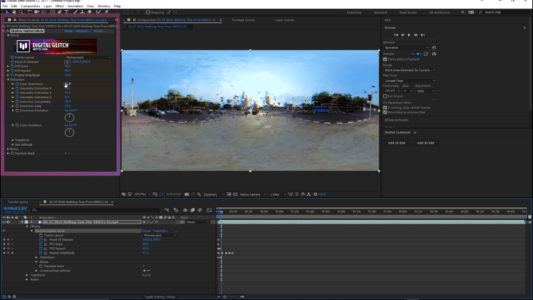
Let’s move on to Mettle SkyBox Digital Glitch. Now that’s when I really think is cool. It’s kind of video gone mad kind of look to it.

Take a look at what we’ve got here. I’m going to activate the keyframing for, Point of Interest, POI Scale, POI Aspect, and Master Amplitude. All of these things and even the Color Distort.
What we’re going to do with her going to create a really funky look. To start, turn the Master amplitude all the way down, so we have no effect yet. Moving across the timeline then let’s bring the Master Amplitude up just a little bit.

This very simple one, as we move across the timeline bring the Amplitude up and down as you like. By going back and forth with the amplitude then you can have the images dissolving into digital noise and then back again. If you don’t like your adjustments, then you can open up the composition video and move the keyframes to create an entirely different look.

What you wind up with is something that looks kind of cool. I’m going to add more to the effect by changing our scale. Add in a different point, change the aspect, the color distortion. Continue along the timeline and make changes till you like what you see. Scrub the timeline or click preview to see how it looks.
There is no right or wrong. It’s just a matter of creating a look that you think is cool.

I could go on for hours and hours about this. It is a really cool digital filter to be able to add. It all depends on your 360 videos as to what you need to enhance the video and make it really cool.
Here is a comprehensive list of the tools and adjustments available in SkyBox Digital Glitch.

DIGITAL GLITCH
• Frame Layout – choose between Monoscopic or Stereoscopic Over/Under.
• The point of Interest – central location of the effect. The position can be moved around by the user. The default position is in the center of the footage. The Point of Interest area is also key-frameable for movement if that is desired.
• POI Scale (Point of Interest Scale) – scaling for effect from the point of inter¬est. A value of 100 means that the effect is applied to 100% of the footage. This value can be scaled down to apply the effect to only a part of the footage. (i.e. to apply it to only 25% of the video, set the value to 25.) The default is 100.
• POI Aspect Ratio (Point of Interest Aspect Ratio) – adjust the aspect ratio for the POI scale. The default is 0. The minimum value of -100 will make the aspect ratio wider and shorter. The maximum value of 100 will make the aspect ratio narrow¬er and taller.
• Master Amplitude – adjust the overall threshold of all of the effect setting values at once. At a value of 100, all of the effect settings will remain as set by the user. At a value of 0, all of the effect settings will be scaled back to 0 from their setting set by the user. (i.e. the Master Amplitude will scale all of the setting values procedurally, so a value of 50 will cut back all of the users set values by 50%. Effectively reducing the overall Digital Glitch effect on visible on the footage by 50%.) The default is 100.
Distortion
• Color Distortion – adjust the overall color distortion (RGB split) on your footage. The default is 50.
• Geometry Distortion X – adjust the distortion occurring on your footage in rela¬tion to the X-axis of your footage. A higher value will result in more distortion on that axis. The default is 50. (Adjust this setting in conjunction with the Distortion Rate in order to see the results of the effect more clearly.)
• Geometry Distortion Y– adjust the distortion occurring on your footage in rela¬tion to the Y-axis of your footage. A higher value will result in more distortion on that axis. The default is 0. (Adjust this setting in conjunction with the Distortion Rate in order to see the results of the effect more clearly.)
• Geometry Distortion Z– adjust the distortion occurring on your footage in rela¬tion to the Y-axis of your footage. A higher value will result in more distortion on that axis. The default is 0. (Adjust this setting in conjunction with the Distortion Rate in order to see the results of the effect more clearly.)
• Distortion Complexity – adjust this to sub-divide the areas of distortion on your footage. (i.e. Higher values will result in smaller, finer looking distortion. Small¬er values will result in larger, blocky distortion areas.) The default is 40.
• Distortion Rate – adjust the overall distortion amount on your footage. A value of 100 will result in 100% of the video being covered in distortion. A value of 0 will result in no distortion on the video. The default is 40.
• Distortion Evolution – cycle this setting to animate the distortion created by the Distortion Rate setting. Faster cycling will result in faster distortion animation. (i.e. animating the evolution will result in more digital glitching animation to occur on your footage.)
• Color Evolution – cycle this setting to animate the RGB color distortion created by the Color Distortion setting. The colors will cycle back and forth on the pan¬ning-axis (Y-axis) of the footage.
To Watch the video Click here.
Next time we will look at Mettle SkyBox Post FX 2 Fractal Noise.


One thought on “How To Use Mettle SkyBox Digital Glitch in Adobe After Effects”