Today I am going to go over how to stitch your images and videos from your GoPro Fusion using the Fusion Studio software.
The first step is to copy your files on the two SD Cards to your PC. The Fusion can be connected directly to your PC or Mac using the USB-C cable. But honestly, this method is very slow and can fail. Copying the files to your computer is much faster and will speed up your stitching and rendering.

Strictly speaking, you can drag all your SD Card files into one folder, but should you miss anything or need to check on individual components, it would be quite challenging. I find that neatness counts and being sloppy isn’t any faster than doing it right.

The file structure that I recommend it one folder labeled “Fusion” and inside that two folders, one labeled “FRONT” and the other “BACK”.
You can use a Powered USB 3.0 Hub to speed things up in the transfer.
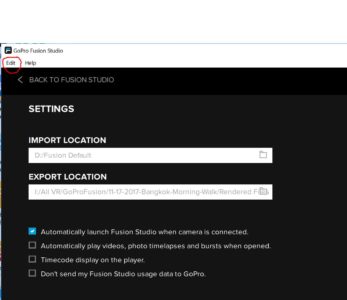
Once the transfer is complete, open Fusion Studio and go to “Preferences” to choose where you want your rendered files to go. This illustration shows my typical extremely organized layout of the folders.
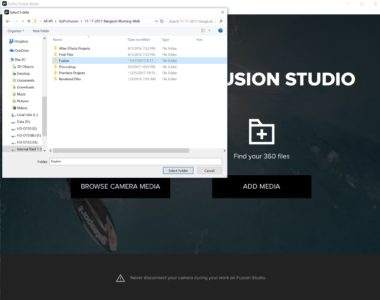
Go back to Fusion Studio main page and click “+Add Media” or drag and drop the “Fusion” folder in.

The go through each one of your previews or just click “CTRL A” to select all of the clips. Your choices are as follows:
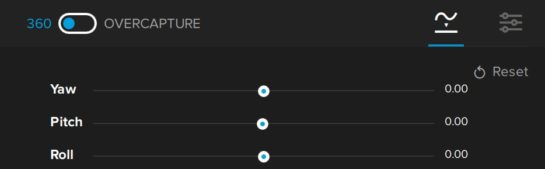
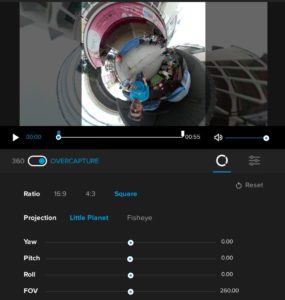
360 or Overcapture
If OverCapture: 16:9 / 4:3 / Square
And the type of Projection: Little Planet or Fisheye
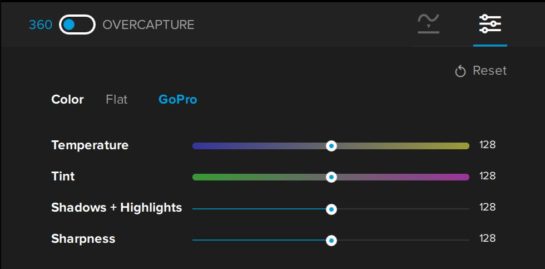
ProTune or GoPro Color. If you are going to use the clips straight from Fusion Studio and not edit them further, then GoPro Color is best. If you are going to edit them, then always choose Protune. Other choices here include (Color) Temperature, Tint, Shadows & Highlights, and Sharpness. Unless you are using the clip straight from Fusion Studio, I leave these alone.
Yaw, Pitch, Roll and FOV (OverCapture) sliders to adjust your composition.Stabilization or not,
In and Out points for each clip
Create A Copy, which allows you to make of copy of a clip so that you can render it differently. This could be 360 or Overcapture or to use different render format choices (will go over those next)
Once you have completed your choices for your shots, click “Add to Render Queue.”
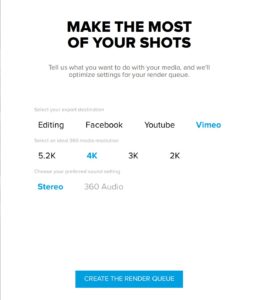
At this point, a pop-up window will appear that helps you to decide on the render format.
If you choose “Editing” you then have a choice of 5.2k, 4k, 3K, or 2K with either 360 Audio or Stereo. The Video format will be Cineform ‘422 High’
Choose “Facebook”, “You Tube”, or “Vimeo” and your render format changes. If you pick 5.2K, the render format will be ProRes. If you pick 4K, 3K, or 2K you will get H.264 render format.
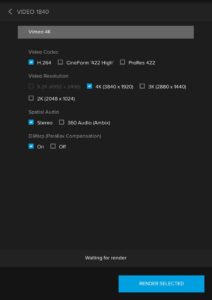
The next screen is the render queue. Here you can open each of the clips individually and change any of the parameters. This is also where you can disable D-Warp if you wish to. Although I have never felt the need to do so. D-Warp is your friend for tight shots that the Fusion does so well.
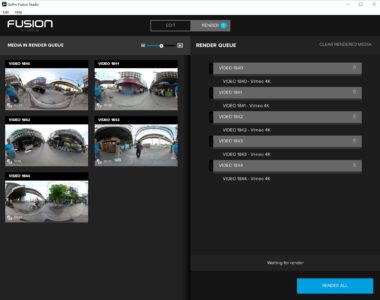
From there you only need to Click “Render All” to get the final process started.

DJI Phantom 360 Camera Mount 3-piece