
Next up on the Red Giant Color Suite is Red Giant Colorista 2.

Colorista 2 is not only one of the most powerful tools for color correction but offers unprecedented latitude for color grading. With primary and secondary correction and Master correction stages you can do just about anything with your image. Add to that the always available Power Mask for each stage and you have a tool to work with color like no other.
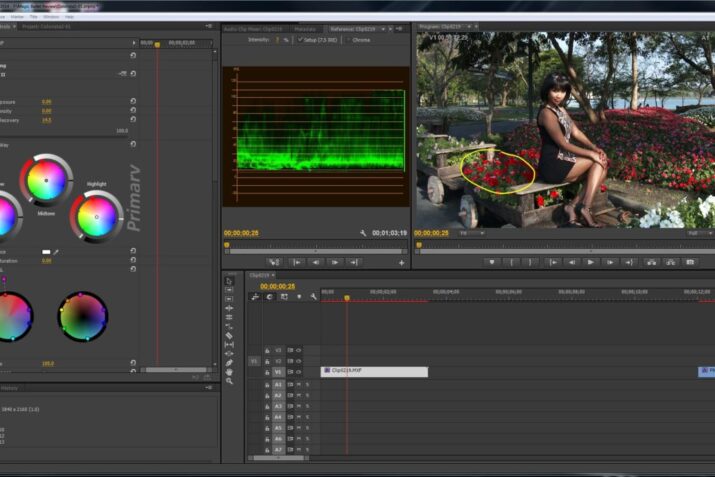
The first thing that you see is the primary stage. The first thing that you’ll see is the primary exposure this allows you to adjust your brightness overall in the image. Next up is the primary density it’s very similar to a gamma correction. Highlight Recovery helps you correct highlight areas that are blown out by overexposure.

I’m sure by now you’re familiar with with 3-Way color correctors but this is a 3-Way color corrector some big differences. In this Primary Stage the three-way color corrector gives you color wheels to adjust shadows, midtones and highlights. Each wheel has individual controls but let you adjust hue, saturation and luminance within each of these ranges.

In addition you find a unique HSL corrector. HSL stands for Hue, Saturation and Luminance. The wheel on the left control saturation while the other wheel controls brightness. Circled around the edges are various stops of color which represent the different hue. If you put one of those colored dots outward away from the center on the left wheel you will increase the saturation of that particular hue of color. With the other wheel bringing the dot in or out will adjust the brightness of that particular hue of color. But wait there’s more, if you take the dot and start sliding in towards its neighbor the color will take on the characteristics of the color you’re pushing towards. Reds can become more orange or going the other way, more violet.
This is an amazingly powerful tool for changing selected colors in the scene.
Here’s the scene with Xanny in the garden. Notice the flowers. Here’s their original color. Now with just moving the read more towards the purple of the flowers I’m able to change the color.
The secondary stage is just as powerful as the first with one difference. You can add a secondary power mask and even a secondary here to go ahead and concentrate your changes just in the mast or keyed areas. In the secondary stage is like a sharpening tool you can bring out the detail from your image when you slighted towards the right side or the positive area you can also soften things by sliding into the left.
Lastly, you have the master stage. The master stage also contains exposure, density, and mix controls. You even have an additional HSL controller to fine-tune Settings even more. The extra goodie here are the Curves.

In this stage you get RGB curves plus curves to adjust the red green and blue colors individually. But wait there’s more! In addition to that you get another Power Mask. Talk about taking fine-tuning your picture down to a fine art.
Additionally you have a Show Skin Overlay check box. With this box checked it helps you achieve proper skin tones. And overlay grid pattern shows up over the skin tone. This grid increases the more you correct your footage.
What you could say is that with Magic Bullet Looks you can use a shotgun approach to apply presets and build your own. Colorista 2 is more of an artist toolbox filled with fine brushes and pallets to gently sculpt your color and image to what you desire.
But truly amazing thing is that with Red Giant Color Suite you have both of these excellent tools to work with. You may not always need every single tool in the Colorista 2 toolbox but it’s nice to know that they’re there.
Red Giant LUT Buddy
A LUT or a Look Up Table is a quick, in the field, way to take a look at your footage rather than seeing it in the flat, desaturated image that you originally recorded. They are not meant to take the place of color correction and color grading.
A LUT is a file that numerically stores the information that makes up a particular color style.
The main purpose of it is to instantly be able to view a scene with a the desired look quickly applied.
With Red Giant LUT Buddy you can record your own LUTs and apply them to your footage.