

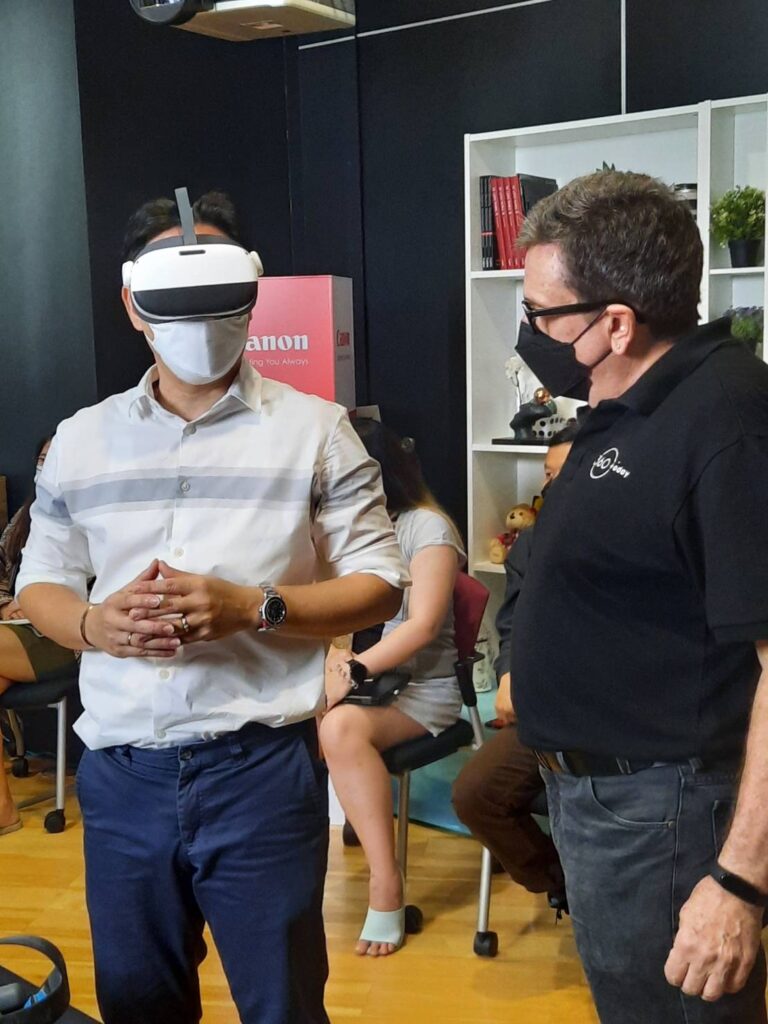
When Canon debuted the RF 5.2mm Dual Fisheye Lens, I, for one, was blown away. Throughout my extensive time creating 3D stereoscopic film projects, Canon was not ever in the conversation. But ever since getting my hands on the lens, first with the Canon R5 and then with the CanonR5C the setup and I are inseparable. I even did training classes for Canon Thailand to help them understand the differences of working in 3D VR180 and communicating that to their customers.
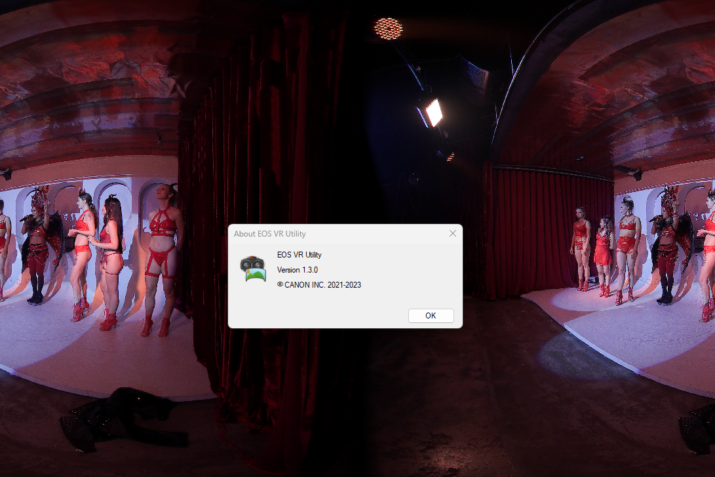
And Canon has remained dedicated to expanding and improving the VR video infrastructure by upgrading the EOS VR Utility and Firmware for the camera. Now, with the debut of the Canon R6 being compatible with the VR180 lens, they have updated the EOS VR Utility to version 1.3.0. Rather than a ton of major changes, they have increased the usefulness of the existing toolset.
For the sake of not repeating things too much I have quoted from my good friend Naoto Somese and his article posted on the highly regarded Japanese publication Video Salon.
Overview
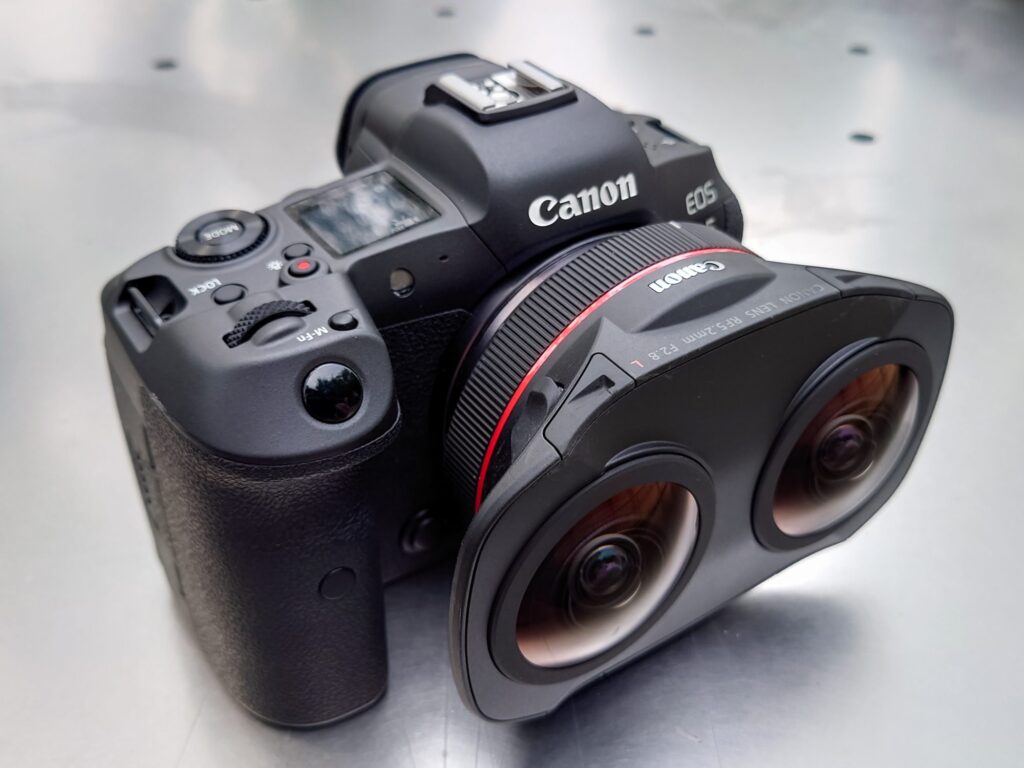
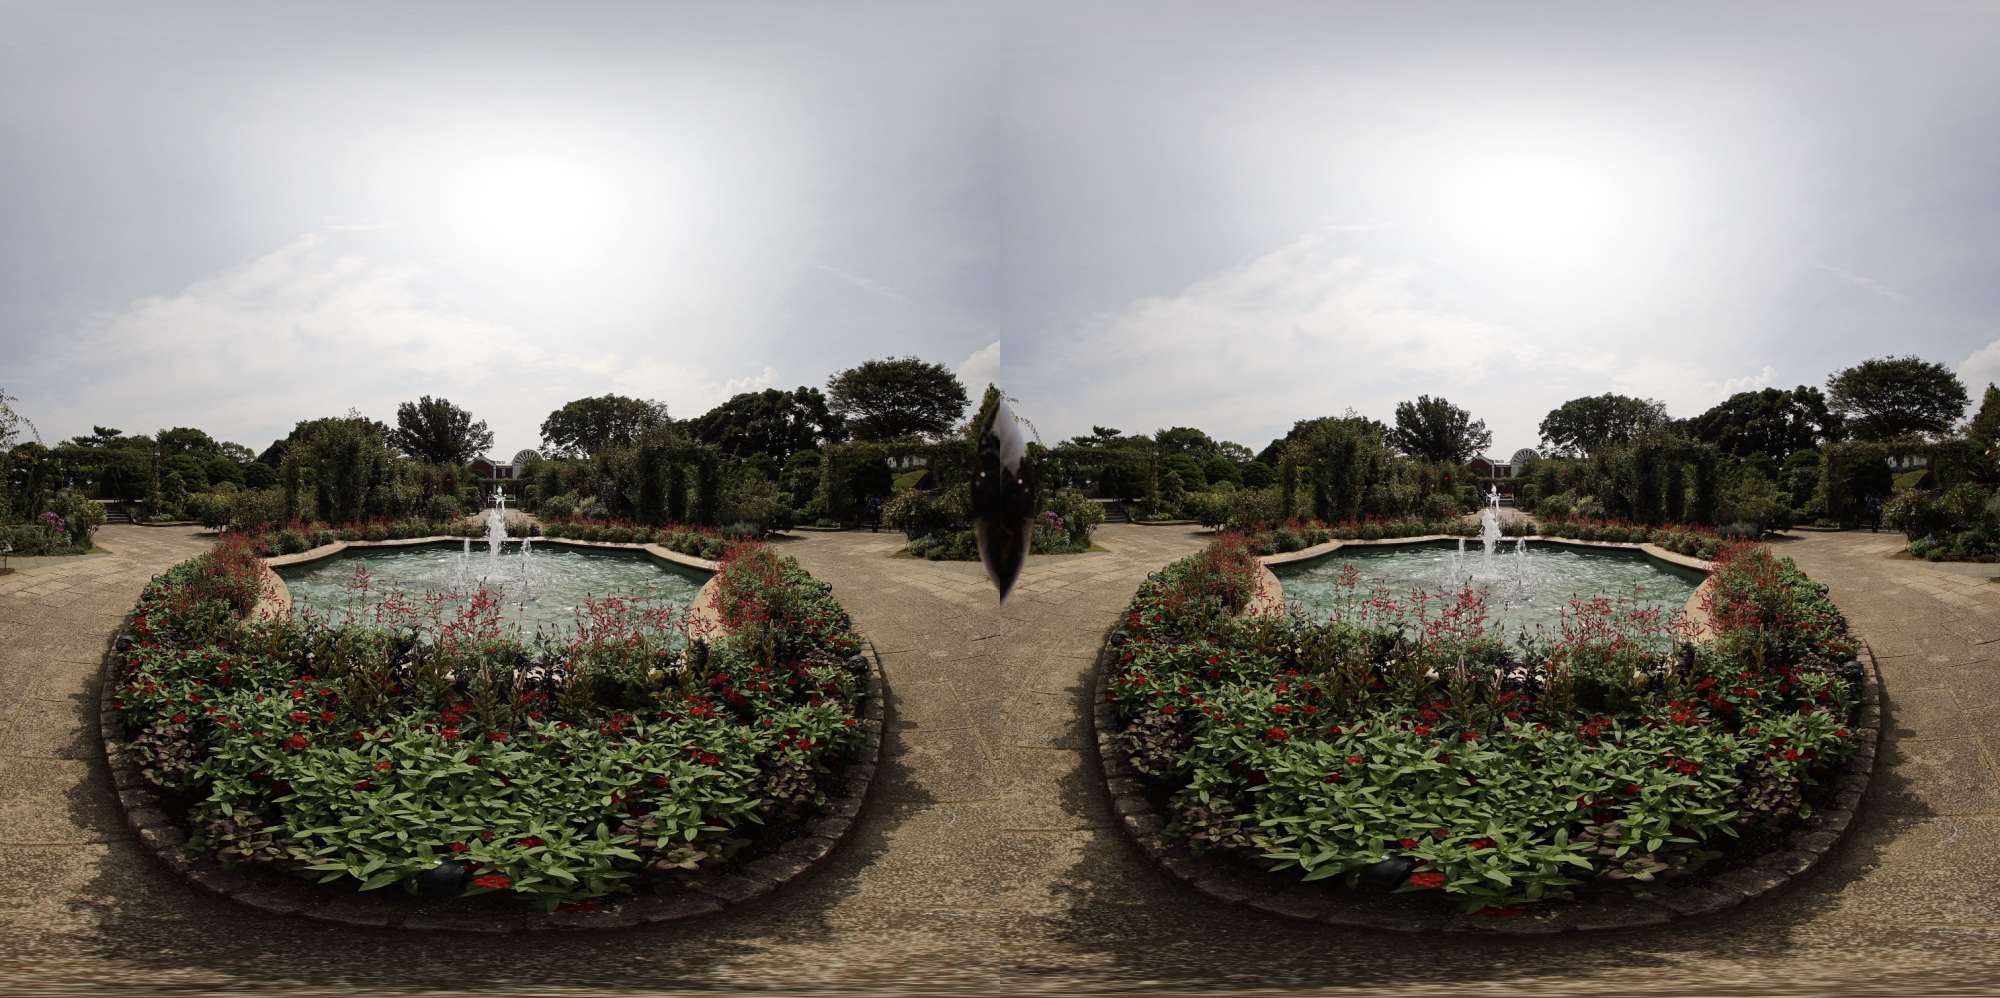
Canon EOS VR SYSTEM is Canon’s first VR shooting system, released in December 2021. By attaching the company’s RF5.2mm F2.8 L DUAL FISHEYE lens to compatible cameras such as Canon EOS R5 and EOS R5C, you can shoot high-quality 180-degree VR 3D videos of up to 8K with both an immersive and three-dimensional effect.
Images shot with the RF5.2mm F2.8 L DUAL FISHEYE’s twin fisheye lenses are recorded in a single file with the left and right sides reversed. This makes life VR creators like myself, to be able to shoot more efficiently. It also means not having to worry about separate controls on what was two cameras synced together. Now, we have one unified system taking away many of the headaches and affording us the opportunity to achieve the maximum results with the 8K Canon RAW LT setting.
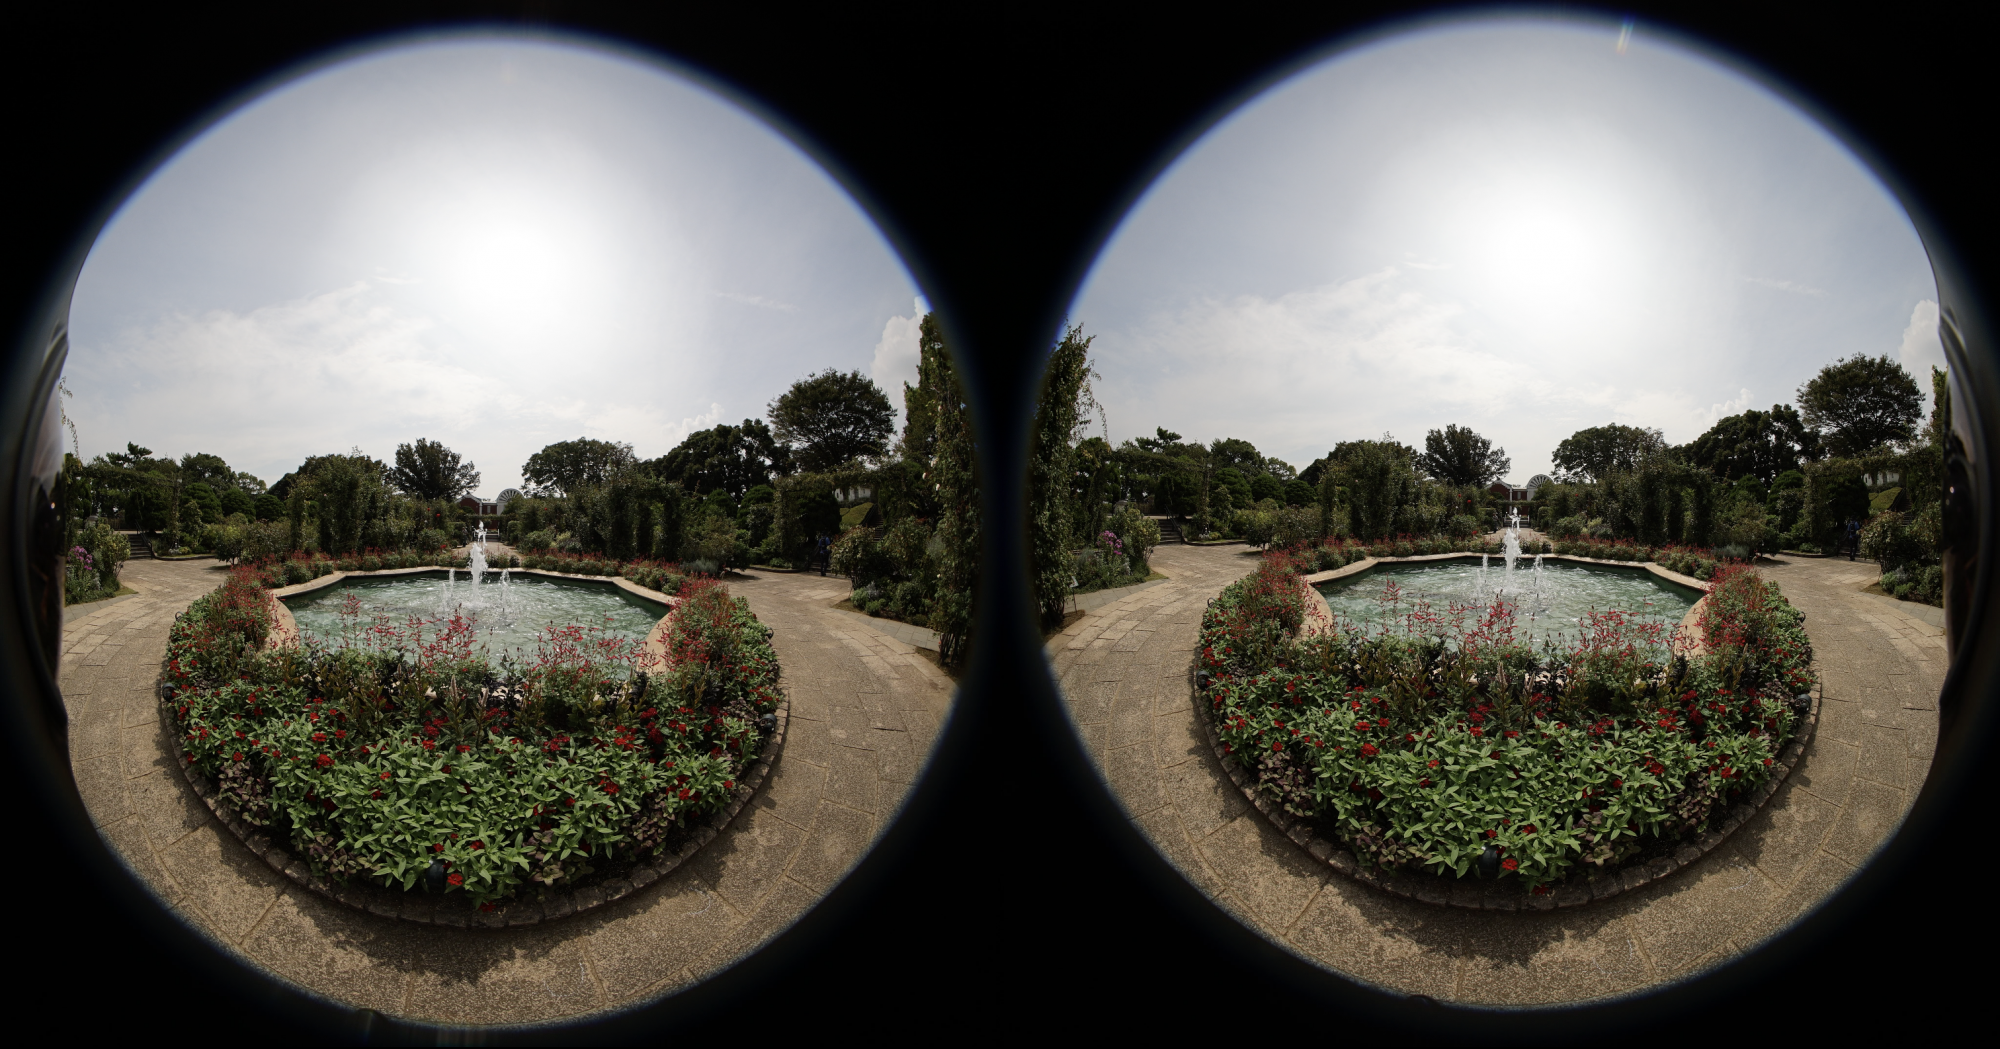
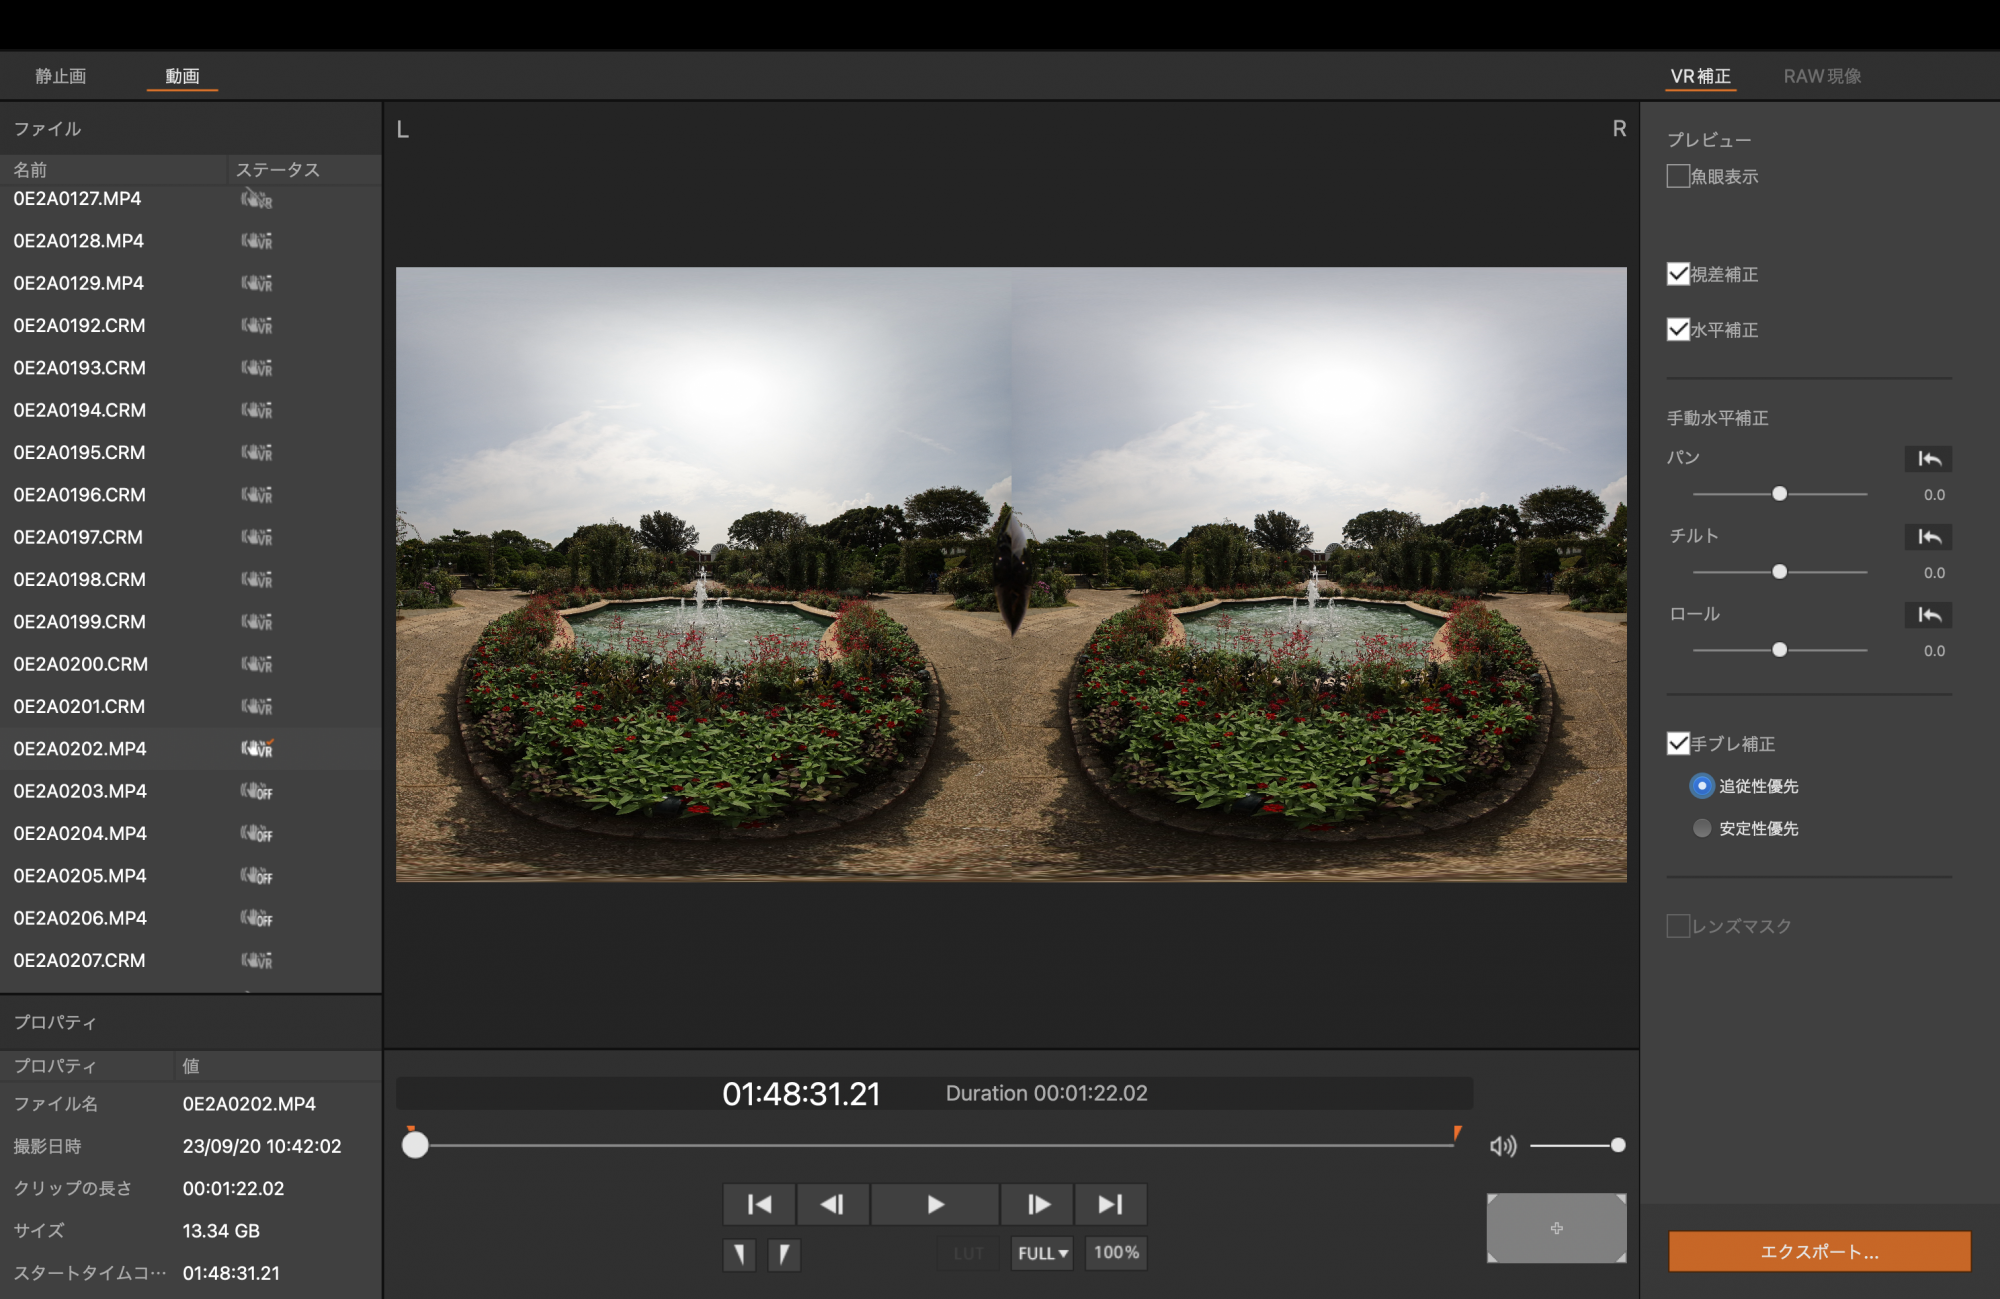
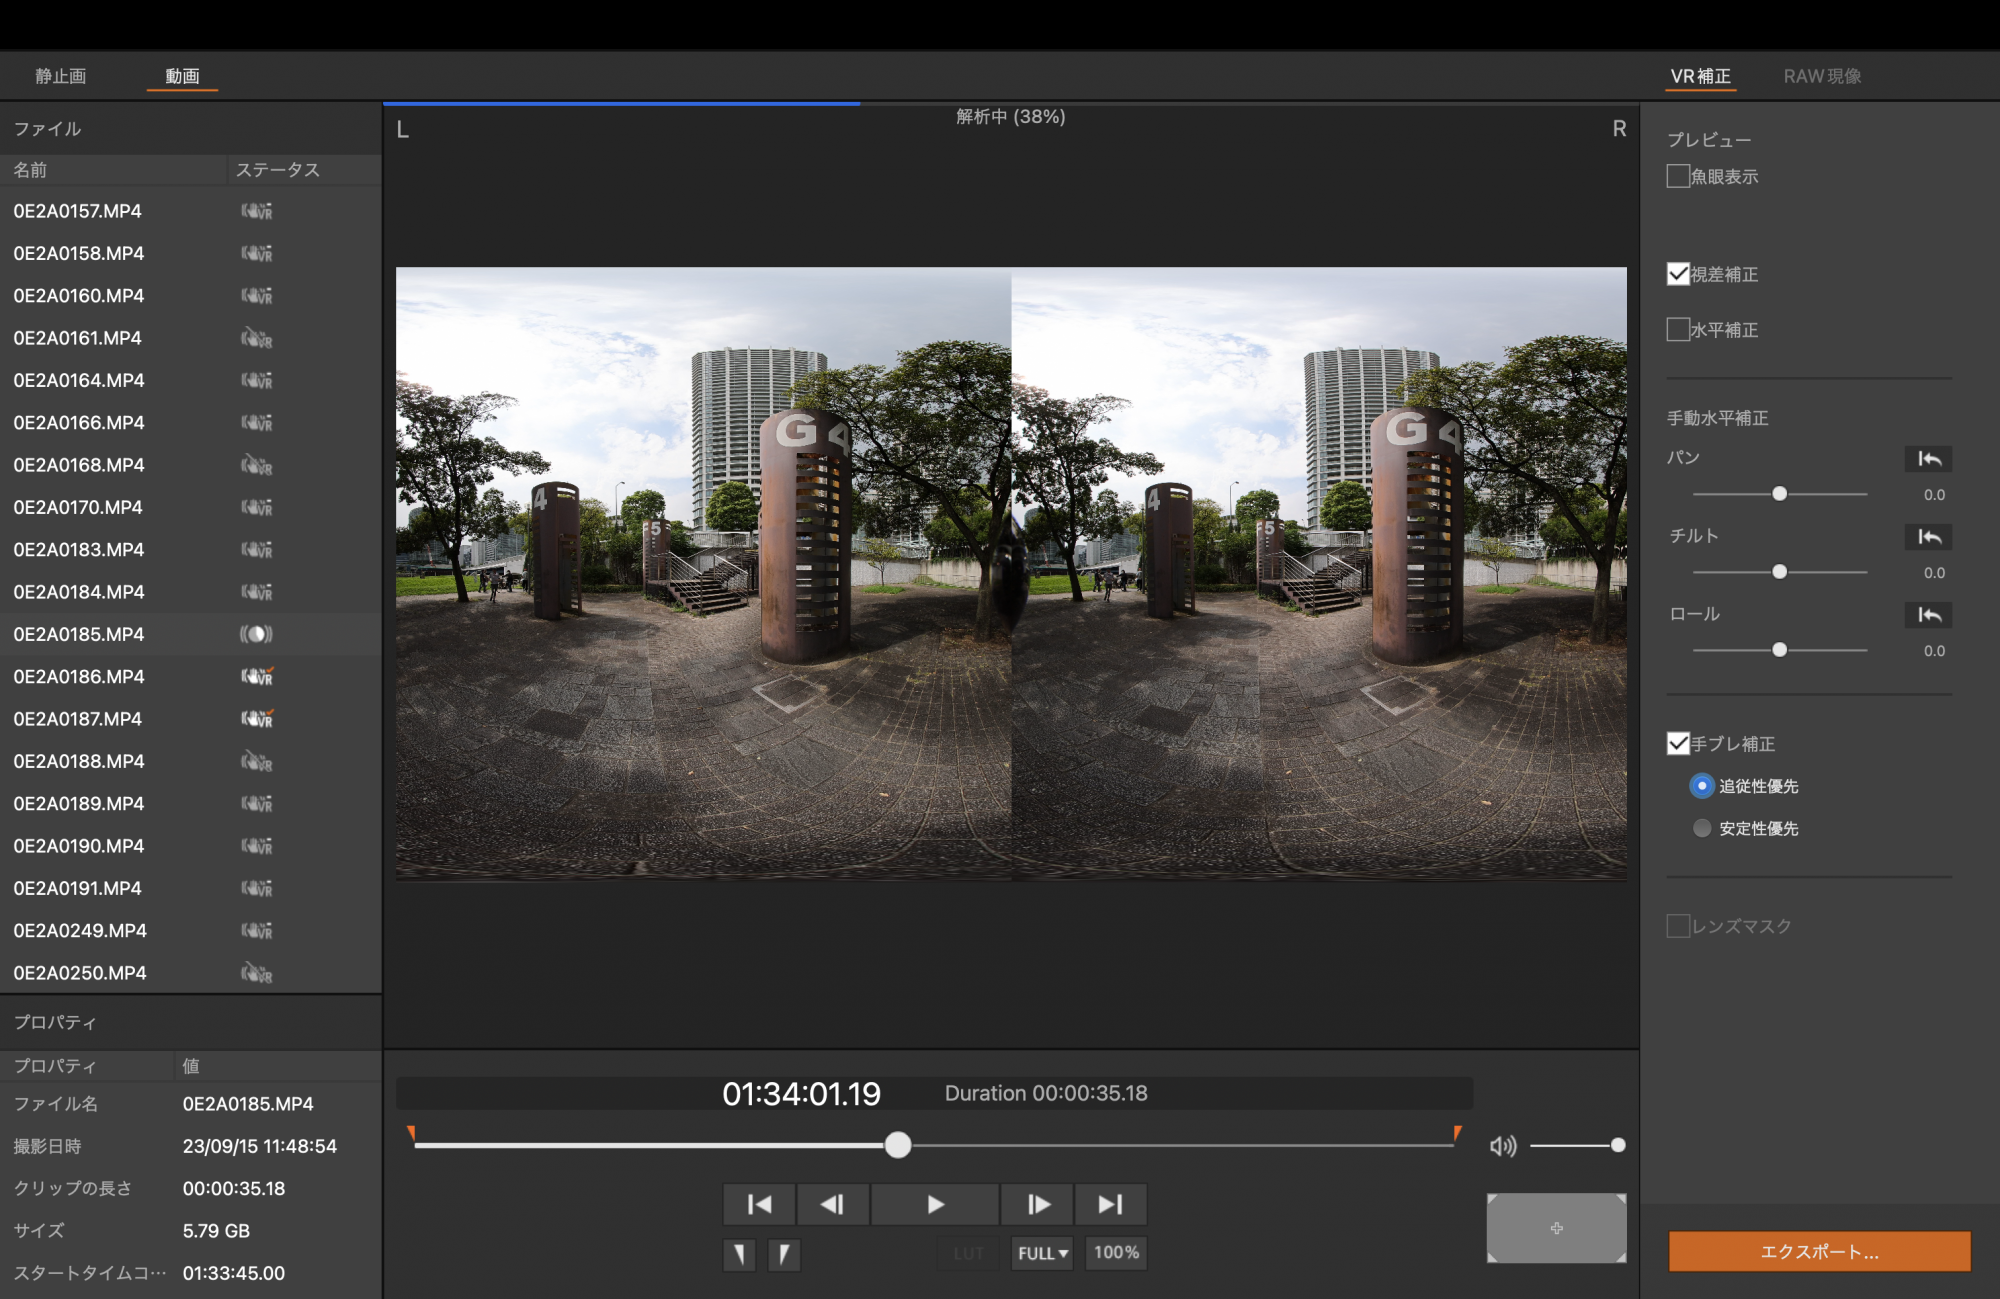
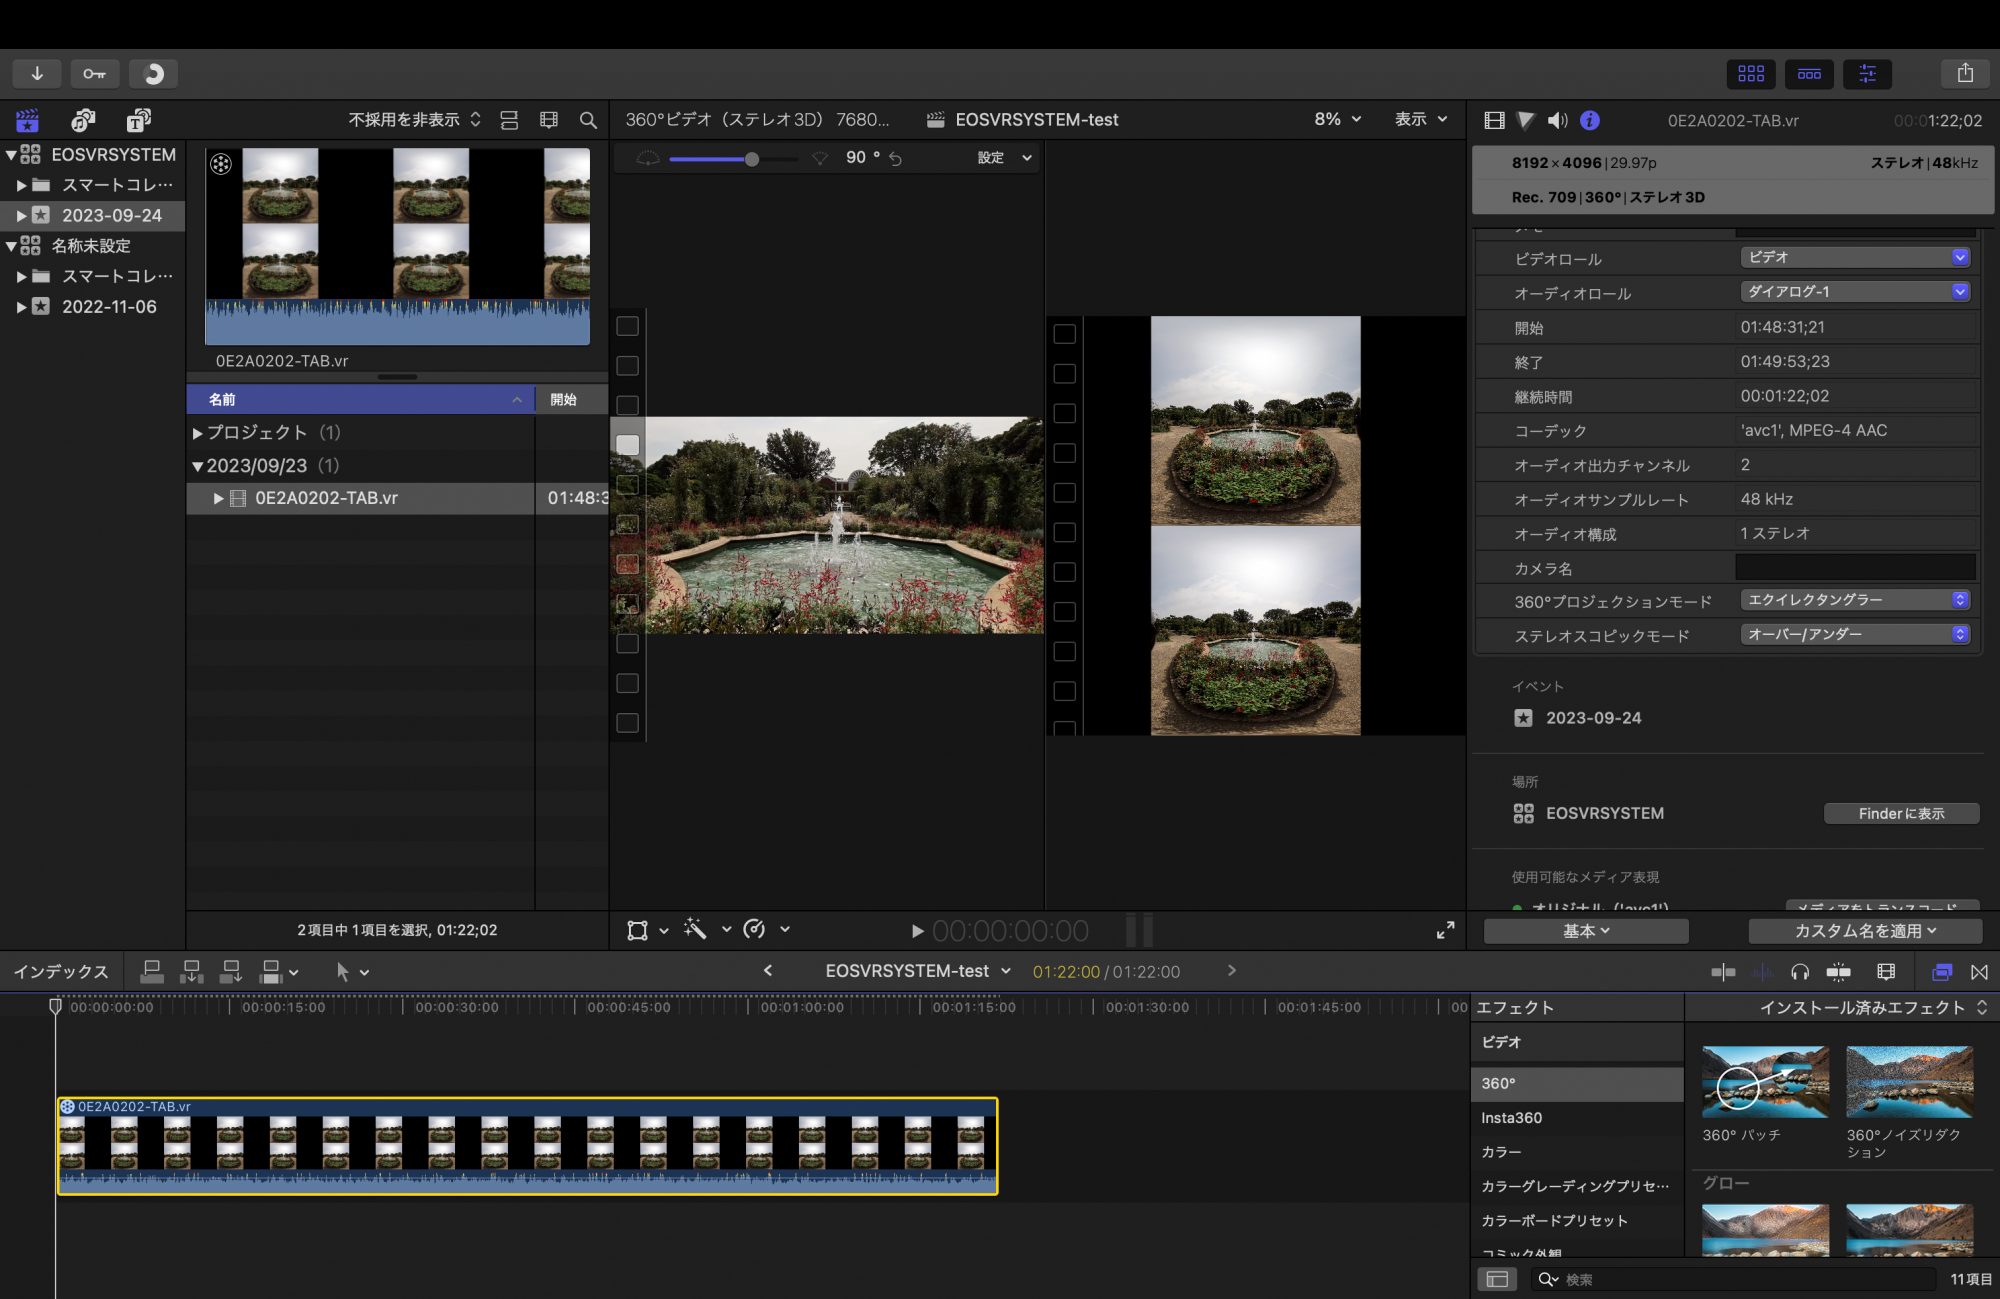
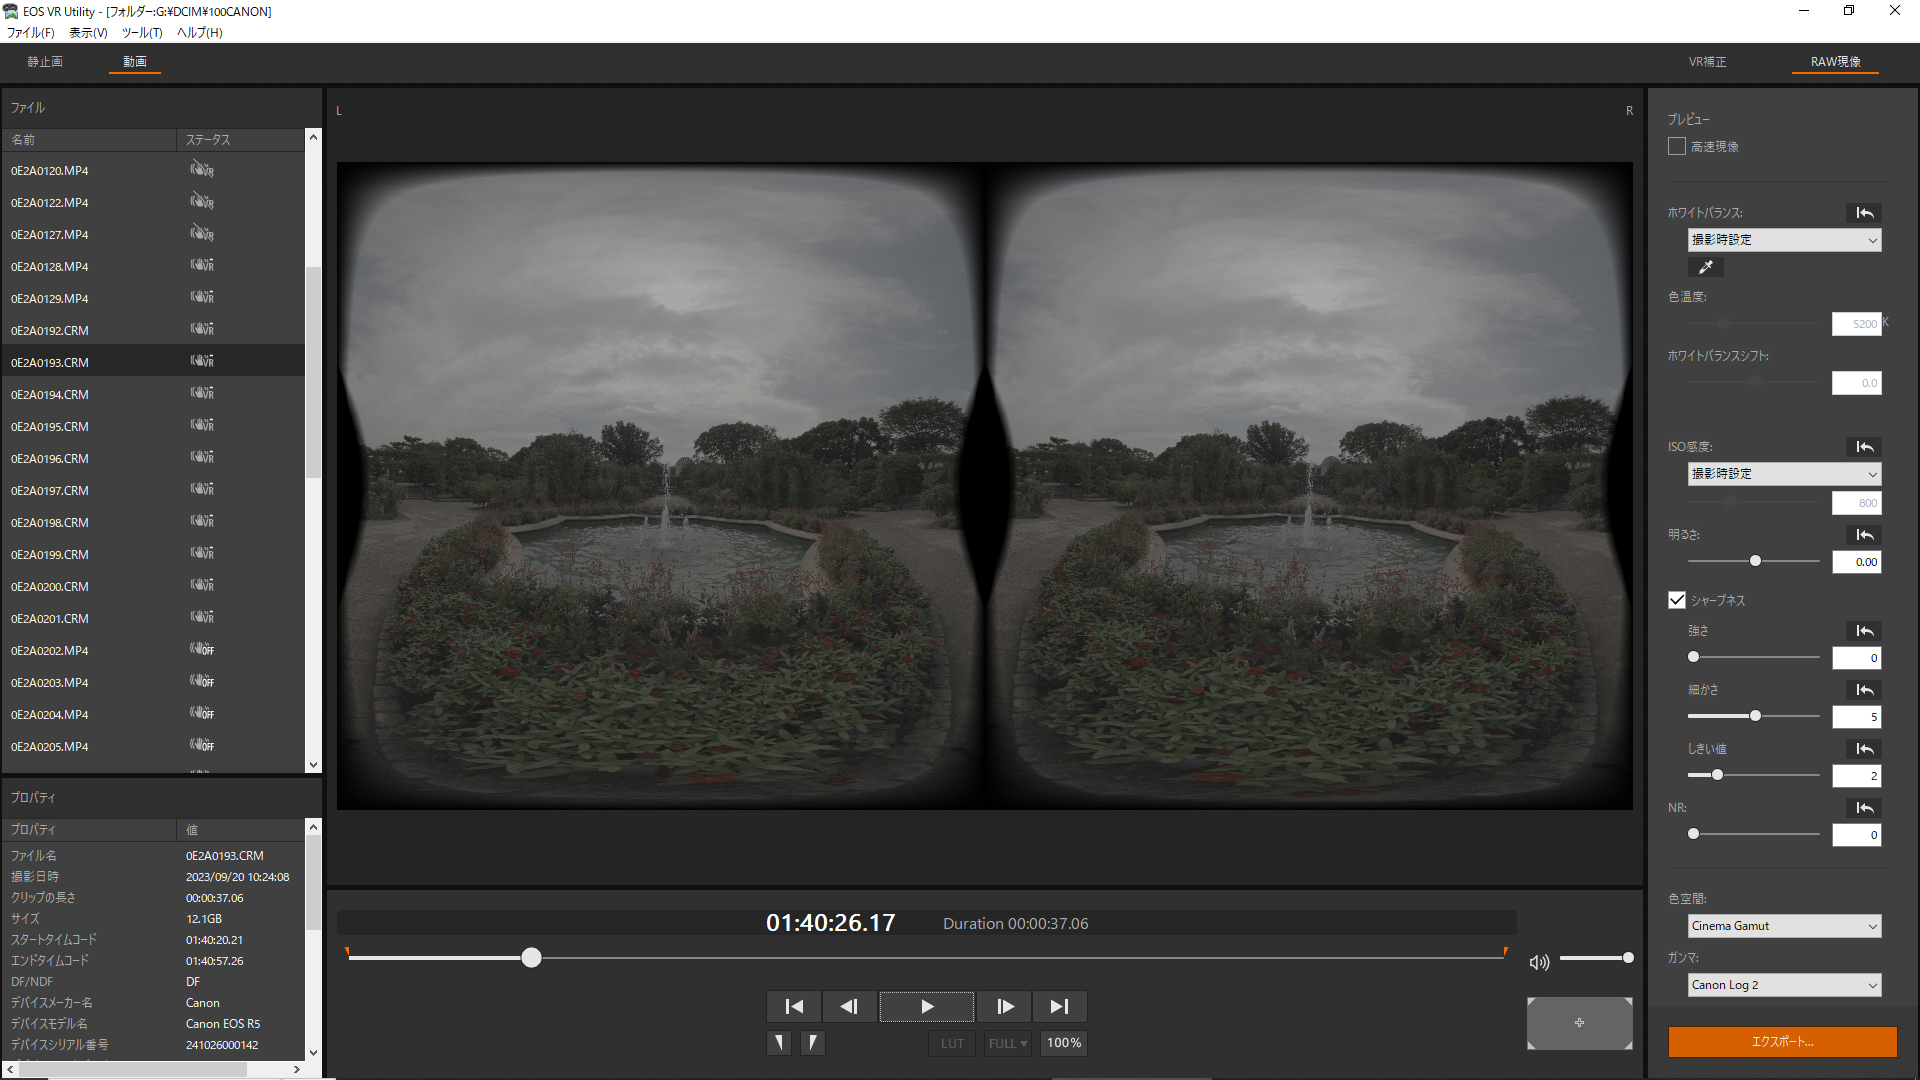
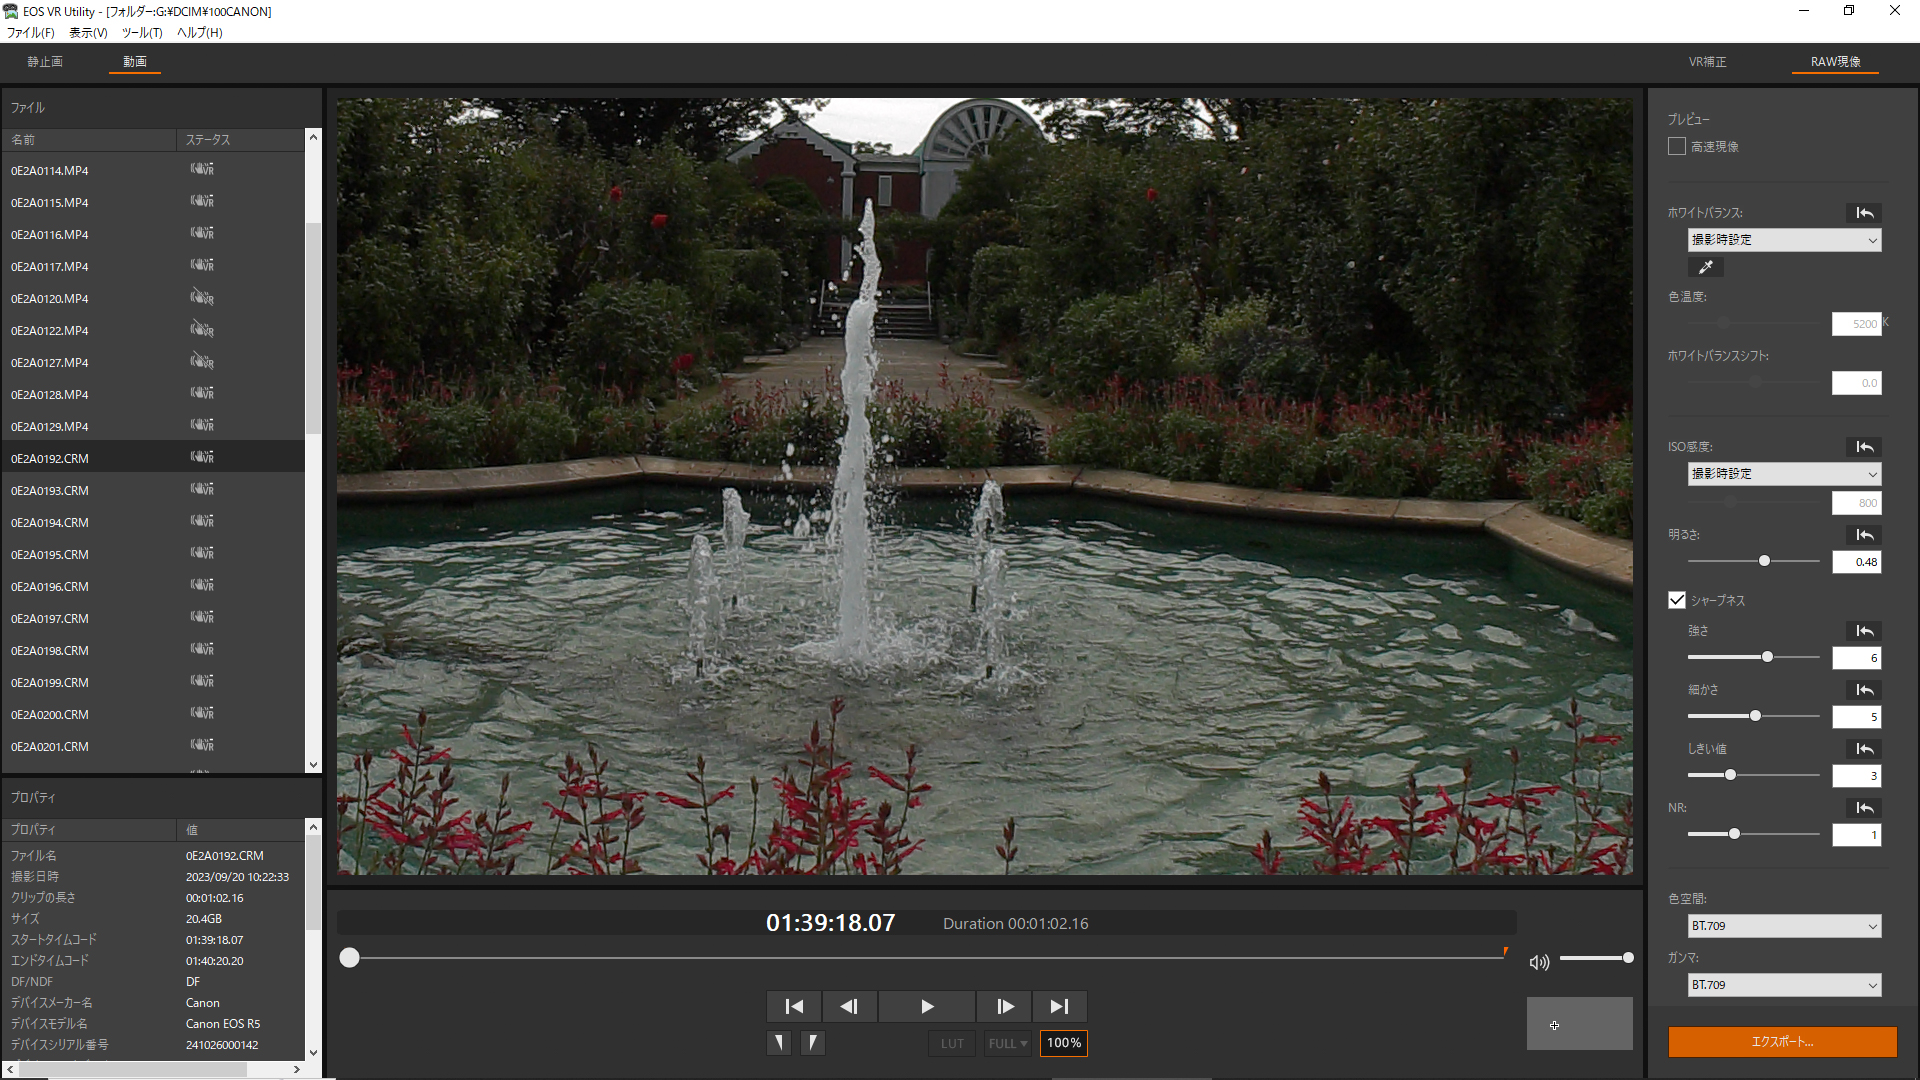
EOS VR Utility is a dedicated software that converts the file into equirectangular projection, the basic format of VR, so that it can be viewed and edited in a VR environment. Using the EOS VR Utility or EOS VR Plugin for Adobe Premiere Pro to swap the placement of left and right lenses, adjust horizontal correction, parallax adjustment, and then convert it to equirectangular. Importanly the software also adds VR metadata as 180-degree 3D VR, and export to a choice of DPX, H.264, or my favorite HEVC 4:4:4 10-bit color.
The Canon EOS VR Utility and Plugin upgrade in December last year added GPU-compatible options to speed up processing and speed priority options with the VR Plugin. In addition, support for RAW videos, faster processing by adopting high compression HEVC (VR Utility/Win version only), compatibility with Apple Silicon (VR Utility/ Plugin/Mac version), and a lens mask function. The EOS VR SYSTEM is officially compatible with two models, EOS R5 and R5C, but with the update to V1.2, the operation is not guaranteed, and some functions are limited, but EOS R3, EOS R6, EOS R6 Mark II, and other devices have become virtually compatible models, which certainly lead to more creators getting onboard.
One item that has not been changed yet is that the EOS VR Utility does not support RAW files of still images, but it does support converting JPG files without metadata, so my first step with 3D VR180 Still images is to start with Adobe Lightroom then adjust and render as JPG then bring the images into EOS VR Utility. You also have the option to use DPP (Digital Photo Professional), or Adobe Camera Raw. There is also an option to Stereo Photo Maker from my friend Masuji Suto, available for free at the link embed. I’ll be doing a story on that soon.
Now, the EOS VR Plugin for Adobe Premiere Pro V1.3, which was updated at the same time as EOS VR Utility V1.3, is now compatible with EOS R6 Mark II firmware 1.2.0. The VR information will be added to the metadata of clips shot with the EOS R6 Mark II. I welcome the EOS R6 Mark II to the EOS VR SYSTEM.
Items added with V1.3 update
The main features of the V1.3 update released on September 26 2023, are the following four points (Windows version/Mac version).
Where to download EOS VR Utility V1.3
1. Stabilization of VR videos by applying electronic vibration isolation
When shooting VR, the basic shooting method is to use a monopod or tripod and shoot stationary to avoid VR sickness. When performing mobile photography, stabilization is an essential condition. With the addition of an electronic stabilization function in the V1.3 update, it is now possible to support moving shooting using a gimbal, leading to an expansion of shooting scenes.
2. Supports export of 360 degree VR format (“Extend to 3D 360”)
Even software that does not support 180-degree VR images, such as Apple Final Cut Pro, can be supported by outputting files that assume 360-degree VR images, expanding the VR editing environment.
3. Detailed settings for sharpness when developing RAW are now possible
This is a RAW video supported by EOS VR Utility V1.2, but in this update, sharpness has been improved to allow more detailed adjustment. By adding sharpness, it is possible to emphasize edges while simultaneously reducing noise and improving image quality.
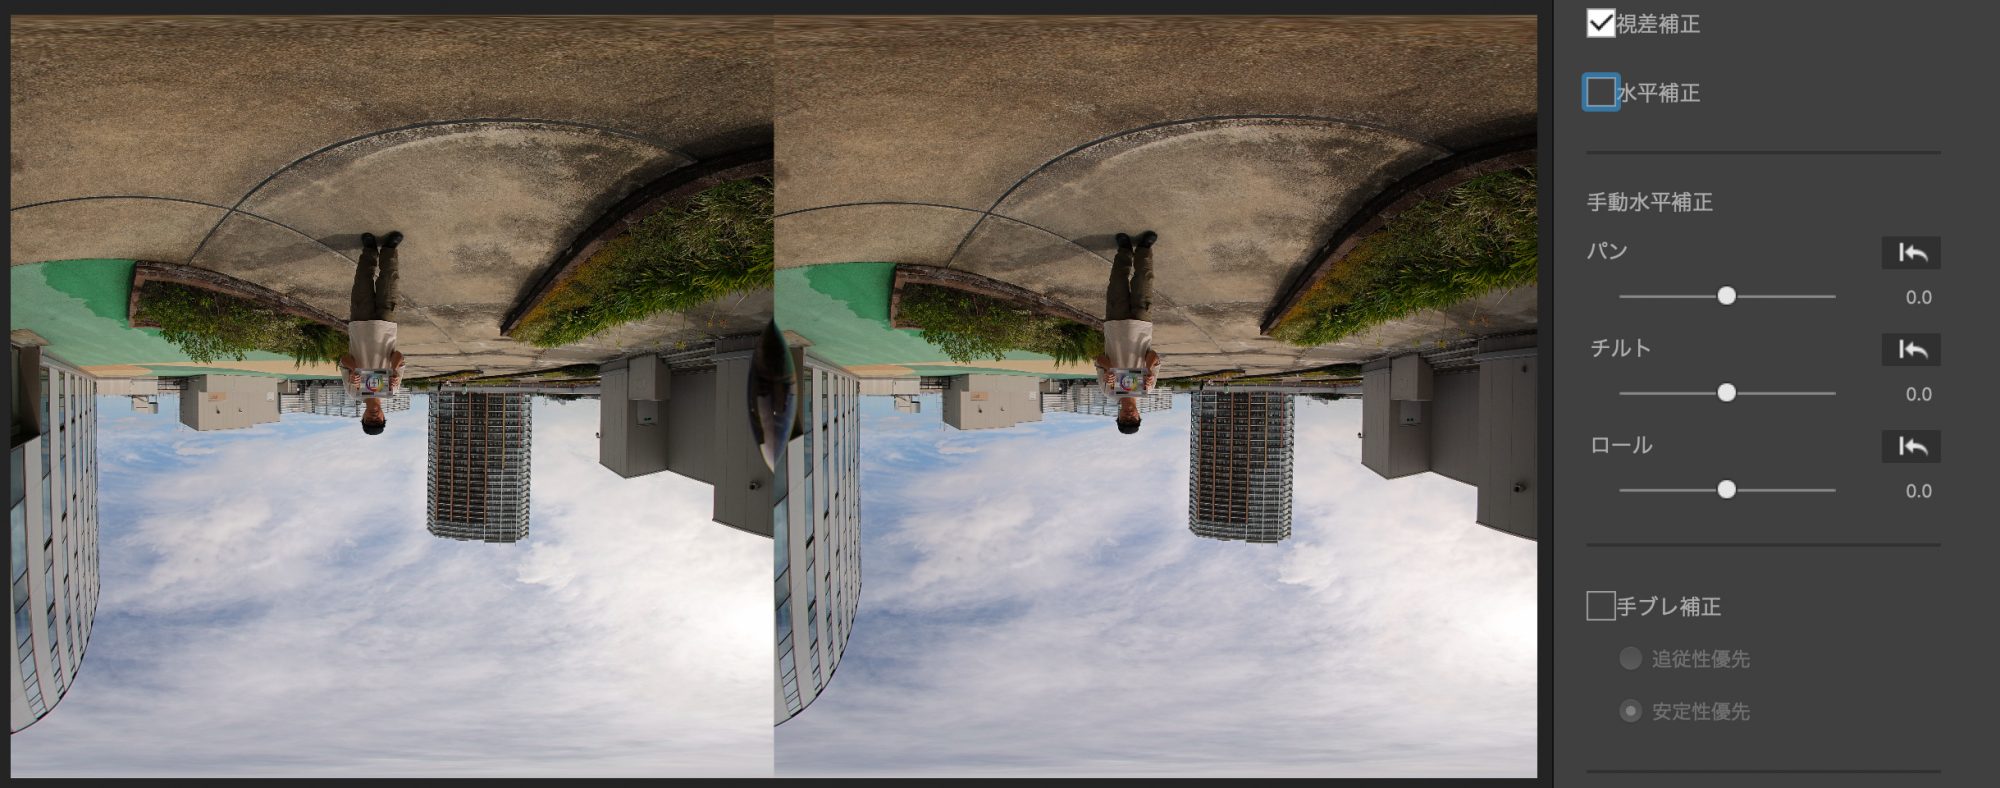
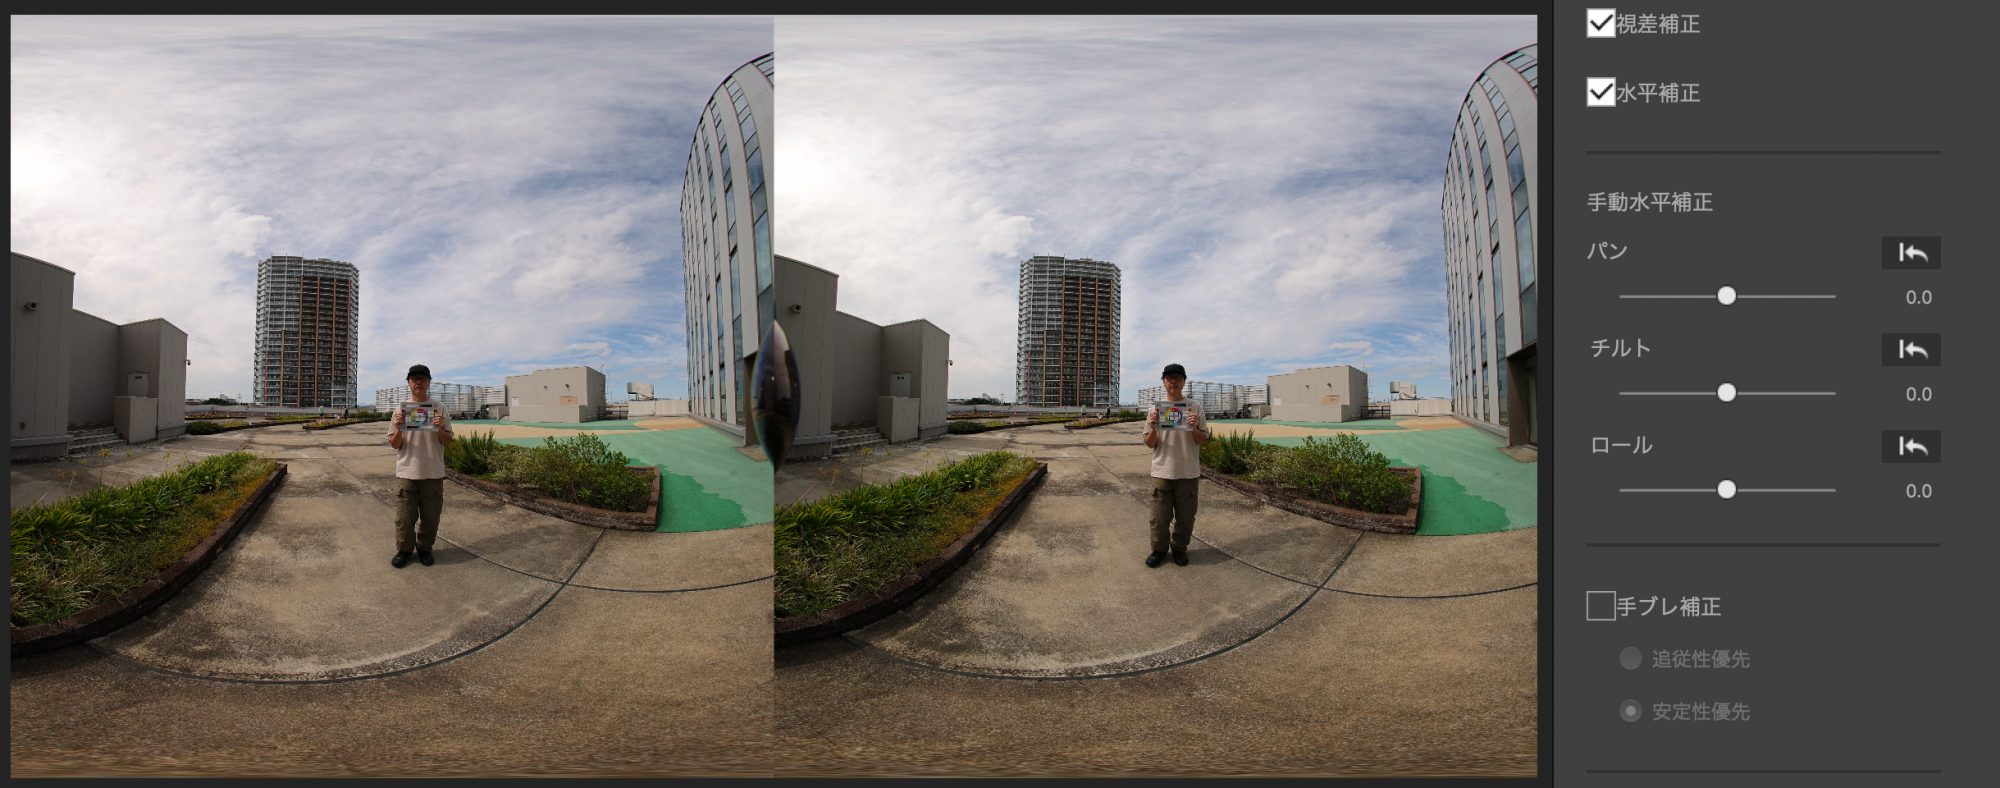
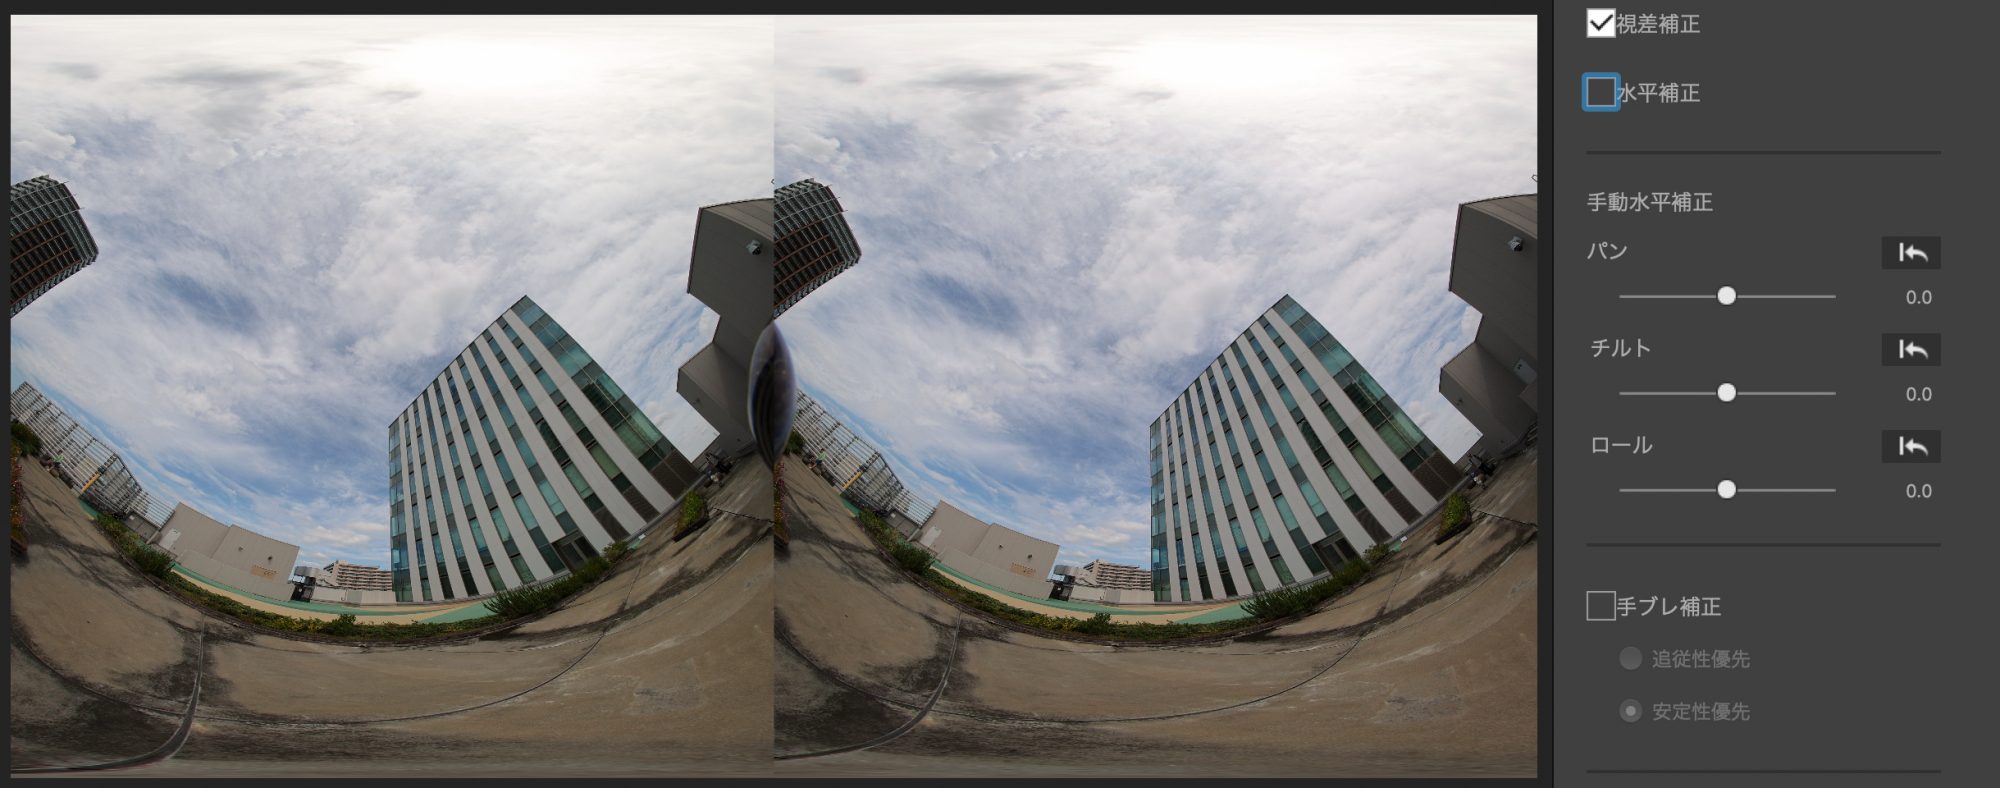
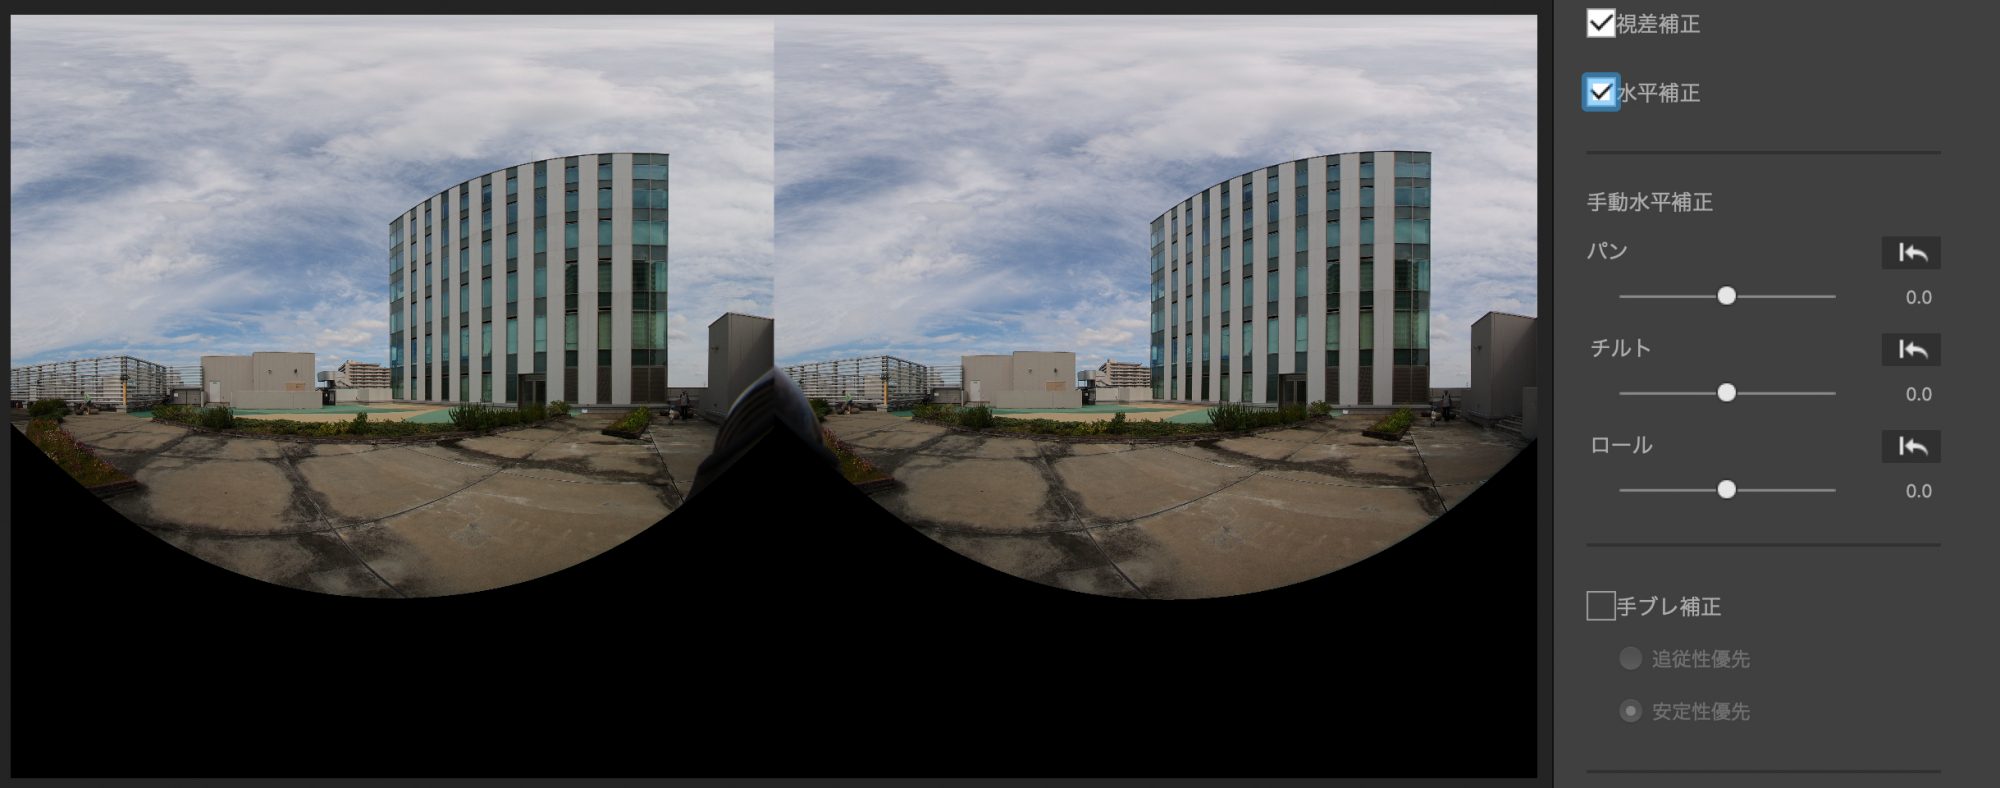
4. Supports automatic horizontal correction when upside down or facing upward, etc.
The horizontal correction accuracy has been improved, and the algorithm has been improved to more accurately correct the horizontal image even when the image is upside down, facing upwards, or downwards.
In the next chapter, we will look at each feature one by one.
Application of electronic image stabilization to VR images
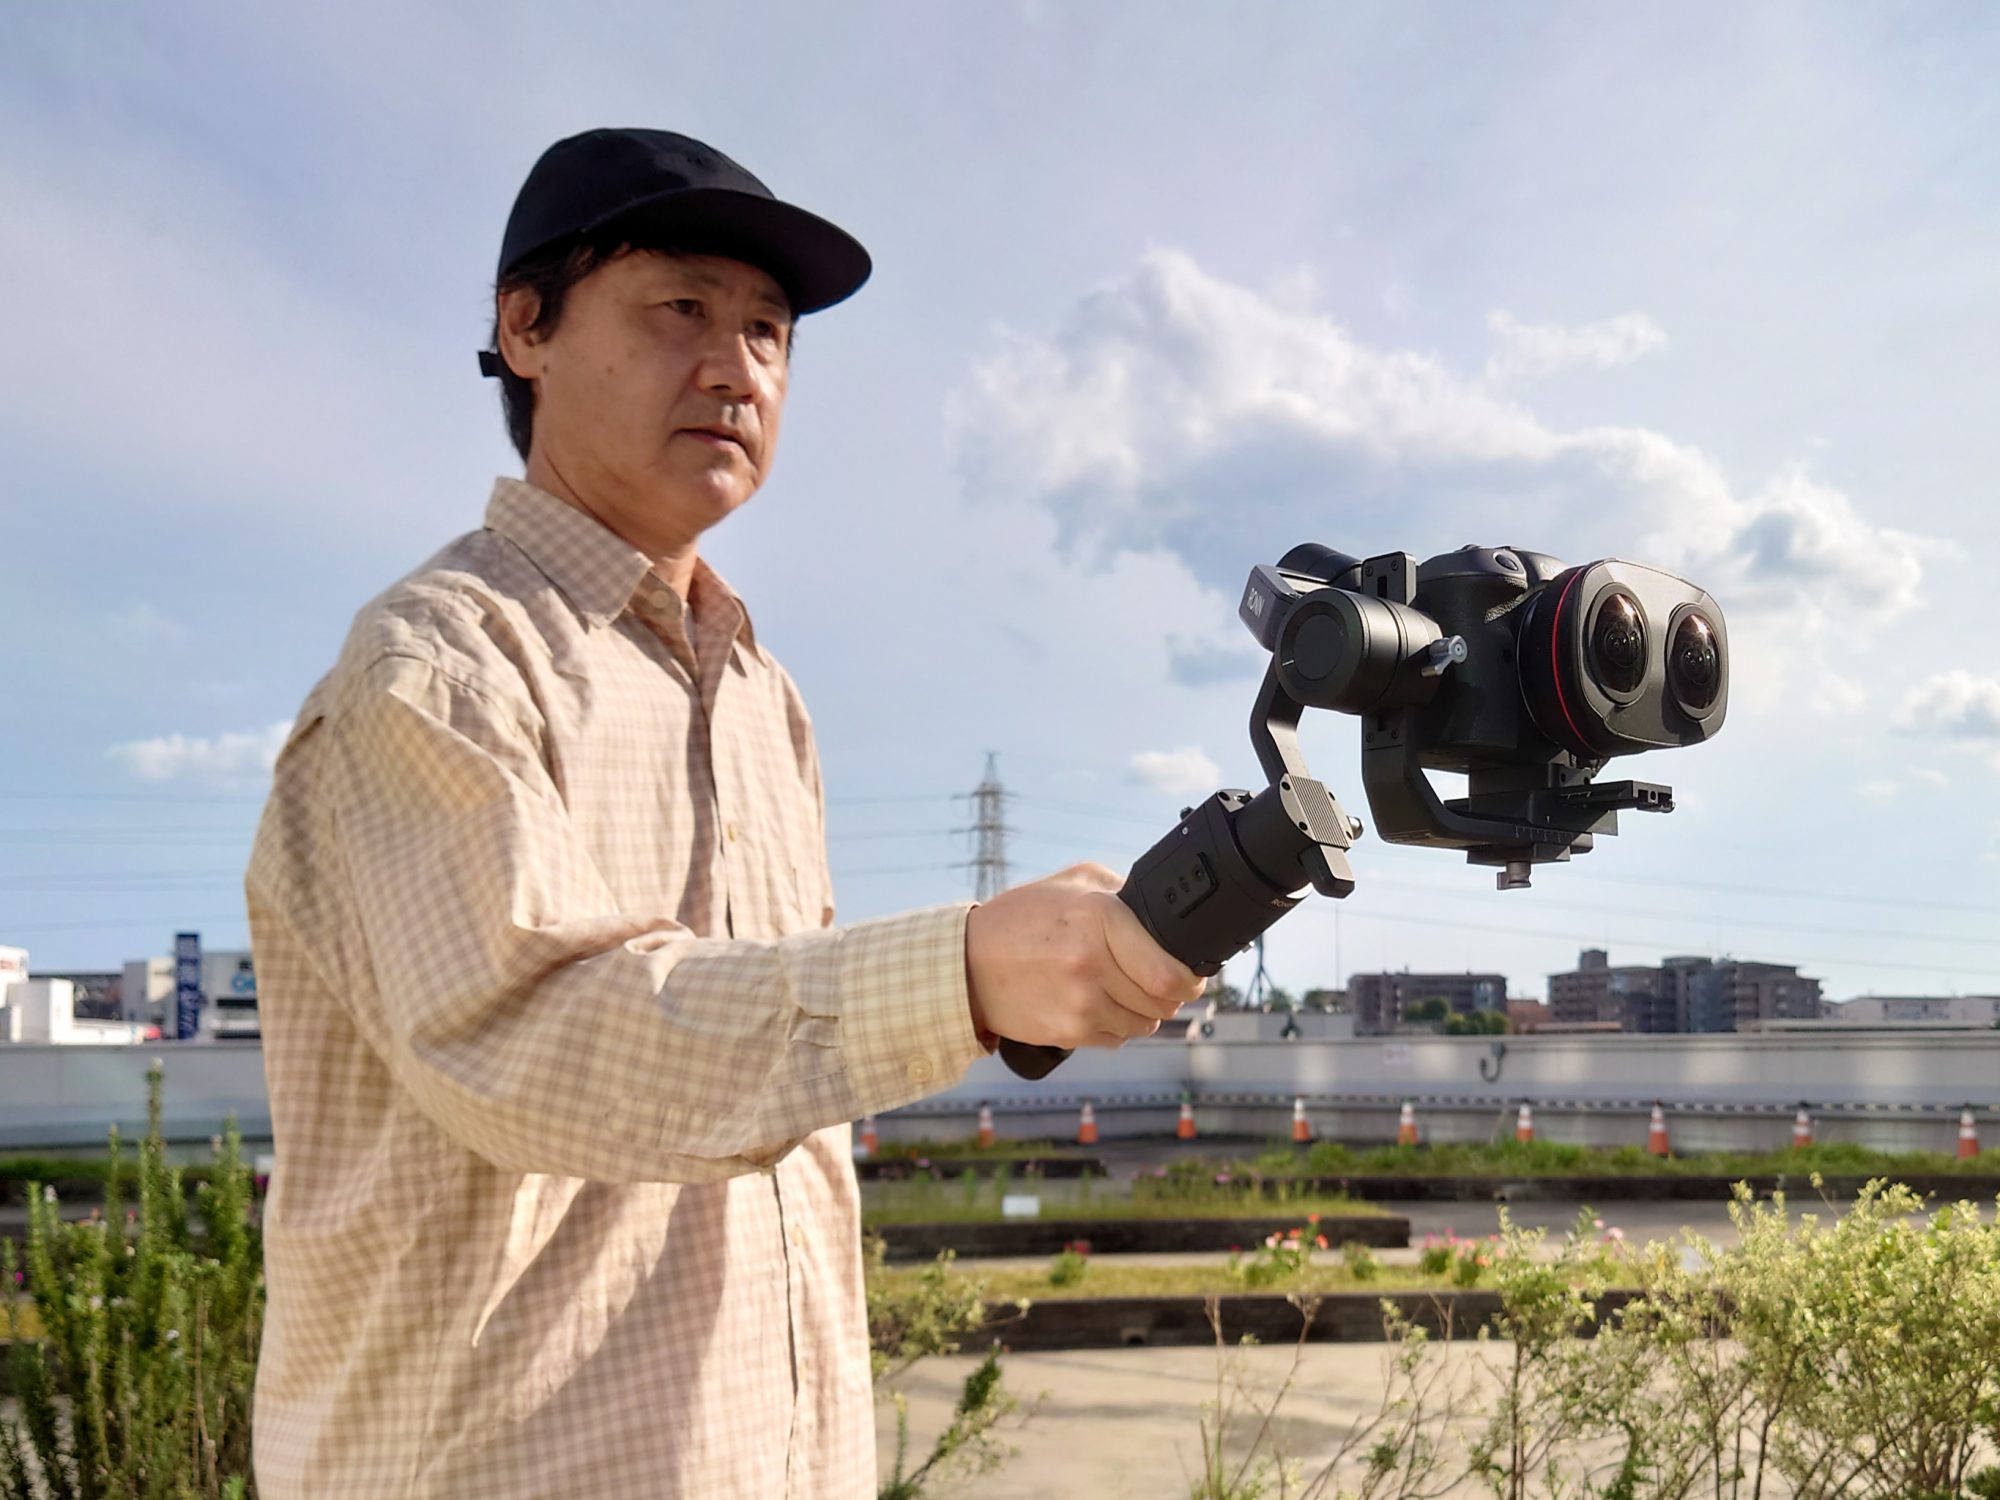
It goes without saying that camera shake is a major enemy when shooting videos, but in the case of VR videos in particular, it can lead to VR sickness, so stabilizing the image during moving shooting is an even more severe problem. Therefore, even for 180-degree VR videos, stationary shooting using a tripod + boom or monopod + plate + stand has been recommended up until now. However, there was a dilemma: if the content was composed only of VR videos shot on a stationary basis, the finished content might give a mediocre impression. In EOS VR Utility V1.3, a new item “Image stabilization” has been added, and by checking this, electronic image stabilization will be added to the target image. If you can incorporate moving photography while walking, you can also enhance the simulated experience of VR.
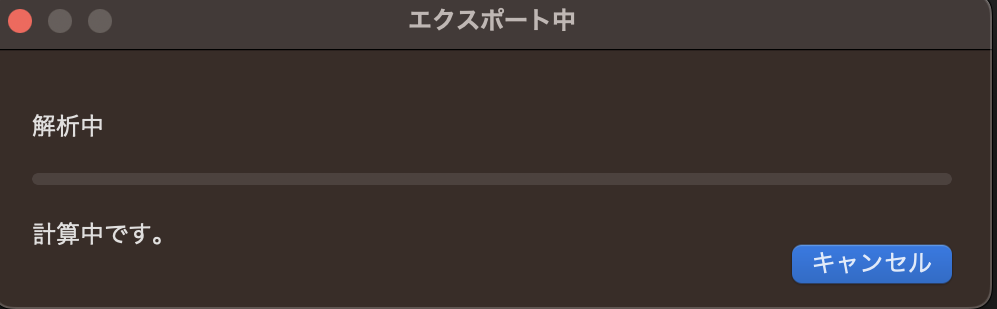
Specifically, the system uses software to analyze the image information of videos shot while walking using a gimbal, etc., calculates parameters for stabilization, and then previews and exports the stabilization results. is. Incidentally, V1.3 also officially supports batch processing of image stabilization and export of multiple clips. The EOS VR SYSTEM using the RF5.2mm F2.8 L DUAL FISHEYE does not have an optical correction function due to its specifications, so when shooting on the go, first use a gimbal to move up and down as much as possible while moving with your feet. Optical correction is performed by taking pictures with the image suppressed. The EOS VR Utility software then uses electronic angular shake correction to stabilize the video and reduce the risk of VR sickness. There are two options for this “image stabilization” function, and you can choose which one to use.
・Following priority: Effective when the camera is mounted on a gimbal, and the camera is moved while walking carefully.
・Stability priority: Effective when holding the camera hand-held and shooting in a still position.
Note that when performing image stabilization, the checkbox for the lens mask function, which hides the reflections of the left and right lenses, will be grayed out and cannot be used.
In order to use the image stabilization function, you will need to subscribe to Canon’s paid plan. The anti-shake function is only available in EOS VR Utility, so it cannot be used with the EOS VR Plugin for Adobe Premiere Pro. Furthermore, in the case of short clips of about 10 seconds or videos with no feature points in the background, it is difficult to analyze the video, so the anti-shake effect may not be achieved. As for the computer you use, it is recommended that you use a machine equipped with an eligible GPU. I also tried using the CPU, and although analysis and export were possible, the processing still took a very long time.
On a Windows machine, in an environment using GALLERIA, Core i-7-13700F, RAM 64GB, GeForce RTX 3060, I processed an 8K 29.97fps HEVC MP4 40-second clip with anti-shake processing and changed the output format to H. .264 4:2:0 MP4 When exported as 8bit, analysis (anti-shake parameter generation time) takes 5 minutes and 24 seconds, and export takes 2 minutes and 37 seconds, for a total of about 8 minutes and 1 second. : If you use MacStudio with an Apple M1 Ultra and 64GB of RAM to perform image stabilization on an 8K 29.97fps HEVC MP4 40-second clip and export it as an output format of H.264 4:2:0 MP4 8bit, Analysis (anti-vibration parameter generation time) takes 3 minutes and 7 seconds, and exporting takes 4 minutes and 14 seconds, for a total of about 7 minutes and 21 seconds.
When using MacBook Pro RAM 64GB, selecting Apple M1 Max as the processor, and processing a 30-second clip of 8K 29.97fps All-I MP4, it took 4 minutes 14 seconds to analyze, 7 minutes to export, and a total of 11 minutes. It took 14 seconds.
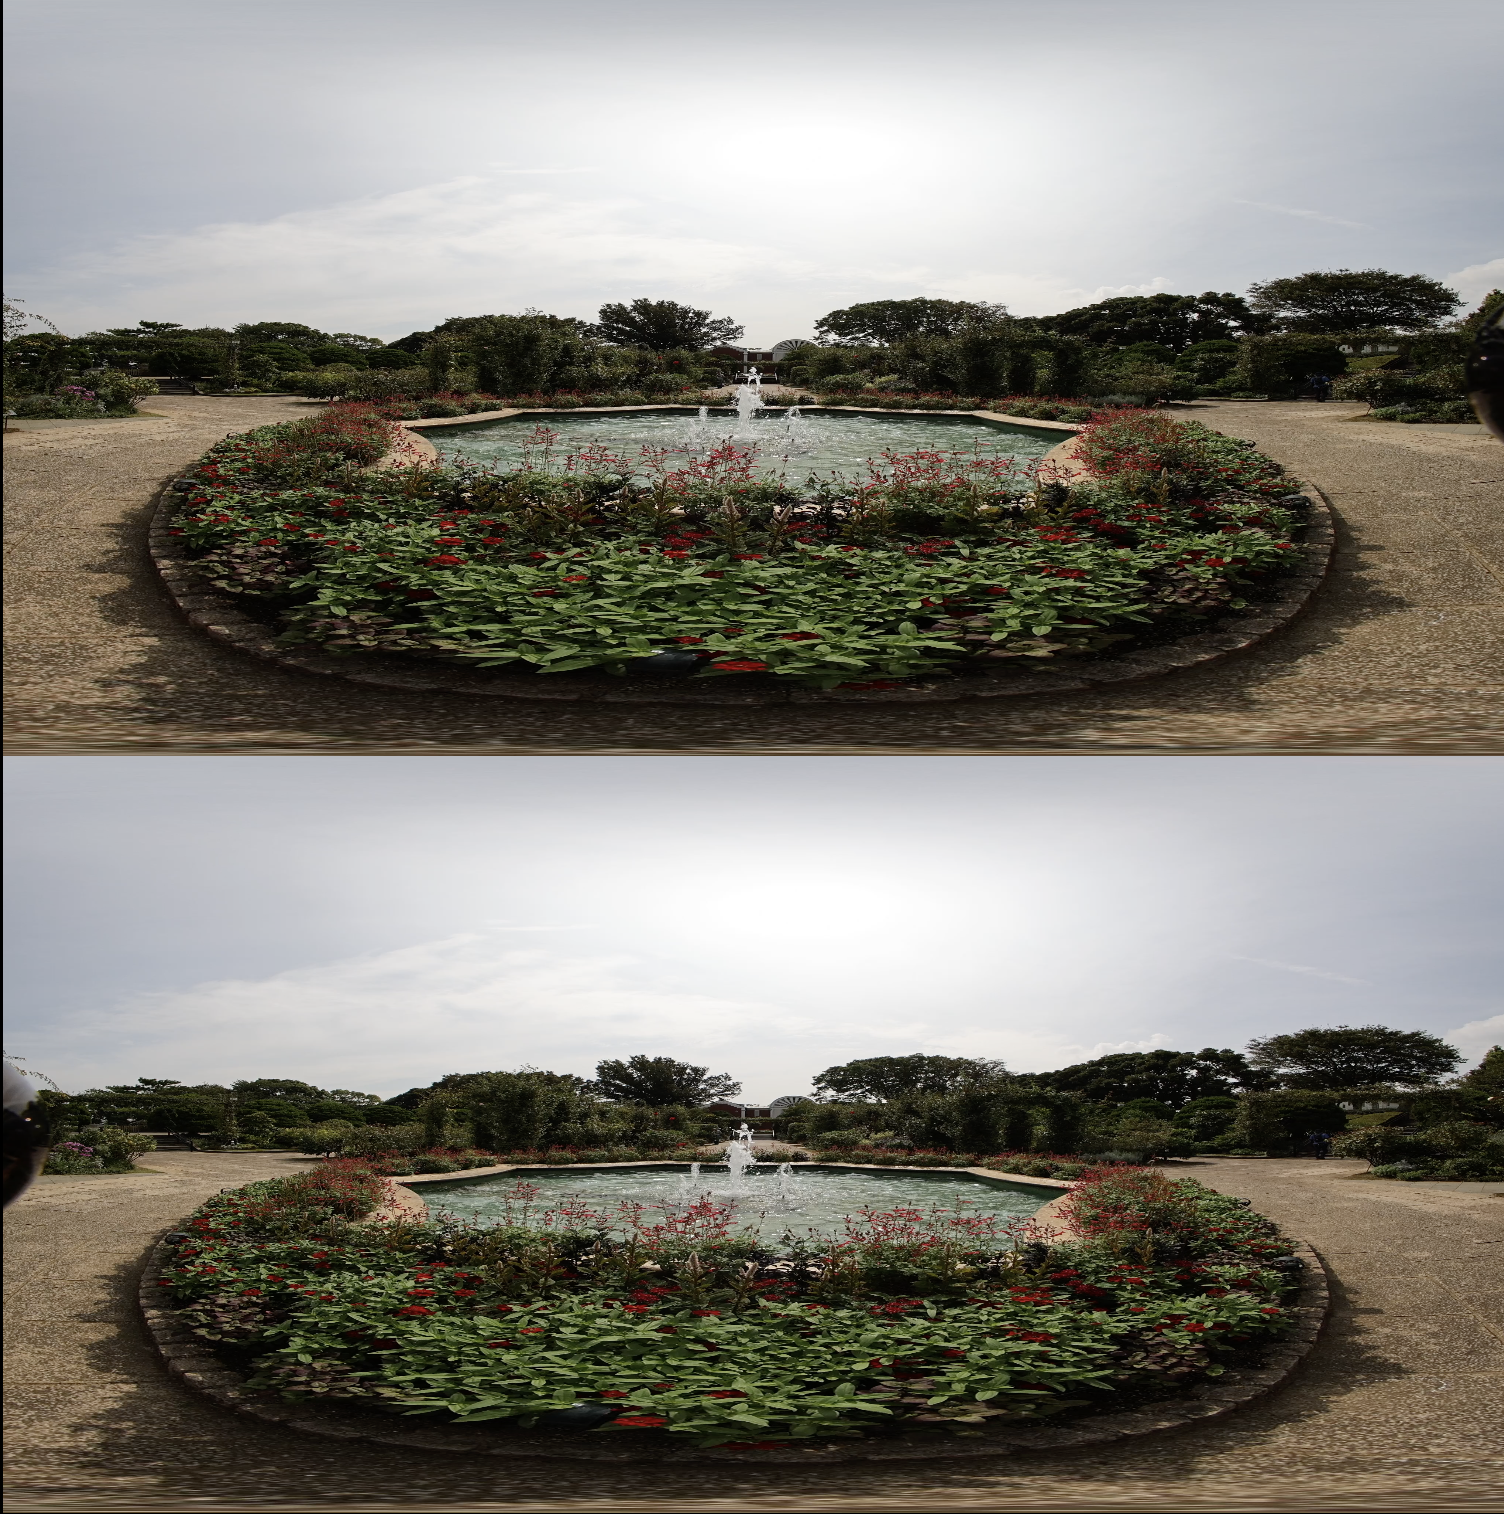
If you play back a file exported side-by-side with image stabilization processing as is, the reflections of the left and right lenses will be equal before image stabilization, but after image stabilization the reflections may vary. It can be observed. This can be said to be evidence that the correction has been reflected.
In addition, when shooting VR videos, in addition to moving in a straight direction, unexpected and tricky camera movements such as sudden panning can cause viewers to experience VR sickness. It is wise to avoid this as it will lead to a deterioration in the quality of the VR experience.

The blur is suppressed to a level that does not cause VR sickness.
Supports export of 360 degree VR format (“Extend to 3D 360”)
In post-production editing, Adobe Premiere Pro supports both 360-degree VR videos and 180-degree VR videos, making it highly compatible with VR videos.
On the other hand, products such as Apple Final Cut Pro support 360-degree VR videos but not 180-degree VR videos.
This time, in addition to “3D 180”, the option “Extend to 3D 360” has been added to the VR format options for exporting with EOS VR Utility, allowing users other than Adobe Premiere Pro to use EOS Utilization of VR SYSTEM become easier. Specifically, it is exported not in side-by-side format but in top-and-bottom format, with the vertical direction compressed to 1/2, with a resolution of 8192 x 8192.

Supports detailed sharpness settings
As mentioned above, EOS VR Utility V1.2 now supports RAW data, which is very useful as it allows you to use RAW videos with a wide range of adjustments. Another big step forward was that the EOS R5 C’s Canon Cinema RAW Light 8K 60fps high-resolution, high-frame-rate clips can now be used in VR shooting.
Furthermore, in V1.3, the sharpness function for RAW video development has evolved to allow more detailed settings. In V1.2 there were only sharpness and NR (noise reduction) items, but in V1.3, parameters for strength/fineness/threshold were added to the sharpness item. Originally, there was a trade-off relationship in which adding sharpness increases noise as a side effect and reducing noise results in a blurry image, but with this improvement, the edges can be emphasized while suppressing noise, making it possible to improve the quality of VR videos. It is now possible to develop RAW images while maintaining high quality. When adjusting sharpness, uncheck the preview “high-speed development” and check the sharpness item checkbox.
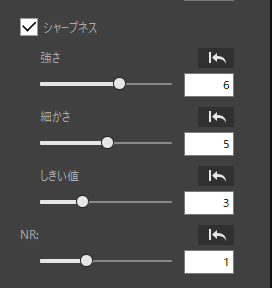
Strength/Fineness/Threshold has been added.
Supports automatic horizontal correction when upside down or facing up
Generally, when shooting 180 degree VR video, it is basic to keep the shooting level horizontal. However, in rare cases, it may be possible to change the angle and take a picture. In V1.3, the accuracy of horizontal correction has been improved, and the algorithm has been improved to enable more accurate horizontal correction of images even in special situations, such as when the image is upside down, facing upward, or downward. By default, the checkbox for automatic horizontal correction is unchecked, so you can turn it on if necessary.
summary
Almost two years have passed since the EOS VR SYSTEM was announced last year. During this time, important features have been added step by step, even if not very quickly, such as support for RAW video, expansion of compatible models, support for image stabilization, and expansion of post-production editing options. That can be appreciated. There is no doubt that this kind of accumulation will lead to improved quality of VR images.
This time, the EOS VR Plugin for Adobe Premiere Pro has also been updated to V1.3, but the main content is model compatibility (R6 Mark II firmware update compatible).
Recently, the lineup of VR180 compatible models from Chinese manufacturers has been increasing, and Apple Vision Pro is expected to be released next year and support for 180 degree VR 3D images, so there is a tailwind in the field of live-action VR images. It’s blowing. Under these circumstances, the environment has become even more promising for the appearance of high-quality content by creators using the EOS VR SYSTEM.