

Welcome back to part two of the GoPro Fusion Studio Exclusive Report.
Here we have overcapture.

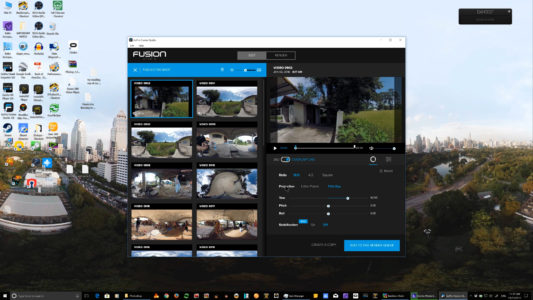
When you select that, you see we have a choice of either 16:9 or 4:3. We have a choice of Little Planet or Fisheye. So if we want to use this as a regular video we could just turn it into 16:9 and look at that we got this great video straight shot that you can use, and you can pan around to whatever view you want to have.
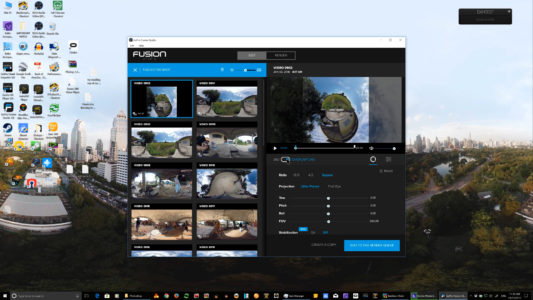
You also change the pitch of it so you can be looking straight down or looking straight up.
Then, of course, there’s roll which we want to keep that nice and level.
And we get a choice of turning on our stabilization which is a beta function right now.

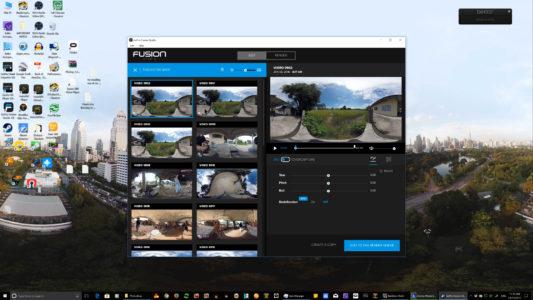
We’re going to get back to 360.
We’re going to turn on the stabilization. You will note that it leveled that out right away. But let’s reset these we don’t really need it moved over at all.

And here you notice we now can have either GoPro or Flat Color Profile.
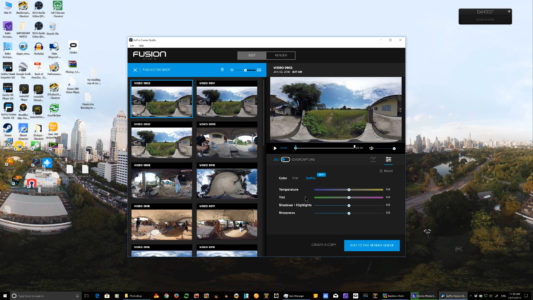
And we can adjust our Color Temperature.
Tint
Shadows and Highlights.
And sharpness.
Let’s reset all those back we’re going to set this up for Flat Color Profile.
Which is the way that I like to have it
And then we’re going to go on to our next video.
What you can do is if you’re going to set everything the same you can just hit control A, and it’ll highlight everything.
Then you could turn on the Beta Stabilization.
You can go here your settings set everything for flat, or you can adjust anything that you want to.
And when you go to look at each individual clip those settings will, hold. You will notice the stabilization is still on.
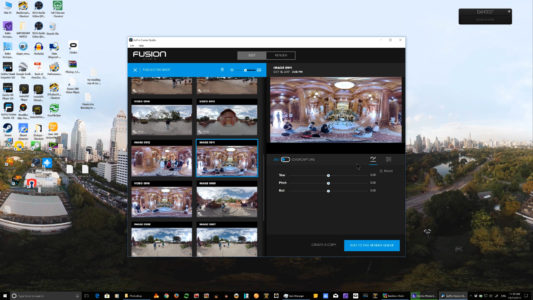
Let’s go down here to one of our still images.
And in the still images, you have the same functions.
And automatically it is set to FLAT.
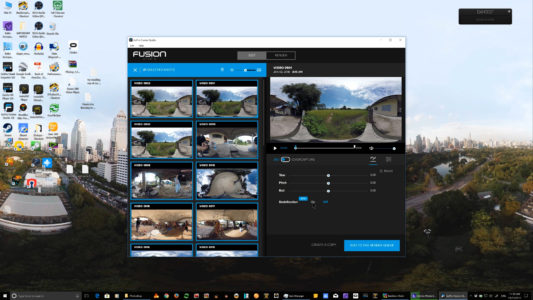
Or if you want to you can adjust your color temperature here, or you can do it after.
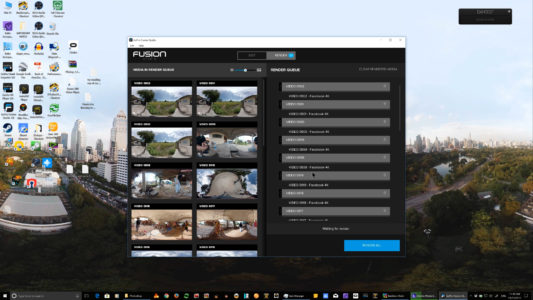
So we’ll highlight everything. Then the next step would be to add it to the render queue.
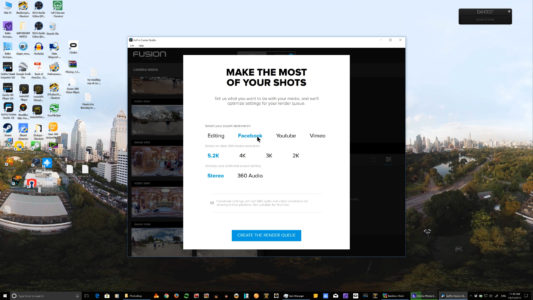
Then we get a pop-up.

That lets you go ahead and set up what you want your optimized settings to be in the render queue.
We can set up for regular Editing we can set it for 5.2K. And we have a choice of stereo audio or 360 audio.
We also have a choice of 4K, 3K or even down to 2K.

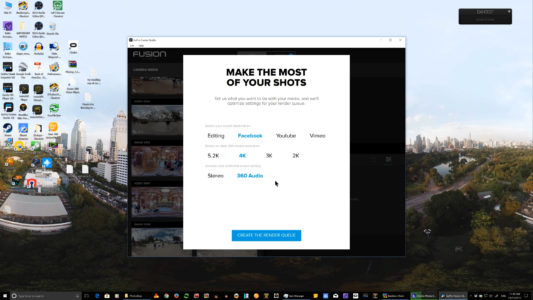
We move over here to Facebook, and we also have similar settings.
Here’s one for YouTube and for Vimeo.
Now in editing, it’s going to automatically create everything outputting it in the Cineform Codec.
You go to Facebook and take it down to 4K and 360 audio you automatically output everything in H.264.
Let’s see what that looks like.
Notice here’s all my videos at all says Facebook 4K.
And by the way in this 4K we are talking about 3840 x 1920.
And you can go ahead and change that, to other smaller sizes, but you will notice that you can’t do 5.2k in H.264.
But you do have a choice at this point.
But you can go ahead and change the setting and choose Cineform 422 high or ProRes 422.
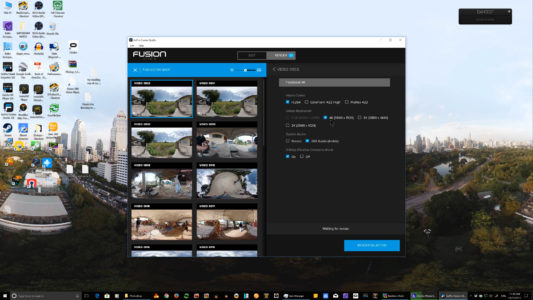
And you can either turn off the D-warp.
Or leave it on.
Please Check in tomorrow for Part Three of the GoPro Fusion Studio Exclusive Report
And please join GoPro Fusion Studio Users.

And give a facebook LIKE for 360VRVOICE.

Thanks for watching.