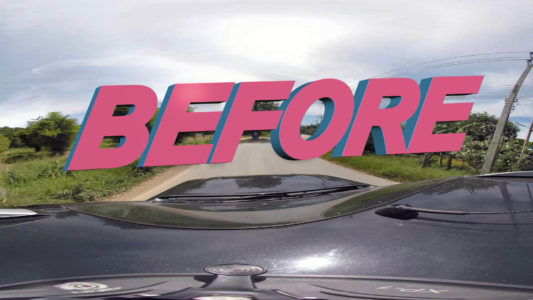
Car shots are great. They establish your location in give you a sense of being there. But for 360 they also add another problem to be solved, seeing the rig in the shot. Floating along with the car is great but seeing the rig when you look down breaks the sense of immersion. But you can get rid of it, and it’s not terribly difficult.
Using Adobe After Effects and the great immersive tools that they provide, I will show you a step by step way to accomplish the task right after the break.


DJI Phantom 360 Camera Mount 3-piece
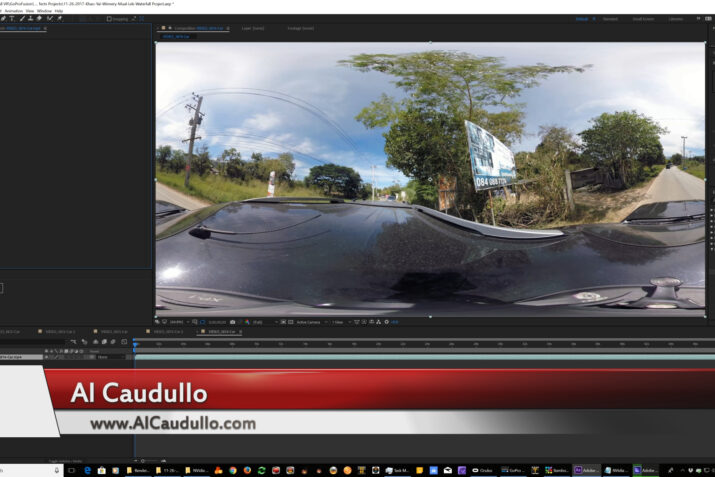
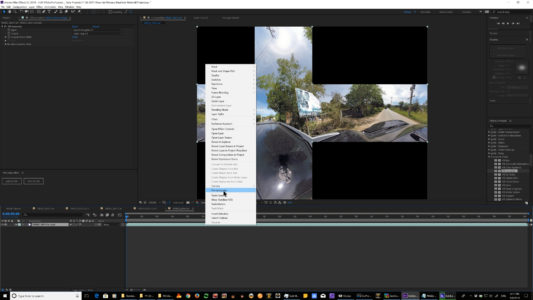
The first thing that we’re going to do is we’re going to put our clip on the timeline into the composition.
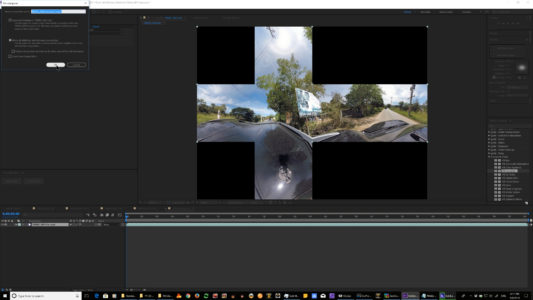
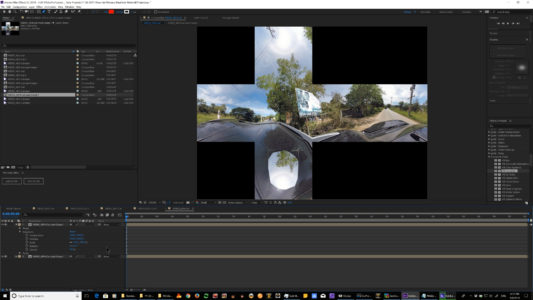
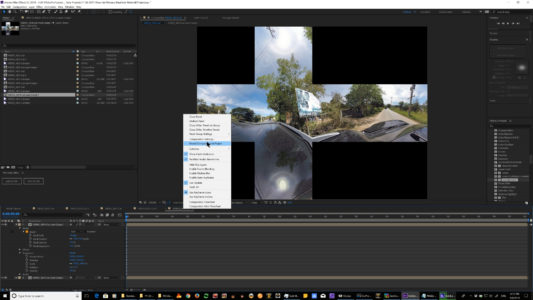
Next, we’re going to add the VR converter, so we create a new comp for our video, and then we add the VR Converter.
In the VR Converter, we will select Equirectangular 2:1 for the Input and Cube Map 4:3 for the Output.

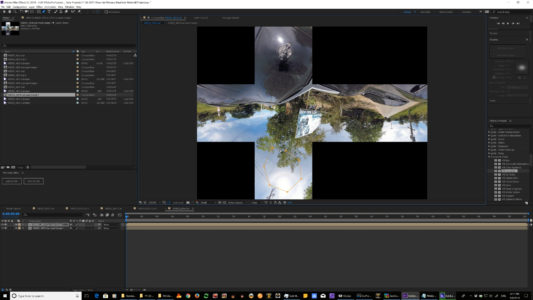
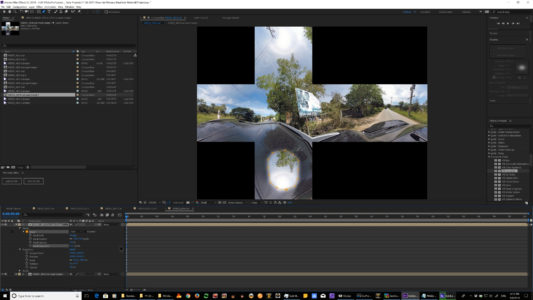
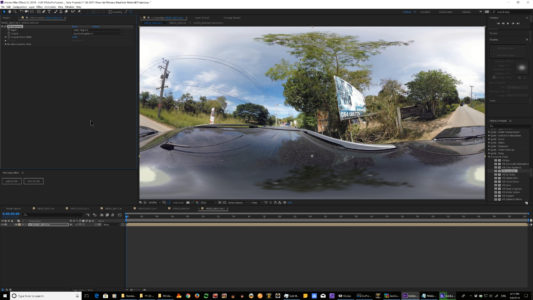
Then we need to make sure that the car mount is in a good position to remove it.

We’ve got our car mount is in the perfect spot for where we need to go ahead and replace it.
Now what we’re going to do is going to right-click, and Pre-Compose and move all the attributes into the new composition.
Then let’s go to the project tab.
Let’s find our comp right here and let’s drag a second one down into the composition.
We’re going to go to the top video in the comp and what we’re going grab the top point, and we will drag it down, flipping it upside down and putting it right back on top of the other one.

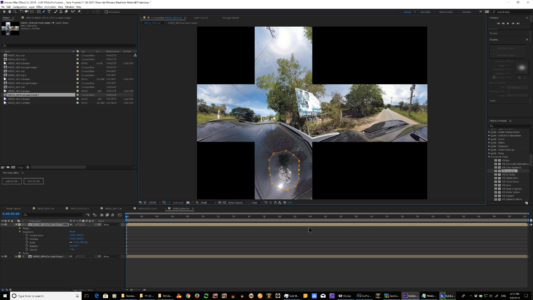
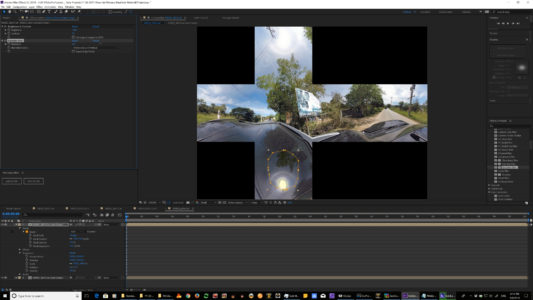
Now we’re going to grab a pen tool to create our mask, and we’re going to roughly sketch in the masked out the area.
We’ll add more to that later.

Let’s expand the settings so we can see this better. Go to transform. Let’s take down the opacity so you can see what we have to cover.
We can see here we need to cover this area because we’ve got to cover the shadow, but we don’t need this much up here.
But we do want to have this kind of rounded so let’s throw a few more points in to smooth it out.
Keep adjusting to make a smooth pattern to replace.
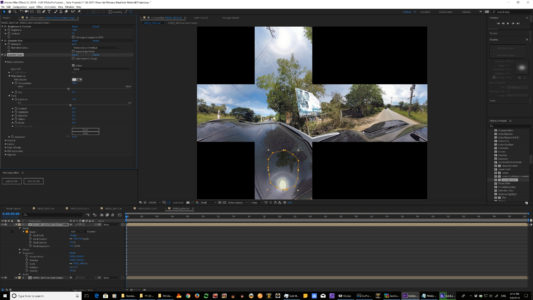
Let’s go back to our Opacity and restore it to 100%.
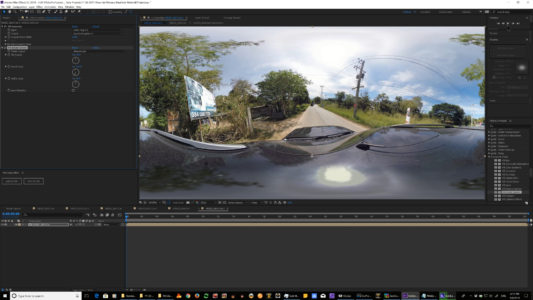
We also have to make sure that the tree is angled the right way because the reflection is angled due to the reflection.
And what I have found is that if you about put +1 it angles the tree just about the right way. As we play forward you’ll see the tree comes in beautifully.
Let’s reduce this down the opacity again so we can see through it you see there is the tree.
It’s coming in just about perfect.
So now we’ve got it there, but it’s too bright.
Let’s go to our mask.
Let’s expand out the feather.
Around 60 or 70 or so.
And then increase the pixels probably about 10 to 15 something in that area.
Now what we’ve got to do is we’ve got to adjust the brightness because it’s a reflection.
I’m going to go to my color correction, and I’m going to grab brightness and contrast and drag it onto the comp.

And I’m going to turn down the brightness to try and get it to match probably and flatten out or bring up the contrast.
Let’s see what works better.
We bring it up, but now it’s still a little bit too clear.
So what we’re going to need is we’re going to need a little bit of blur.
So let’s go to our Blurr and Sharpen Tools.
Let’s grab the Gaussian and blur and let’s tweak that up a little bit to make it look better.
Now we’re going to need one more thing from our color correction.
We’re going to add the Lumetri Color.
And what I’m going to do is in Basic Correction, I’m going to change the exposure and the temperature slightly to match.
So first, I turn the exposure down just a little bit. Not too much.
And then I’m going to shift till I feel like the color temperature is about right and I’m also going to take down the color saturation because in that reflectivity you’re not going to have the same saturation.
That looks pretty good at this point.
So now we have one more step to do.
We want to make sure you grab the right Comp so right click on your comp here and reveal the composition and the project.
Then take that composition that’s got the two comps inside of it and make another Comp.

Then finally open up your Immersive Video Tools again add the VR converter back in.
And change it from a Cube Map 4:3 to Rectilinear 2:1.
We’re not quite facing the right way because here’s the way the car is going so I’m now going to add the Rotate Sphere Tool and pan to bring that car pointing to the center of the road.
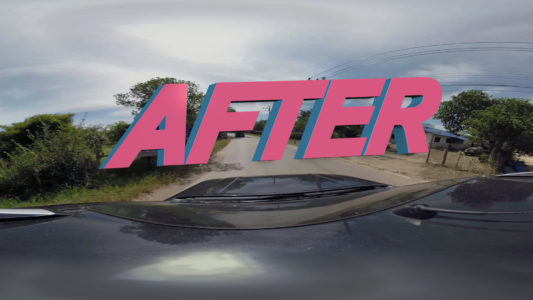
And there we have it, and we’ve got a good reflection that’s following.
It’s tracking through beautifully.
And we’ve gotten rid of the car mount completely from the shot.
So now that’s all that’s left to do is to output it to Adobe Media Encoder and we’ve got something that we can work with in our edit, and that’s it.