
What I would like to do today to show you how to do a basic stitch and prepare your files for the first phase of post-production in 360.

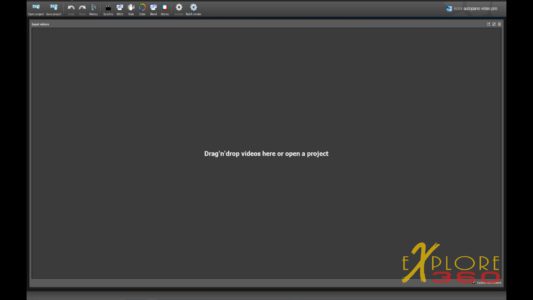
I’ve opened up Autopano Video Pro, and I’ve opened up another folder that contains my six files. I’m going to drag them over and just plop them into the program.
The first thing that you normally have to do is synchronize them, and you can either use audio or motion to try and synchronize.
Luckily these come from the GoPro Omni, and they are perfectly synced, so we don’t have to worry about that part.
So we’re going to go straight to stitching. Normally if I were using my Omni, I would be using the Omni Importer but because I want to show you the basics of how to do this I’m going to do this manually. My Stitch is set for Hero 3 + /4, and the clip is about one minute and twenty seconds in length.

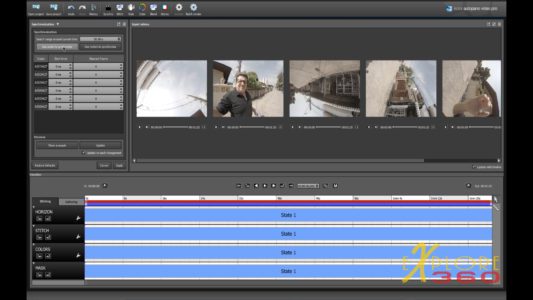
I’m just going to choose a current selection and use five positions. Now, I’m going to click Stitch.
This is going to give me a Range Stitch. What this does is take five different places in the one minute and 20 seconds and create still images and to stitch them together based on those parameters.
This shouldn’t take too long. Okay, it’s completed it is already showing as a real-time preview now. As soon as the little spitting dial stops it’ll be all set in place.
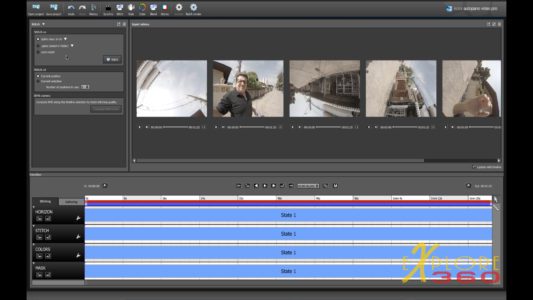
We don’t need our individual images anymore, so I’m going to click Ctrl + 1 and only bring up the real-time preview.
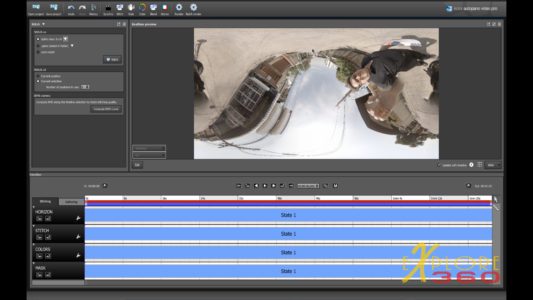
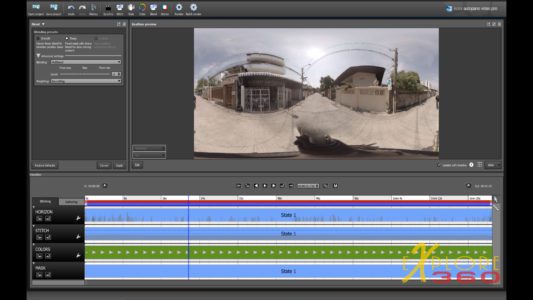
The first thing we should do is to straighten our Horizon.

Click the mouse at the top center of the image and drag it down until you get a good Horizon and a straight image.
I’m going to keep the rig in the center of the image to make things easier.

And I’m going to click apply. Next thing I’m going to do is I’m going to check the stabilization I want to get the Horizon set.
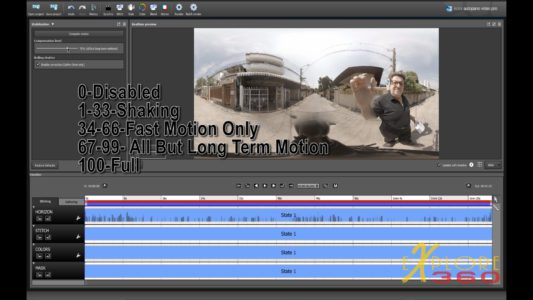
Now, I’m going to compute motion. The rig is sitting on a monopod, and it’s nice and sturdy and there wasn’t much wind so I don’t expect that I’m going to see very much but it’s a good thing to go ahead and take a look at this parameter because there are times when the rig maybe moving and this will help you determine if you need to make adjustments. in the video we will fast forward through this until it finishes doing its motion analysis.
We don’t have much going on if you look at the compensation levels you will see that 0 is disabled, from 1 to 33 is for shaking only, from 34 to 66 is for fast motion, from 67 to 90 is all but long-term motion, and then one hundred is full. I’m going to turn it down to 8℅ because it really doesn’t have much going on. It’s just about non-existent. But you should make this standard procedure.

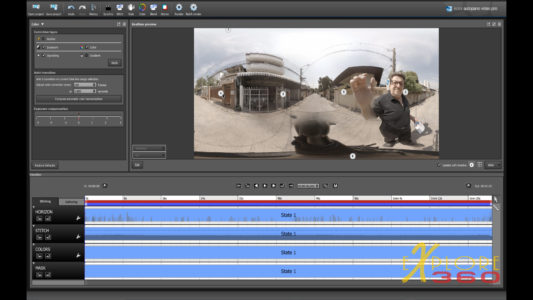
Then let’s compute the RMS curve. RMS stands for Root Mean Squared. It is a mathematical formula that is being applied to compute how good you stitching is and where it may need adjustment. This process does take some time, and in the video, we sped things up. When this is complete, you will notice with this video looks good. There are four ranges shown by dotted lines. 0-25, 26-50, 50-75, and 76-100. With RMS, the lower the number, the better it is. In this case, our graph is below 50%. What it would better is it were below 25, but it is consistent, and if we watch the video there are no obvious problems.
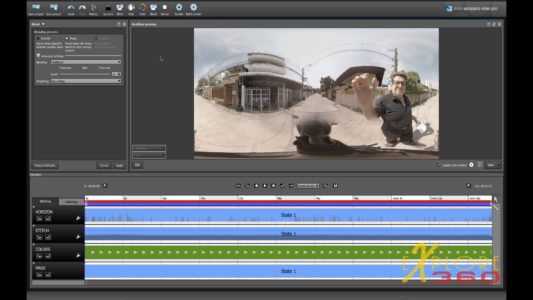
Color Harmonization is the next step in the process. What Color Harmonization does is to even out the exposure and color settings between the six cameras. By activating the icon in the picture, you can see just where each of your cameras is located in the overall image. The icon next to it turns on a grid overlay which can be helpful for making sure of you horizon and image placement. In this case, I’ve used it to center up the video on the screen.

For measurement of the Auto Transition, I am going to choose to sample every 3 seconds. Clicking the Compute bar before the settings start the process. Once again I sped up the video till the process was completed.

Blending Presets are very important. There are two main choices, Smooth or Sharp. Smooth creates a linear blend to minimize parallax issues. It comes in handy for fast moving images.
Sharp is used more often, and it creates a fixed mask which is best for slow moving content.
In this case, we are going to use Sharp. But we want to do one more thing. The rig profile can be reduced. So Click “Edit.”, this will open up Autopano Giga.
Autopano Giga is for still images and should not be used as a crutch to correct video mistakes. But it can help with certain problem areas that are consistent throughout the video clip, as the rig.
Once the first part of Giga is open, select “Edit, ” and it will reveal the clip image from Autopano Video Pro.
We see that Giga is saying that we need to optimize the image. Clicking the icon does that, and now we can move forward.
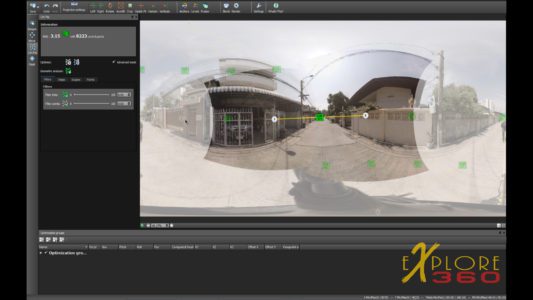
If you want to see if there are any issues with your stitch, open the “Control Points.”. The Control Points show your connections between the images. By mousing over, you can see the shapes of your cameras and see which are portrait and which are landscape set up.
By double-clicking on the green square between two images, you will open the Control Points, editor. There are a lot od sky and not much building for it to create control points from. This why we don’t have a perfect stitch. By clicking and dragging the mouse to create a matching selected area in each of the images, we tell the control points editor to look for areas to match up to.

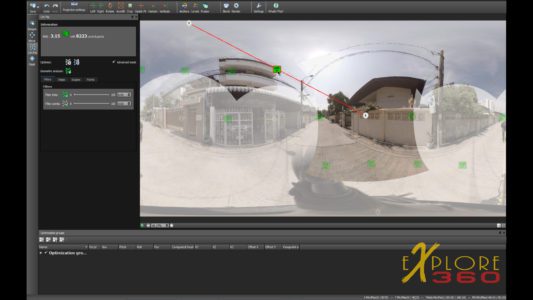
As you can see we the control points editor has found additional points. We want to use only green colored control points. The closer to red the worse they are.

By clicking full optimize or quick optimize we can usually get them to change color. Repeating the process will add additional control points. We want to go to the RMS value column and delete anything below 5.9. Clicking optimize completes the process.
Going back to the image we can check to see if we need any more adjustments. Click “Blend” will let us examine the image. By clicking the “+” you can zoom in to get a more detailed look at the image for any errors. Using the slider bars enables you to move side to side and top to bottom.
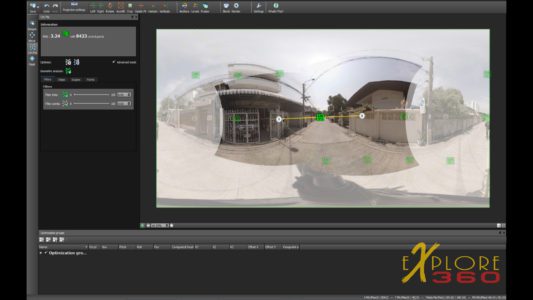
To see where your lines are for the cameras, choose “Mask” and “preview” button. This will show you an overlay of the camera separation. Blend takes you back to a normal view.
As much as possible any errors should be corrected using “Control Points.”
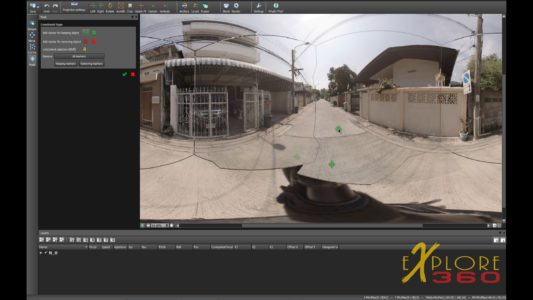
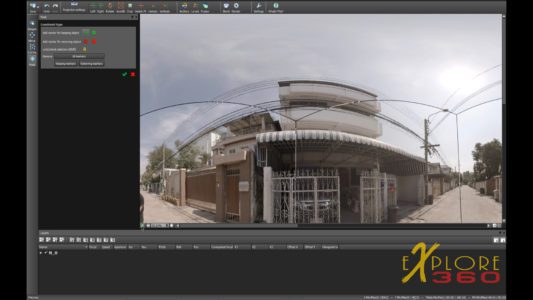
Once that is fixed to your satisfaction the last thing to do is to get rid of as much of the rig in the nadir of the image. We do this by selecting “Mask” and applying “Markers for keeping objects.” Try to position as few markers as you can and try to keep you lines straight.
The above video goes into more detail.
Lastly, when you are happy with the image, click”Save” and the changes will be sent to Autopano Video Pro.
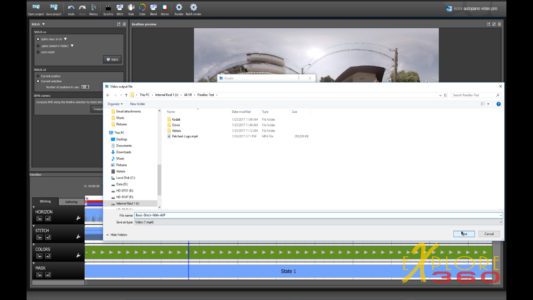
In Autopano Video Pro save the project and finally render the video to whatever folder that you choose.
This has been a very basic introduction to stitching. There is much more to the stitching process than can be covered in one video. Stayed tuned for more on the subject in the future.