
https://www.facebook.com/Explore360Asia/videos/792504994249827/

In this 360 VR University Class, I am will show the next tutorial, using the RE: Lens “To LatLong” with a single lens image and create a 360 Spherical output and then to create a flat 2D video image from a Fisheye Video image.
In the first class on RE:Vision Effects, RE:Lens I showed you how to stabilize 360 VR Video using ToLatLong Plugin. This one of the seven (7) Plugins that you get.
RE:Lens Chromatic Aberration
RE:Lens Lens Curved Mirrors
RE:Lens DeFish
RE:Lens From LatLong
RE:Lens ReFrame
RE:Lens Superfish
RE:Lens To LatLong

The footage that I am using has been shot using a Sony a6300 and an amazing little lens, the Meike 6.5mm. Why is this lens so amazing? Because it yields a beautiful 190-degree view for only $149USD. It is available in the Sony E-Mount or the Micro Four Thirds Mount.

I am going to apply the same “Lens to LatLong” plugin, but we are not going to worry about the stabilization this time. But yes, you could use the stabilization at the same time if you need it.
The shot was done from a car traveling past a field.

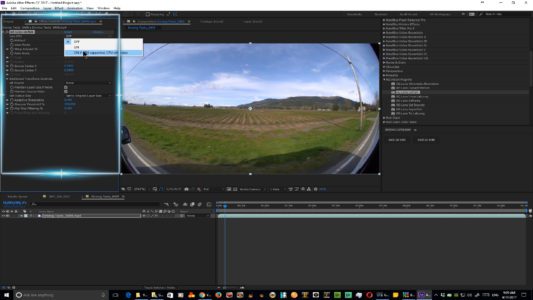
Open the “View Mode” and change from “Result” to “Set Circle Over Source”.
That gives us an overlay on our image. As you can see the circle is oversized so I need to adjust it to fit the source image.
Expand the Radius controls and manipulate the “Radius”, “Center X” and Center Y” controls so that the image is covered properly by the circle overlay.

Once that is done, go back to the “View Mode and change it back to “Result”.
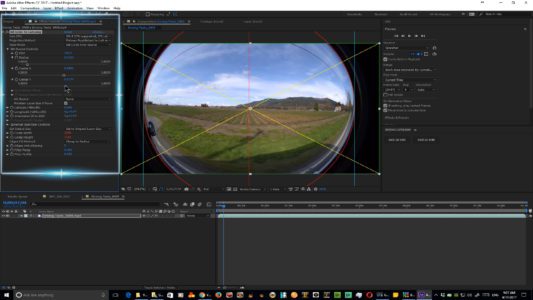
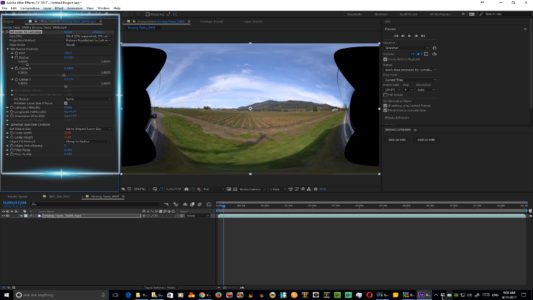
Now you can see that we are almost there. Change the “FOV” to 190 to match the lens. Looking at our video in the GoPro Player we see that we have a 360-degree video with a 190-degree image from our single lens.

Your creative self can play with this image. Change the 190mFOV to 280. You still don’t have a full 360 video but, again, use some creativity to add another 190 video to the other half or add graphics or a background, the choices are limited only by your imagination.
For the last example of this tutorial is using the DeFish Plugin to take that 190-degree view and make it flat to use in a regular 2D video space.
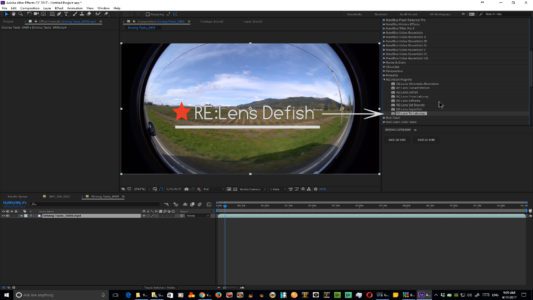
To do that, I will use a new comp with the same video and add the “DeFish” plugin to the video timeline.
You have four choices with this plugin.
Fish (pincushion)
Straighten (wide angle barrel)
DeFish Full Frame Fisheye
DeFish Circular Fisheye
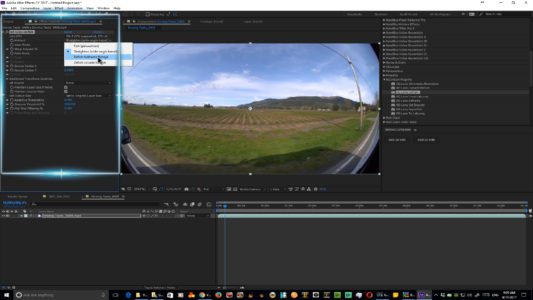
Each one gives you a slightly different look. By using this you can keyframe a pan and scan effect to increase the ways that this can be used.
Watch the video here.
I have really fallen in love with the ease and multiple uses that each one of these plugins gives you.
This is definitely a must-have in your 360 arsenal of tools. I’ll have more tutorials on the other plugins in this set soon.
For more information on 360 VR, please visit the 360 VR University.