
One of the things that separate the “men from the boys,” is whether you remove your rig in 360 shots or just put a logo patch. The mainstream thinking says that if you patch, instead of removing it is just not professional. I’m not going to step into that discussion. Another popular thought is that removing the rig is hard.

On that point, I will beg to differ. It’s all about having the right tool for the job. If you are creating 360 VR Videos, then Mettle is one of the tools that you must have. This is just my opinion, but I think after you read this, you will agree.
There are many methods for patching or removing the rig in the nadir. In this article (and accompanying video) I am going to show one method that, I think, makes replacing the rig easy.
To do this, you will need Adobe After Effects, Mettle Skybox Studio Version 2 and some 360 VR Video footage that has a monopod showing in the nadir. Now that you have those let’s get started.
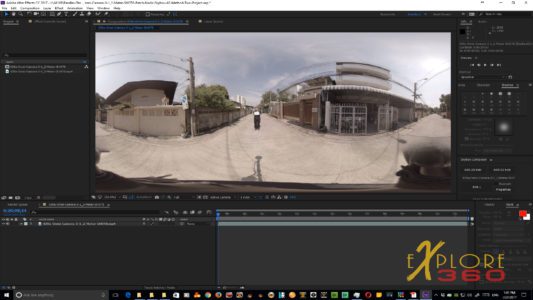
Step one is to open After Effects and import your 360 video footage.

Next, drag the footage down to create a new composition.

Then go to Skybox Composer and click “Add 2D Edit.”.
Doing this will open a window where you need to select the “Comp Width.” In my case, it is 3840. The last step here is to click “Add 2D Edit” in the window.
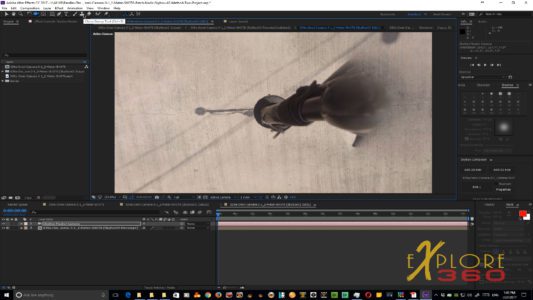
Automatically, the image is opened in a new comp labeled, “SkyBox2 Edit 1.”. Click on the camera icon, and you will be able to rotate your 360 videos to your choice of positions and angles.
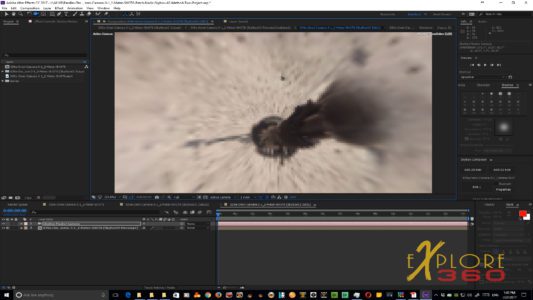
Rotate the camera so that you are looking straight down on the monopod that you want to remove. Be sure that you give yourself some room around the monopod to be removed.
Once you position it where you want, select the SkyBoxV2 Precomp 1 layer and then click the Clone Stamp Tool.
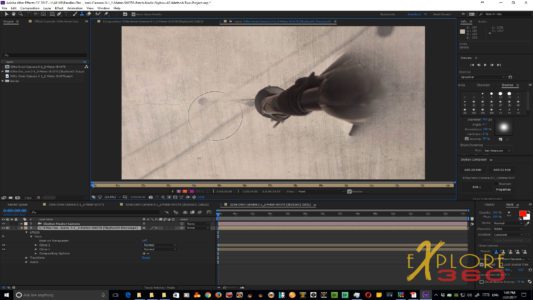
Using the Clone Stamp Tool hold the ALT key and choose where you want to target for use to replace the rig. It is best if you select different areas to accurately replace the rig.

In this case, I didn’t want to take too long, and so I use a very big tool size to replace the areas quickly. You can alter the size of the tool as needed. Continue using the Clone Stamp Tool till you have everything replaced. Be sure to pay attention to textures and shadows to replace everything as best as you can.

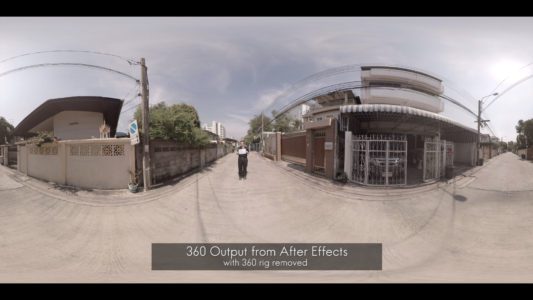
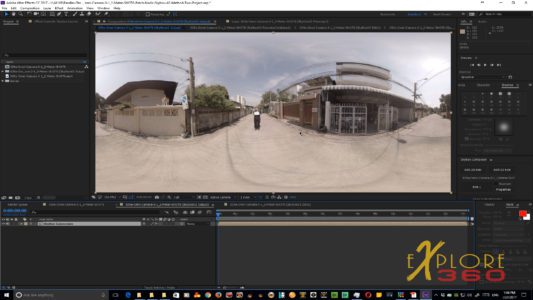
Finally, click on the comp layer, SkyBoxV2 Output, and, bang, everything that you worked on in the SkyBox2 Edit 1 comp layer is revealed in 360 format in this comp.
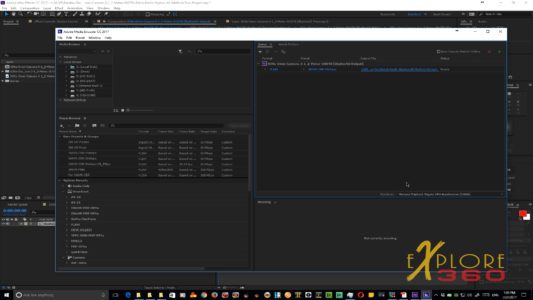
Lastly output to Adobe Media Encoder so that you maintain the 360 metadata information and you work is done and ready for final editing in Adobe Premiere.
Watch the accompanying video for the step by step example.